📖 Basic Information
The server is based on Season 6 Episode 20 files with several custom improvements to gameplay.
We aim to stay as close to PLAY2WIN as possible. Progress comes from playing actively and dedicating your time.
Our mission is to provide a long-term, professional service where players can show their skill, dedication, and form a lasting community.
💬 Every piece of feedback — big or small — will be heard and considered.
⚙️ Server Information
⚡ Server Rates by VIP Tier
| VIP Tier | EXP Rate | Master EXP | Drop Rate | Zen Drop Rate |
|---|---|---|---|---|
| Non VIP | 50x | 3x | 40% | 40% |
| 🥉 Bronze VIP | +10% Bonus | 4x | +10% | +10% |
| 🥈 Silver VIP | +20% Bonus | 5x | +20% | +20% |
| 🥇 Gold VIP | +30% Bonus | 6x | +30% | +30% |
Note: VIP bonuses are percentage increases applied to base rates. Drop rates stack with base 40%.
📊 Level Caps
🔄 Reset System
📊 Points System
👑 VIP Tier Benefits Summary
| Feature | Non-VIP | 🥉 Bronze | 🥈 Silver | 🥇 Gold |
|---|---|---|---|---|
| OFF Attack Time | 12h | 16h | 20h | 24h |
| Goblin Points/Hour | 25 | 50 | 75 | 100 |
| Extra Vaults | 2 | 3 | 4 | 5 |
| Elf Soldier Max Level | 350 | 360 | 370 | 380 |
| Reset Cost Discount | - | 40% | 40% | 40% |
| Chaos Machine Bonus | - | +3% | +7% | +5-10% |
| Event Entry Bonus | Standard | +0.5x | +0.7x | +1x |
| /openware Command | ✗ | ✗ | ✓ | ✓ |
Note: See VIP Benefits section for complete list of all 24 benefits including jewel success rates, daily rewards, and arena access.
🎁 Starter Package
- 🐾 Skeleton Pet
- 💍 Skeleton Ring
- 🪽 Small Wings
- 🛡️ Basic Armor Set
- ⚔️ Basic Weapon
⚙️ Game Features
- Helper: From Level 1
- Reconnect: Enabled
- Potion Stack: 255
⚔️ OFF Attack System - Enabled
🔄 Reset Requirements & Rewards
💰 Reset Cost & Points by VIP Tier
VIP tiers reduce reset costs. Points awarded decrease with higher reset ranges.
| Min Reset | Max Reset | Required Level | Non-VIP Money |
🥉 Bronze Money |
🥈 Silver Money |
🥇 Gold Money |
Points Awarded |
|---|---|---|---|---|---|---|---|
| 0 | 10 | 400 | 5,000,000 | 3,000,000 | 3,000,000 | 3,000,000 | 2,000 |
| 11 | 20 | 400 | 10,000,000 | 6,000,000 | 6,000,000 | 6,000,000 | 1,500 |
| 21 | 30 | 400 | 15,000,000 | 9,000,000 | 9,000,000 | 9,000,000 | 1,000 |
| 31 | 40 | 400 | 20,000,000 | 12,000,000 | 12,000,000 | 12,000,000 | 500 |
| 41 | 50 | 400 | 25,000,000 | 15,000,000 | 15,000,000 | 15,000,000 | 250 |
Note: All resets require Level 400. VIP players receive significant discounts on reset costs (40-60% off).
📊 Dynamic EXP Rates (50x)
⚡ Normal EXP (Level 1-400)
Experience rates decrease as you progress through resets to maintain balanced progression.
| Min Level | Max Level | Min Reset | Max Reset | Min Master Reset | Max Master Reset | EXP Rate |
|---|---|---|---|---|---|---|
| 1 | 400 | 0 | 10 | - | - | 100% (50x) |
| 1 | 400 | 11 | 20 | - | - | 80% (40x) |
| 1 | 400 | 21 | 30 | - | - | 60% (30x) |
| 1 | 400 | 31 | 40 | - | - | 40% (20x) |
| 1 | 400 | 41 | 50 | - | - | 20% (10x) |
| 1 | 400 | 0 | 10 | 1 | 3 | 95% (47.5x) |
| 1 | 400 | 11 | 20 | 1 | 3 | 75% (37.5x) |
| 1 | 400 | 21 | 30 | 1 | 3 | 55% (27.5x) |
| 1 | 400 | 31 | 40 | 1 | 3 | 35% (17.5x) |
| 1 | 400 | 41 | 50 | 1 | 3 | 15% (7.5x) |
| 1 | 400 | 0 | 10 | 3 | 5 | 90% (45x) |
| 1 | 400 | 11 | 20 | 3 | 5 | 70% (35x) |
| 1 | 400 | 21 | 30 | 3 | 5 | 50% (25x) |
| 1 | 400 | 31 | 40 | 3 | 5 | 30% (15x) |
| 1 | 400 | 41 | 50 | 3 | 5 | 10% (5x) |
🎓 Master EXP System
👥 Party EXP System
Bonus applies regardless of race mix
🛡️ Guild System
🤝 Alliance System
🎮 Additional Features
👤 Character Management
- All Classes Unlocked: From Level 1
- Max Delete Level: 350
- ⚠️ Characters over level 350 require contacting support to delete
🔒 Connection Limits
💎 Server Philosophy
- ✅ Play2Win System
- ✅ Balanced Shops for low-exp
- ✅ Reconnect System Enabled
👑 VIP Benefits

Compare the benefits across different VIP tiers and choose the level that best suits your gameplay style.
| Description | Non-VIP | Bronze VIP | Silver VIP | Gold VIP |
|---|---|---|---|---|
| EXP Regular | x50 | +10% | +20% | +30% |
| EXP Master | x3 | x4 | x5 | x6 |
| Post command Zen | 50.000 | 40.000 | 30.000 | 25.000 |
| Soul % Rate for item with +Luck | 70% | 80% | 80% | 80% |
| Jewel of Life Success Rate | 70% | 72% | 73% | 75% |
| Chaos Machine Rates | standard | +3% | +7% | +5% - +10% |
| Goblin Points per 1 Hour online | 25 | 50 | 75 | 100 |
| Limit per 24h to access events | standard | +0.5x more | +0.7x more | +1x more |
| Extra vaults /ware | 2 | 3 | 4 | 5 |
| Available Command /openware | no | no | yes | yes |
| Elf Soldier use max level | 350 | 360 | 370 | 380 |
| Offlevel use max time | 12 | 16 | 20 | 24 |
| Offlevel Pick | No | Yes | Yes | Yes |
| Custom Jewel Bank Auto | No | Yes | Yes | Yes |
| Custom Daily Reward | No | Yes | Yes | Yes |
| Arena Map Access | No | Yes | Yes | Yes |
| Blood Castle Entry Count Daily | 3 | 4 | 4 | 4 |
| Devil Square Entry Count Daily | 3 | 4 | 4 | 4 |
| Chaos Castle Entry Count Daily | 3 | 4 | 4 | 4 |
| Double Goer Entry Count Daily | 1 | 2 | 2 | 2 |
| Illusion Temple Entry Count Daily | 3 | 4 | 4 | 4 |
| Imperial Guardian Entry Count Daily | 2 | 3 | 3 | 3 |
⚜️ Ancient Items
Ancient Items comprises potent equipment sets that, when worn together, unveil an assortment of distinctive supplementary attributes referred to as '+Set Option'. These sets surpass their regular and sometimes even their excellent-grade equivalents, boasting significantly heightened offensive and defensive attributes.
Among the pantheon of equipment, Ancient Sets stand as some of the most formidable and commanding choices, wielding remarkable power within the game world.
✨ Ancient Options
Ancient items always have at least one '+Ancient Option'
🎯 Fixed Set Names
Ancient items have fixed Set Names and fixed '+Set Options'
🔓 Set Bonuses
'+Set Options' unlock when you equip at least 2 items of the same Ancient Set
📈 Progressive Bonuses
Additional '+Set Options' unlock for each additional item equipped
🔀 Mix & Match
You can mix different Ancient Sets to obtain multiple '+Set Options'
📦 How to Obtain Ancient Items
In order to obtain Ancient Items, adventurers must either:
- 🏆 Chaos Castle Event - Triumph in this challenging event
⚔️ Ancient Sets
🛡️ Knight Ancient Sets
Ancient armor sets for Dark Knight class. Each set provides unique bonuses when equipped together.
⚔️ Warrior Leather Set
| Set Item Parts | Parts Set Options | Full Set Bonus Options |
|---|---|---|
| Warrior Leather Helmet | 2 Parts Set option: Excellent damage rate +15% | Skill attacking rate +150 |
| Warrior Leather Armor | 3 Parts Set option: Critical damage rate +15% | Strength +150 |
| Warrior Leather Pants | 4 Parts Set option: Max. Life +200 | Agility +150 |
| Warrior Leather Gloves | 5 Parts Set option: Strength +150 | Stamina +150 |
| Warrior Leather Boots | Energy +150 | |
| Warrior Ring of Ice | Defensive skill +100 |

⚔️ Anonymous Leather Set
| Set Item Parts | Parts Set Options | Full Set Bonus Options |
|---|---|---|
| Anonymous Leather Helmet | 2 Parts Set option: Ignore enemies defensive skill +10% | Double damage rate +10% |
| Anonymous Leather Pants | Damage success rate +70 | |
| Anonymous Leather Boots |

⚔️ Hyperion Bronze Set
| Set Item Parts | Parts Set Options | Full Set Bonus Options |
|---|---|---|
| Hyperion Bronze Armor | 2 Parts Set option: Excellent damage rate +15% | Strength +150 |
| Hyperion Bronze Pants | 2 Parts Set option: Strength +150 | Agjliy +150 |
| Hyperion Bronze Boots | Stamina +150 | |
| Energy +150 | ||
| Skill attacking rate +30 | ||
| Ignore enemies defensive skill +10% |
⚔️ Mist Bronze Set
| Set Item Parts | Parts Set Options | Full Set Bonus Options |
|---|---|---|
| Mist Bronze Helm | 2 Parts Set option: Minimum damage +100 | Increase Agility +120 |
| Mist Bronze Gloves | 2 Parts Set option: Maximum damage +120 | Defensive skill +200 |
| Mist Pendant of Ability | Skill attacking rate +80 | |
| Critical damage rate + 10% |
⚔️ Eplate Scale Set
| Set Item Parts | Parts Set Options | Full Set Bonus Options |
|---|---|---|
| Eplate Scale Helm | 2 Parts Set option: Damage +150 | Agility +300 |
| Eplate Scale Armor | 3 Parts Set option: Stamina +150 | Stamina +150 |
| Eplate Scale Pants | 4 Parts Set option: Excellent damage rate +15% | Defensive skill +200 |
| Eplate Plate Shield | Damage success rate +150 | |
| Eplate Pendant of Lightning | Critical damage rate +15% |

⚔️ Berserker Scale Set
| Set Item Parts | Parts Set Options | Full Set Bonus Options |
|---|---|---|
| Berserker Scale Helm | 2 Parts Set option: Maximum damage +150 | Maximum damage +150 |
| Berserker Scale Armor | 3 Parts Set option: Maximum damage +150 | Double damage rate +5% |
| Berserker Scale Pants | 4 Parts Set option: Maximum damage +150 | Critical damage rate +70% |
| Berserker Scale Boots | Skill attacking rate +100 | |
| Berserker Scale Gloves |

⚔️ Garuda Brass Set
| Set Item Parts | Parts Set Options | Full Set Bonus Options |
|---|---|---|
| Garuda Brass Armor | 2 Parts Set option: Maximum AG +200 | Excellent damage rate +15% |
| Garuda Brass Boots | 2 Parts Set option: Energy +150 | Damage +150 |
| Garuda Brass Gloves | 3 Parts Set option: Double damage rate + 7% | Ignore enemies defensive skill +7% |
| Garuda Pendant of Fire | 3 Parts Set option: Strength +150 | Damage success rate +150 |
| Agility +200 | ||
| Stamina +200 |
⚔️ Cloud Brass Set
| Set Item Parts | Parts Set Options | Full Set Bonus Options |
|---|---|---|
| Cloud Brass Helm | Critical damage rate +40% | |
| Cloud Brass Pants | Critical damage +200 |

⚔️ Kantata Plate Set
| Set Item Parts | Parts Set Options | Full Set Bonus Options |
|---|---|---|
| Kantata Plate Armor | 2 Parts Set option: Critical damage rate +15% | Strength +150 |
| Kantata Plate Gloves | 2 Parts Set option: Critical damage +50 | Energy + 150 |
| Kantata Plate Boots | 3 Parts Set option: Agility + 150 | Mana +200 |
| Kantata Ring of Poison | 3 Parts Set option: Defensive skill +125 | Skill attacking rate +50 |
| Damage success rate +100 | ||
| AG increase rate +15 |
⚔️ Rave Plate Set
| Set Item Parts | Parts Set Options | Full Set Bonus Options |
|---|---|---|
| Rave Plate Helm | 2 Parts Set option: Double damage rate +10% | Excellent damage rate +10% |
| Rave Plate Armor | 2 Parts Set option: Damage success rate +110 | Ignore enemies defensive skill +10% |
| Rave Plate Pants | Double damage rate +5% |
⚔️ Hyon Dragon Set
| Set Item Parts | Parts Set Options | Full Set Bonus Options |
|---|---|---|
| Hyon Dragon Helm | 2 Parts Set option: Minimum damage +110 | Strength +400 |
| Hyon Dragon Gloves | 2 Parts Set option: Maximum damage +120 | Energy +150 |
| Hyon Dragon Boots | 3 Parts Set option: Double damage rate +15% | Critical damage rate +25% |
| Hyon Lightning Sword | 3 Parts Set option: Strength +150 | Critical damage +100 |
| Excellent damage rate +20% | ||
| Excellent damage +100 |

⚔️ Vicious Dragon Set
| Set Item Parts | Parts Set Options | Full Set Bonus Options |
|---|---|---|
| Vicious Dragon Helm | 2 Parts Set option: Damage success rate +130 | Minimum damage +130 |
| Vicious Dragon Armor | 3 Parts Set option: Skill attacking rate +140 | Maximum damage +150 |
| Vicious Dragon Pants | Double damage rate +15% | |
| Vicious Ring of Earth | Ignore enemies defensive skill +15% |

⚔️ Paladin Dark Phoenix Set
| Set Item Parts | Parts Set Options | Full Set Bonus Options |
|---|---|---|
| Paladin Dark Phoenix Helm | 2 Parts Set option: Damage + 200 | Stamina +200 |
| Paladin Dark Phoenix Armor | 3 Parts Set option: Critical damage rate +20% | Minimum damage +170 |
| Paladin Dark Phoenix Pants | 4 Parts Set option: Excellent damage rate +20% | Critical damage +200 |
| Paladin Dark Phoenix Gloves | Skill attacking rate +200 | |
| Paladin Dark Phoenix Boots | Double damage rate +15% | |
| Ignore enemies defensive skill +10% |
⚔️ Wraith Dark Phoenix Set
| Set Item Parts | Parts Set Options | Full Set Bonus Options |
|---|---|---|
| Wraith Dark Phoenix Armor | 2 Parts Set option: Skill attacking rate +200 | Strength +200 |
| Wraith Knight Blade | 2 Parts Set option: Damage success rate +200 | Stamina +200 |
| Wraith Ring of Ice | Damage +200 | |
| Double damage rate +15% | ||
| Ignore enemies defensive skill +10% |


📋 Non-Excellent Drops

⭐ Star of Sacred Birth
🎲 80% - Jewels:
💎 Bless, Soul, Life, Creation, Chaos
🎲 20% - 💰 2kk Zen

❤️ Heart of Love
🎲 80% - Jewels:
💎 Bless, Soul, Life, Creation, Chaos
🎲 20% - 💰 2kk Zen

🥈 Silver Medal
🛡️ Normal Sets +7/+9 (chance +luck +add):
Dragon, Legendary, Guardian, Storm Crow, Adamantine, Ashcrow, Eclipse, Iris, Valiant, Dark Steel
⚔️ Normal Weapons +7/+9 (chance +luck +add +skill):
Dragon Spear, Sword of Destruction, Staff of Destruction, Saint Crossbow, Bolt of Fate, Thunder Blade, Rune Blade, Master Scepter, Great Scepter
💎 Jewels:
Bless, Soul, Life, Creation, Chaos

🥇 Gold Medal
🛡️ Premium Sets +7/+9 (chance +luck +add):
Black Dragon, Dark Phoenix, Great Dragon, Divine, Red Spirit, Grand Soul, Dark Soul, Thunder Hawk, Hurricane, Glorious, Dark Master
⚔️ Premium Weapons +7/+9 (chance +luck +add +skill):
Daybreak, Knight Blade, Dragon Soul Staff, Celestial Bow, Arrow of Light, Dark Reign Blade, Lord Scepter
💎 Jewels:
Bless, Soul, Life, Creation, Chaos
🎁 Miscellanous Drops

🎁 Red Ribbon Box
💎 Drops:
Bless, Soul, Life, Creation, Chaos
📍 How to Obtain:
Hunt these monsters or complete Custom Quests:
Pouch of Blessing

🍫 Red Chocolate Box
💎 Drops:
Bless, Soul, Life, Creation, Bless Bundle, Soul Bundle, Gemstone
📍 How to Obtain:
Win in Blood Castle event or complete Custom Quests

📦 Green Box
💎 Drops:
Bless, Soul, Life, Guardian, Chaos, Gemstone, Purple Chaos Box, Box of Luck, Jewel of Level
Bonus: Chance for 9,999,999 Zen!
📍 How to Obtain:
Hunt these monsters, win in Devil Square or Illusion Temple, or complete Custom Quests:
Golden Soldier
Golden Vepar
Golden Wheel

🍫 Pink Chocolate Box
💎 Drops:
Bless, Soul, Harmony, Chaos, Life Bundle, Jewel of Luck, Condor Flame, Purple Chaos Box
📍 How to Obtain:
Win in Blood Castle 7 or Devil Square 6 events

📦 Red Box
💎 Drops:
Box of Kundun +1, Box of Kundun +2, Box of Kundun +3
📍 How to Obtain:
Complete Custom Quests or obtain from:
Gold Medal

🍀 Box of Luck
💎 Drops:
Box of Kundun +1, Box of Kundun +2, Box of Kundun +3
📍 How to Obtain:
Hunt these monsters, complete Custom Quests, or obtain from:
Budge Dragon
Green Box

📦 Purple Box
💎 Drops:
Box of Kundun +2, Box of Kundun +3, Box of Kundun +4
📍 How to Obtain:
Complete various Custom Quests

💜 Purple Chaos Box
💎 Drops:
Box of Kundun +1, Box of Kundun +2, Box of Kundun +3
📍 How to Obtain:
Win in Illusion Temple 1-5 or Pandora Event, complete Custom Quests, or obtain from item bags:
Gold Medal
Green Box
Pink Chocolate

✨ Golden Box
💎 Drops:

Green Ribbon Box

Blue Ribbon Box
📍 How to Obtain:
Defeat the strongest Boss in LoyalMu:
Selupan
⭐ Excellent Drops

📦 Box of Kundun +1
💎 Excellent Drops:
💍 Jewelry: Ring of Ice, Ring of Poison, Pendant of Lighting, Pendant of Fire, Ring of Fire, Ring of Earth, Ring of Wind, Ring of Magic, Pendant of Ice, Pendant of Wind, Pendant of Water, Pendant of Ability
📍 How to Obtain:
Hunt these golden monsters:
Golden Budge Dragon
Golden Goblin
Golden Soldier

📦 Box of Kundun +2
💎 Excellent Drops:
⚔️ Weapons: Blade, Gladius, Falchion, Serpent Sword, Sword of Salamander, Light Saber, Elven Axe, Battle Axe, Nikea Axe, Larkan Axe, Great Hammer, Crystal Morning Star, Battle Scepter, Giant Trident, Serpent Spear, Berdysh, Great Scythe, Battle Bow, Tiger Bow, Golden Crossbow, Bluewing Crossbow, Arquebus, Light Crossbow, Serpent Crossbow, Thunder Staff, Gorgon Staff, Book of Samut, Book of Neil, Mystery Stick, Violent Wind Stick
🛡️ Shields: Dragon Slayer Shield, Skull Shield, Spiked Shield, Tower Shield
👕 Armor Sets: Bone Armor, Scale Armor, Sphinx Armor, Brass Armor, Wind Armor, Spirit Armor, Light Plate Armor, Violent Wind Armor
📍 How to Obtain:
Hunt these golden monsters:
Golden Vepar
Golden Titan
Golden Dark Knight
Golden Devil

📦 Box of Kundun +3
💎 Excellent Drops:
⚔️ Weapons: Sacred Glove, Legendary Sword, Heliacal Sword, Double Blade, Lighting Sword, Giant Sword, Crescent Axe, Crystal Sword, Chaos Dragon Axe, Elemental Mace, Master Scepter, Bill of Balrog, Silver Bow, Chaos Nature Bow, Aquagold Crossbow, Legendary Staff, Staff of Resurrection, Chaos Lighting Staff, Book of Lagle, Red Wing Stick
🛡️ Shields: Plate Shield, Large Round Shield, Serpent Shield, Bronze Shield, Dragon Shield, Legendary Shield
👕 Armor Sets: Plate Armor, Dragon Armor, Legendary Armor, Guardian Armor, Adamantine Armor, Storm Crow Armor, Red Wing Armor, Sacred Fire Armor RF
📍 How to Obtain:
Hunt these golden monsters:
Golden Lizard King

Golden Iron Wheel
Golden Crust
Golden Tantalos
Golden Derkon
(2 boxes)

📦 Box of Kundun +4
💎 Excellent Drops:
⚔️ Weapons: Divine sword of archangel, Thunder blade, Dark breaker, Sword of destruction, Chaos dragon axe, Elemental mace, Great scepter, Lord scepter, Divine stick of arcangel, Dragon spear, Saint crossbow, Celestial bow, Divine staff of archangel, Dragon soul staff, Staff of destruction, Ancient stick, Demonic stick, Divine scepter of archangel, Divine crossbow of archangel, Great Reign Crossbow
🛡️ Shields: Dragon shield, Elemental shield, Grand Soul shield, Cross shield, Crimson Glory
👕 Armor Sets: Black Dragon Armor, Dark Phoenix Armor, Grand Soul Armor, Grand Soul Pants, Ashcrow Armor, Eclipse Armor, Glorious Armor, Dark Steel Armor, Thunder Hawk Armor, Ancient Armor, Iris Armor, Divine Armor, Valiant Armor
📍 How to Obtain:
Hunt these golden monsters:
Golden Satyros
Golden Twin Tail
Golden Stone Golem

📦 Box of Kundun +5
💎 Excellent Drops:
⚔️ Weapons: Deadly Staff, Inberial Staff, Summon Spirit Stick, Chromatic Staff, Raven Stick, Staff of Kundun, Grand Viper Staff, Platina Staff, Storm Blitz Stick, Lilium Stick, Soleil Sceptor, Shining Scepter, Frost Mace, Arrow Viper Bow, Aileen Bowr, Knight Blade, Dark Reign Blade, Bone Blade, Explosion Blade, Daybreak, Rune Blade, Sacred Glove, Holly Storm Claws, Piercing Glove, Phoenix Soul Star, Demonic Stick, Sword Dancer, Flameberge, Sword Breaker, Rune Bastard Sword, Absolute Scepter, Striker Scepter, Sylph Wind Bow, Albatross Bow, Dark Stinger
🛡️ Shields: Frost Barrier, Salamander Shield, Guardian Shield
👕 Armor Sets: Dark Master Armor, Dragon Knight Armor, Venom Mist Armor, Titan Armor, Sylphid Ray Armor, Sunlight Armor, Storm Blitz Armor, Lilium Armor, Brave Armor, Seraphim Armor, Royal Armor, Hades Armor, Storm Hard Armor, Piercing Armor, Phoenix Soul Armor, Volcano Pants, Phantom Armor, Destroy Armor
📍 How to Obtain:
Hunt these golden monsters:
Golden Iron Knight
Great Golden Dragon
(2 boxes)
Golden Napin
🎁 Green Ribbon Box
💎 Excellent Drops:
👕 Armor Sets: Dark Phoenix Set, Grand Soul Set, Divine Set, Thunder Hawk Set, Great Dragon Set, Dark Soul Set, Red Spirit Set, Hurricane Set, Dark Master Set
⚔️ Weapons: Knight's Blade, Platina Staff, Sword Dancer, Great Lord's Scepter, Arrow Viper Bow, Bolf of Fate, Elemental Mace
🛡️ Shields: Crimson Glory, Guardian Shield, Frost Barrier, Salamander Shield, Cross Shield
💍 Rings & Pendants: Ring of Fire, Ring of Earth, Pendant of Ice, Pendant of Wind
👂 Earrings: Left Earring, Right Earring
📍 How to Obtain:
Hunt monsters, win Illusion Temple 6, complete Custom Quests, or obtain from:
Golden Twin Tail

Balgass
Medusa
Erohim
Silver Box
🎁 Blue Ribbon Box
💎 Excellent Drops:
👕 Armor Sets: Dragon Knight Set, Venom Mist Set, Sylphid Ray Set, Volcano Set, Sunlight Set
⚔️ Weapons: Bone Blade, Grand Viper Staff, Sylph Wind Bow, Explosion Blade, Soleil Scepter, Arrow of Light
💍 Rings & Pendants: Ring of Poison, Ring of Ice, Pendant of Fire, Pendant of Lighting
👂 Earrings: Earrings Tier 4 (Left), Earrings Tier 4 (Right)
📍 How to Obtain:
Hunt bosses, win King of MU event, complete Custom Quests, or obtain from:
Golden Great Dragon
Kundun
Golden Box
📦 Silver Box
💎 Drop:
🎁 Green Ribbon Box
💎 Jewel of Luck
💎 Jewel of Additional
💎 Jewel of Excelent +2
💎 Bundle of Bless 30
💎 Bundle of Soul 30
📍 How to Obtain:
Open Sealed Silver Box with Silver Key. Silver Key drops from monsters level 50-150 on any map. Sealed Silver Box drops only in Devil Square with low chance.

Silver Key
Sealed Silver Box
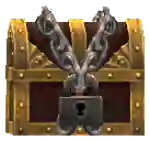
📦 Golden Box
💎 Drops:
🎁 Blue Ribbon Box
💎 Jewel of Luck
💎 Jewel of Additional
💎 Jewel of Excelent +3
💎 Bundle of Bless 30
💎 Bundle of Soul 30
📍 How to Obtain:
Open Sealed Golden Box with Golden Key. Golden Key drops from monsters level 50-150 on any map. Sealed Golden Box drops only in Blood Castle with low chance.

Golden Key
Sealed Golden Box
💎 Regular Jewels

💎 Jewel of Chaos
📍 How to Obtain:
To obtain the Jewel of Chaos, adventurers can embark on hunting expeditions targeting monsters. These formidable foes hold the potential to drop this coveted jewel, allowing players to acquire it through their victories in combat.
💡 Tip:
Alternatively, in the realm of Loyal Mu, the game administration has introduced the option to acquire the Jewel of Chaos or Jewel of Chaos Bundles by completing quests.
Jewel of Chaos Bundles:

Bundle 10

Bundle 20

Bundle 30

💎 Jewel of Bless
📖 Description:
Jewel of Bless enhances the level of an item from +0 to +6, providing a significant boost in its power and capabilities. This versatile jewel can be used on various equipment pieces such as weapons, shields, armor, or wings, allowing players to strengthen their arsenal to take on even greater challenges in the game. It's important to note that the Jewel of Bless is effective only on items up to +6, as higher enhancements require the presence of a Jewel of Soul.
⚙️ How to Use:
To apply this jewel, simply hover the cursor over it and confidently click it onto the desired item, witnessing the item's level increase by one with an impressive 100% success rate.
💡 Tip:
Alternatively, in the realm of Lotus Mu, the game administration has introduced the option to acquire the Jewel of Bless or Jewel of Bless Bundles by completing quests.
Jewel of Bless Bundles:

Bundle 10

Bundle 20

Bundle 30

💎 Jewel of Soul
📖 Description:
The Jewel of Soul enhances the level of an item from +0 to +9, offering a substantial increase in its power and potential. This versatile jewel can be utilized on equipment ranging from +0 to +9.
Further enhancements to +10, +11, +12, +13, +14, and +15 require the use of the Chaos Machine.
⚙️ How to Use:
It can be applied to weapons, shields, armor, or wings, simply by selecting the jewel with the cursor and clicking it onto the desired item. Each application grants a one-level increase.
ℹ️ Success Rate:
Upgrading an item with Jewel of Soul has a 60% chance of success.
However, if the item possesses the +Luck option, the probability of successful enhancement rises to 80%.
VIP players receive an additional +10% bonus to success rate.
⚠️ Warning:
Beware that if your Item's Level is already +7 or more a failed upgrade will cause your to go all the way down to Item Level of +0.
However, items enchanted at the Chaos Machine from +9 to +15 will not disappear on failure - they will only lose one level.
💡 Tip:
Alternatively, in the realm of Lotus Mu, the game administration has introduced the option to acquire the Jewel of Soul or Jewel of Soul Bundles by completing quests.
Jewel of Soul Bundles:

Bundle 10

Bundle 20

Bundle 30

💎 Jewel of Life
📖 Description:
The Jewel of Life increases the option level of an item by one with a 80% chance of success (The +Luck option does not affect this jewel).
⚔️ Weapons:
Adds +4 to both min and max attack damage, with increments of +4, +8, +12, +16, +20, +24, +28.
🛡️ Armors:
Provides +4% defense, with increments of +4%, +8%, +12%, +16%, +20%, +24%, +28%.
🛡️ Shields:
Grants +5 defense rate, with increments of +5, +10, +15, +20, +25, +30, +35.
🪽 Wings:
Various options can be obtained (depending on the type of wings) and can be upgraded up to 7 times.
💡 Tip:
Alternatively, in the realm of Lotus Mu, the game administration has introduced the option to acquire the Jewel of Life or Jewel of Life Bundles by completing quests.
Jewel of Life Bundles:

Bundle 10

Bundle 20

Bundle 30

💎 Jewel of Creation
📖 Description:
Harnessing the mystic powers of the Jewel of Chaos, the Jewel of Creation finds its purpose within the Chaos Machine, where it plays a pivotal role in the creation of exquisite and rare Fruits. These fruits possess the extraordinary ability to elevate a character's stat by a magnitude of 0 to 4.
Moreover, the Jewel of Creation holds a revered position within the crafting rituals of the realm, acting as the catalyst for the creation of legendary artifacts and equipment coveted by the bravest warriors. Through the intricate knowledge passed down by seasoned artisans, the Jewel of Creation unlocks the secrets to summoning loyal companions such as the Crow and the Horse, destined to stand faithfully by the side of the enigmatic Dark Lord.
💡 Tip:
Alternatively, in the realm of Loyal Mu, the game administration has introduced the option to acquire the Jewel of Creation or Jewel of Creation Bundles by completing quests.
Jewel of Creation Bundles:

Bundle 10

Bundle 20

Bundle 30

💎 Jewel of Guardian
📖 Description:
The Jewel of Guardian serves multiple purposes, acting as a crucial component in enhancing the fortification of the castle, crafting Life Stones of great significance, and unlocking the exclusive Item Options option with its unique abilities.
The aforementioned Item Options, commonly referred to as pink options in the world of Mu Online, were originally restricted to 380 level items. However, considering the distinct setup of Lotus Mu, our team has made the decision to extend the availability of these valuable Item Options to encompass all items.
📍 How to Obtain:
You can obtain the Jewel of Guardian from the following golden monsters:
Golden Stone Golem
Golden Dark Knight
Golden Devil
Golden Satyros
💡 Tip:
The Jewel of Guardian can be also obtained in Devil Square and from Green Box.

💎 Gemstone
📖 Description:
A gemstone, in its raw state, possesses no inherent properties or value; however, through the process of refinement, it undergoes a transformation, emerging as a resplendent Jewel of Harmony. For a comprehensive understanding of the intricate process involved in refining a Gemstone into a magnificent Jewel of Harmony, explore the detailed information provided within the dedicated article.
📝 Note:
It is important to bear in mind that the Refinery Tower, becomes accessible to players for a generous duration of 23 hours, but only upon their triumphant defeat of the Nightmare during the Kanturu Event.
📍 How to Obtain:
You can obtain the Gemstone from:

Red Dragon
Red Chocolate Box
Green Box

💎 Jewel of Harmony
The usage of Jewel of Harmony extends to imbuing items with unique and diverse special options. These options can vary significantly and provide distinct benefits to the equipped item.
💡 Tip:
The Jewel of Harmony is main ingredient in a chaos combination that grants Item Options, commonly referred to as pink options.
🔨 Crafting
The acquisition of the Jewel of Harmony is exclusively achievable through the process of crafting. Although the procedure itself is relatively straightforward, there are certain factors that necessitate careful consideration.
To commence the crafting process, you must first acquire a Gemstone.
To refine these raw Gemstones into the coveted Jewel of Harmony, the invaluable assistance of Elpis inside the Refinery Tower is needed.
Elpis
Entrusting Elpis with the refining task ensures the successful transformation of the Gemstone into the potent Jewel of Harmony, allowing you to unlock its exceptional powers.
You can go to the Refinery Tower by using the Gateway Machine (141,186) in Kanturu Relics.

Gateway Machine
✨ Harmony Options
To bestow your item with the coveted Harmony Options (also known as Yellow Options), all you need to do is effortlessly apply the Jewel of Harmony onto it.
The Jewel of Harmony is a single-use item, rendering it irretrievable for any future applications. Once it has served its purpose, the jewel is forever relinquished, unable to be reclaimed or reused. Therefore, it is crucial to consider the decision carefully before employing a Jewel of Harmony.
⚔️ Weapons Harmony Options
The following table shows what harmony options and their respective values you can have on your excellent items depending on their item level.
| Option / Item Level | +0 | +1 | +2 | +3 | +4 | +5 | +6 | +7 | +8 | +9 | +10 | +11 | +12 | +13 |
|---|---|---|---|---|---|---|---|---|---|---|---|---|---|---|
| Minimum attack power increase | 3 | 5 | 7 | 9 | 11 | 13 | 15 | 20 | 25 | 30 | 35 | 40 | 45 | 50 |
| Maximum Attack Power Increase | 5 | 10 | 15 | 20 | 25 | 30 | 35 | 40 | 45 | 50 | 60 | 70 | 80 | 105 |
| Required Strength decrease | 5 | 10 | 20 | 30 | 40 | 50 | 60 | 70 | 80 | 90 | 100 | 110 | 120 | 135 |
| Required Agility decrease | 5 | 10 | 20 | 30 | 40 | 50 | 60 | 70 | 80 | 90 | 100 | 110 | 120 | 135 |
| Attack power increase(Min, Max) | - | - | - | - | - | - | 10 | 20 | 30 | 40 | 50 | 60 | 70 | 85 |
| Critical damage increase | - | - | - | - | - | - | 20 | 30 | 40 | 50 | 100 | 110 | 120 | 135 |
| Skill attack power increase | - | - | - | - | - | - | - | - | - | 45 | 55 | 65 | 75 | 100 |
| Attack success rate increase(PvP) | - | - | - | - | - | - | - | - | - | 50 | 100 | 150 | 200 | 250 |
| SD decrement increase | - | - | - | - | - | - | - | - | - | 3 | 5 | 8 | 15 | 20 |
| SD bypass rate increase | - | - | - | - | - | - | - | - | - | - | - | - | - | 10 |
🔮 Staffs Harmony Options
The following table shows what harmony options and their respective values you can have on your excellent items depending on their item level.
| Option / Item Level | +0 | +1 | +2 | +3 | +4 | +5 | +6 | +7 | +8 | +9 | +10 | +11 | +12 | +13 |
|---|---|---|---|---|---|---|---|---|---|---|---|---|---|---|
| Magic power increase | 5 | 10 | 20 | 30 | 40 | 50 | 60 | 70 | 80 | 90 | 125 | 150 | 175 | 220 |
| Required Strength decrease | 5 | 10 | 15 | 20 | 25 | 30 | 35 | 40 | 45 | 50 | 60 | 70 | 80 | 105 |
| Required Agility Decrease | 5 | 10 | 15 | 20 | 25 | 30 | 35 | 40 | 45 | 50 | 60 | 70 | 80 | 105 |
| Skill attack power increase | - | - | - | - | - | - | 60 | 70 | 80 | 90 | 105 | 120 | 145 | 165 |
| Critical damage increase | - | - | - | - | - | - | 60 | 70 | 80 | 90 | 100 | 125 | 150 | 175 |
| SD decrement increase | - | - | - | - | - | - | - | - | - | 15 | 20 | 25 | 30 | 35 |
| SD bypass rate increase increase (PVP) | - | - | - | - | - | - | - | - | - | 50 | 100 | 150 | 200 | 250 |
| SD bypass rate increase | - | - | - | - | - | - | - | - | - | - | - | - | - | 25 |
🛡️ Armors Harmony Options
The following table shows what harmony options and their respective values you can have on your excellent items depending on their item level.
| Option / Item Level | +0 | +1 | +2 | +3 | +4 | +5 | +6 | +7 | +8 | +9 | +10 | +11 | +12 | +13 |
|---|---|---|---|---|---|---|---|---|---|---|---|---|---|---|
| Defense power increase | 5 | 10 | 20 | 30 | 40 | 50 | 60 | 70 | 80 | 90 | 100 | 110 | 120 | 150 |
| Maximum HP increase | - | - | - | 5 | 25 | 50 | 75 | 100 | 125 | 150 | 175 | 200 | 225 | 250 |
| Maximum HP increase | - | - | - | 5 | 25 | 50 | 75 | 100 | 125 | 150 | 175 | 200 | 225 | 250 |
| HP automatic increase rate increase | - | - | - | - | - | - | 1 | 2 | 3 | 5 | 10 | 15 | 20 | 25 |
| MP automatic increase rate increase | - | - | - | - | - | - | - | - | - | 10 | 15 | 20 | 25 | 30 |
| Defense success rate increase(PvP) | - | - | - | - | - | - | - | - | - | 50 | 100 | 150 | 200 | 250 |
| Damage decrease increase | - | - | - | - | - | - | - | - | - | 4 | 5 | 6 | 7 | 8 |
| SD rate increase | - | - | - | - | - | - | - | - | - | - | - | - | - | 10 |
⬆️ Harmony Options Upgrade
The Harmony Option has the potential for further enhancement through the utilization of either Low Refining Stones or High Refining Stones. These refining stones serve as catalysts for elevating the power and effectiveness of the Jewel of Harmony Option. Whether you opt for the Low Refining Stone or the High Refining Stone, this upgrade process enables you to amplify the benefits and advantages conferred by the Jewel of Harmony Option, allowing for a more formidable presence in the realms of Lotus Mu.
🗑️ Harmony Options Removal
When it comes to Excellent items, the sole individual capable of removing the Harmony Option affixed to them is none other than Jerridon. His expertise and assistance are indispensable in eliminating the Harmony Option from these remarkable items.
ℹ️ Info:
Jerridon can be encountered within the vicinity of Aida.
By seeking out Jerridon's aid, you can effectively remove the Harmony Option and potentially replace it with a more desirable alternative, further enhancing the overall potential and value of your Excellent items.
Jerridon


🔮 Refining Stones
Low Refining Stone / High Refining Stone
In order to enhance the Harmony Options, both the Low Refining Stone and the High Refining Stone play essential roles. By employing either of these refining stones, individuals can unlock new avenues of power and fine-tuning.
🧙 Acquiring Refining Stones
To procure the necessary refining stones, one must engage in conversation with the illustrious and exclusive figure known as Osbourne. This enigmatic individual holds the key to crafting these invaluable stones, possessing the knowledge and expertise required for their creation.
💡 Info:
Osbourne can be encountered within the vicinity of Aida.
Osbourne
By seeking out Osbourne and engaging in dialogue, aspiring craftsmen and enthusiasts can unravel the secrets and intricacies involved in the art of refining stone production.
The nature of the exchange with Osbourne determines the outcome of the transaction, as he has the power to bestow upon you either a Low Refining Stone or a High Refining Stone, depending on what you offer him.
The outcomes of the exchange are further explained in the subsequent section, where you can delve deeper into the specifics and gain a more comprehensive understanding of the factors that influence Osbourne's decision.
⚡ Low Refining Stone
By undergoing an upgrade process with a Low Refining Stone, the Harmony Option undergoes an advancement of one tier, resulting in an elevated level of power and effectiveness.
💡 Info:
The success rate when upgrading Harmony Option with a Low Refining Stone is 50%.
Low Refining Stone
You can acquire Low Refining Stone by dismantling non excellent armor or weapons.
⚠️ Caution:
In the unfortunate event of a failed upgrade, the Harmony Option will be entirely removed.
💎 High Refining Stone
Through the upgrading process with a High Refining Stone, the Harmony Option experiences an elevation of one tier, enhancing its overall potency.
💡 Info:
The success rate when upgrading Harmony Option with a High Refining Stone is 80%.
High Refining Stone
You can acquire High Refining Stone by dismantling excellent armor or weapons.
⚠️ Caution:
In the unfortunate event of a failure, the Harmony Option undergoes a decrease to its initial value.
✨ Excellent Jewels

Jewel of Level
By utilizing the Jewel of Level, you can elevate the level of your Items by a single point, thereby increasing its power and effectiveness. The Jewel of Level offers the ability to elevate the level of a ring or pendant, transforming it from its initial state with one tier, up to maximum of +11.
It is worth noting that this enhancement process carries a success rate of 80%, signifying the likelihood of achieving the desired outcome.
⚠️ Caution:
In the event of an unsuccessful upgrade, the item will retain its original level, unaffected by the application of the jewel.
You can obtain the Jewel of Level from:
Green Box

Jewel of Luck
Unlocking a new realm of possibilities, this functionality empowers you to bestow the coveted Luck option upon your item. Embrace the potential of the Jewel of Luck and harness its transformative power to elevate your item to new heights of fortune and prosperity.
The Jewel of Luck offers the ability to add the Luck Option to any of your items.
It is worth noting that this enhancement process carries a success rate of 100%, signifying the likelihood of achieving the desired outcome.
You can obtain the Jewel of Luck from:
Pink Chocolate Box

Jewel of Skill
The Jewel of Skill offers the ability to add the Skill Option to your weapons, enhancing their capabilities and unlocking new potential in combat.
It is worth noting that this enhancement process carries a success rate of 100%, signifying the likelihood of achieving the desired outcome.
You can obtain the Jewel of Skill from:
Green Box

Jewel of Additional
The Jewel of Additional offers the ability to add Maximum Additional Option to your items, enhancing their capabilities based on item type:
- Weapons: +28 Additional Damage
- Armor/Pants/Gloves/Boots: +28 Additional Defence
- Helm: +28 Additional Defence
- Wings: +28 Additional Defence
- Ring/Pendant: Automatic HP Recovery +7%
- Earrings: Automatic HP Recovery +7%
It is worth noting that this enhancement process carries a success rate of 100%, signifying the likelihood of achieving the desired outcome.
You can obtain the Jewel of Additional from:
Pink Chocolate Box

Jewel of Excellent +1
Adds one additional random Excellent option to an Non-Excellent Item.
Success rate: 100%
Obtain: Coming soon (stage2)

Jewel of Excellent +2
Adds one additional random Excellent option to an item that already has at least one Excellent option.
Success rate: 100%
Obtain: Coming soon (stage2)

Jewel of Excellent +3
Adds one additional random Excellent option to an item that already has at least two Excellent option.
Success rate: 100%
Obtain: Coming soon (stage2)

Jewel of Excellent +4
Adds one additional random Excellent option to an item that already has at least three Excellent option.
Success rate: 100%
Obtain: Coming soon (stage2)

Jewel of Excellent +5
Adds one additional random Excellent option to an item that already has at least four Excellent option.
Success rate: 100%
Obtain: Coming soon (stage2)

Jewel of Excellent +6
Adds one additional random Excellent option to an item that already has at least five Excellent option.
Success rate: 100%
Obtain: Coming soon (stage2)

Extension Jewel
The Extension Jewel serves a specialized purpose in restoring the durability of Lucky items that have been damaged or deteriorated through use.
When applied to a Lucky item with reduced durability, the Extension Jewel will fully repair and restore the item's durability to its maximum value, ensuring your valuable Lucky items remain functional and effective in combat.
It is worth noting that this restoration process carries a success rate of 100%, signifying the likelihood of achieving the desired outcome.
You can obtain the Extension Jewel only from X Shop in the Lucky Items section.
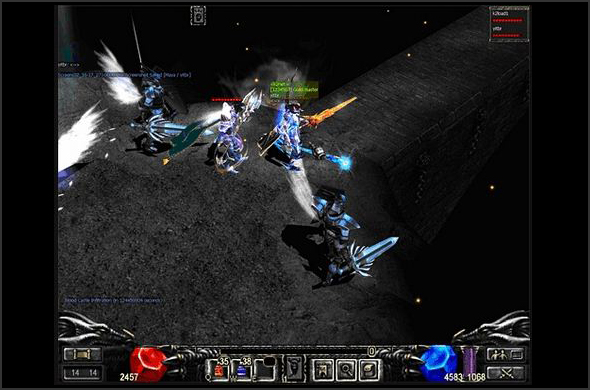
🏰 Blood Castle
Risk Your Life to Save the Archangel
One of the strongest warriors in the Continent of MU, the Archangel, has secretly been laying watch over the lands that he has sworn to protect. As Kundun's presence approaches, the Archangel has been warding off all the monsters trying to invade the Continent of MU. But alas, our Guardian Archangel cannot fend on his own forever.
Kundun's Army has invaded his Castle and has overcome the strength of the Archangel. The Archangel, injured and in peril, summons forth the warriors of MU to come aid him in his most dire time of need. Unable to summon his strengths without his Divine Weapon of Archangel, you have been asked to infiltrate this now overridden Castle and retrieve his weapon for him.
Fight through the bridge and gain entrance into the castle. Be the first to retrieve the Divine Weapon of Archangel and return it to him to complete the event. With the Cloak of Invisibility, you will be allowed onto the castle grounds. Will you be able to infiltrate the castle and retrieve what is needed without fear?
📜 How to Gain Entry to Blood Castle
When you have successfully created the Cloak of Invisibility, you may use it to enter the Blood Castle. To create the Cloak of Invisibility, you must combine a Scroll of Archangel and a Blood Bone of the same levels, along with a Chaos Jewel.
You will need the level of cloak that will match the level of Blood Castle you will be entering. Only items of the same level can be combined to create the Cloak of Invisibility for that specific Blood Castle.

📋 Items Needed & Drop Levels
🎯 Level Restrictions
⚠️ Note: Magic Gladiator and Dark Lord have -20 level requirement
📖 Blood Castle Rules
- Warping command will work in Blood Castle
- Only a maximum of 15 players are allowed per each Blood Castle level sub-server
- If you die in Blood Castle, you will not lose experience, zen, or drop items
- Specific skills can be used in safety zone of Blood Castle (Attack/Defense buff, heal, soul barrier, swell life)
- Blood Castle can be held as part of a party, in which case all of its members will receive rewards
🏆 Rewards
Red Chocolate Box
BC 1-6 Reward
Pink Chocolate Box
BC 7 Reward
😈 Devil Square
Survive the Endless Barrage
Enter as one of 15 warriors to engage the forces of Kundun as they spawn in front of you in an endless barrage of attacks. Either alone or in a team, only the strongest will survive Devil Square.
With the Devil Square Invitation, you are granted access into Devil Square, where your strength will be tested.
💡 Tip: Devil Square contributes points toward the weekly rankings.
📜 Entry Requirements
🔑 Required Item
You must craft a Devil Square Invitation to enter Devil Square.
Devil Square Invitation is crafted via Chaos Goblin Machine. Additionally, you'll also need one Jewel of Chaos for the crafting.

Devil's Key

Devil's Eye

Jewel of Chaos

Devil Square Invitation
💡 Tip: Detailed information on the crafting process you can find in the Devil Square Invitation article.
🎯 Required Level
Knights, Wizards and Elves:
Gladiators and Lords:
📖 Devil Square Rules
- A minimum of 1 player must enter, or it will not start
- A maximum of 15 players can join in a single instance
- Entry limit per 24 hours: 3 entries
- Party is allowed and can be formed inside the Devil Square map
- Any character with a PK Status cannot enter the Devil Square map
- No penalty upon character death
- PVP is not allowed
💡 Tip: VIP Players have 4 entries limit instead of 3.
🎮 Game-play
⏰ Preparation
Prior to the start of the Devil Square, the following messages start to appear in the Lotus Mu Server: "Devil Square will close in 5 (4,3,2,1) minute(s)".
As soon as you see such a message, go with your Devil Square Invitation to the Charon located in Noria.
Engaging with Charon will open a window with a table in which you need to select the appropriate level of Devil Square for your character (you should have the same level of Devil Square Invitation in your inventory).
If you did everything correctly, then you will be taken to the Devil Square Event map.
⚔️ Devil Square Quest
When the Devil Square starts, 200 monsters will instantly spawn throughout the arena. If a monster is killed, another will spawn to keep the monster count at 200.
As the time progresses, the monsters which spawn will change and their difficulty will slightly increase.
ℹ️ Info: Monsters will continue to spawn for 20 minutes.
✅ Event Completion
Depending on your score which is based on how many monsters you killed during the event, your character will gain a reward.
🏆 Rewards
Green Box
DS 1-5 Reward
Pink Chocolate Box
DS 6 Reward
📝 Note: Devil Square can be held as part of a party, but the rewards are individual.
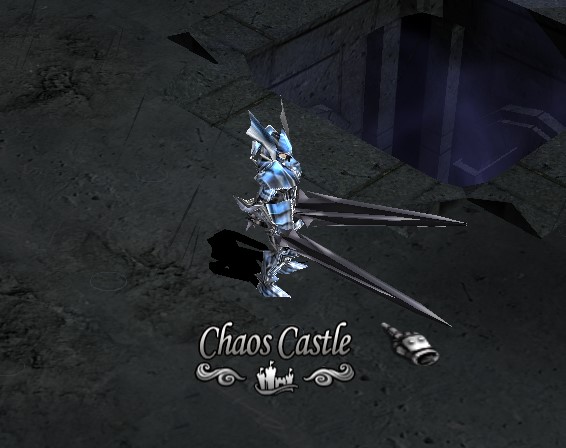
⚡ Chaos Castle
Fight for Prestige and Prize
Chaos Castle is the place where Mu Warriors fight for prestige or prize, but there can be only one winner.
📝 Note: During the Chaos Castle Event you are disguised to look like your enemies, where no one will be able to tell who's who.
📜 Entry Requirements
As the Chaos Castle is about to commence, a system notice will be sent to all active players.
💰 Required Item
There is a Zen fee to enter Chaos Castle.
All participant's Zen fee is put into a pool and the winner of the minigame will win 80% of the total amount.
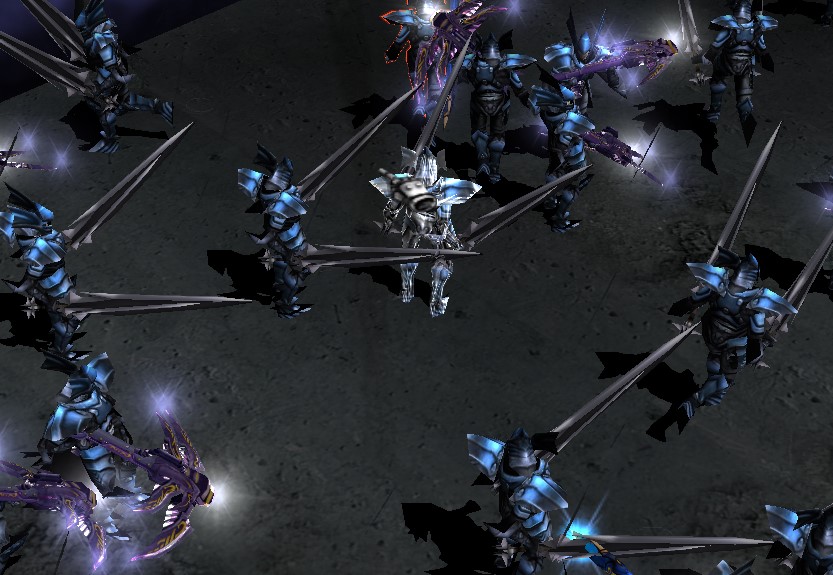
When you enter your character will have the Guardsman skin applied.
The monsters that spawn also have a Guardsman skin so it's hard to see the differences between players and monsters.

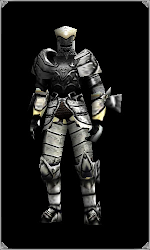
Armor of Guardsman
Sold by Carmen in Lorencia Bar
🎯 Required Level
Knights, Wizards and Elves:
Gladiators and Lords:
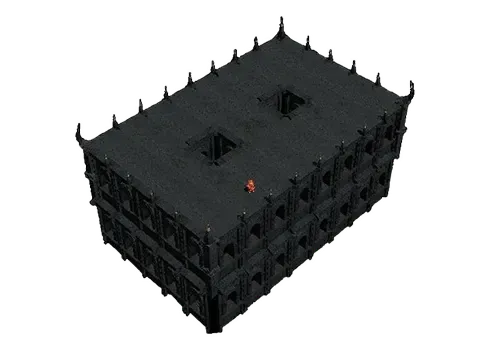
🎮 Game-play
⏰ Preparation
The Chaos Castle arena is square shaped with sections of the floor missing. A character can fall off the edge of the arena. If a character falls off the edge of the arena, they are disqualified.
📝 Note: Once the Entry Period has passed, there is a 1 minute delay before the event starts.
⚔️ Chaos Castle Quest
When the event starts, monsters will instantly spawn throughout the arena. Including other characters, there will be a total of 100 enemies in the arena. As enemies are killed, the Character Counter will decrease.
Once the Character Counter reaches 50, sections of the outer floor will crumble. If a character is standing where the floor crumbles, the character will fall off the arena and will be disqualified.
ℹ️ Info: The Chaos Castle will last for 10 minutes, until only one player is alive or until all players die.
💥 Explosion Mechanic
Some of the monsters in Chaos Castle have a special Skill called Explosion, which causes strong Knock-back. Explosion (Range: 2) is only casted after the monster dies. The Knock-back effect of the Skill can cause characters to fall off the stage.
💡 Tip: Equipping Ring of Fire or Pendant of Fire can decrease the chances of the Explosion Knock-back (Elemental Fire Resistance). Using AOE Skills can also help avoid Explosion Knock-back.
🏆 Rewards
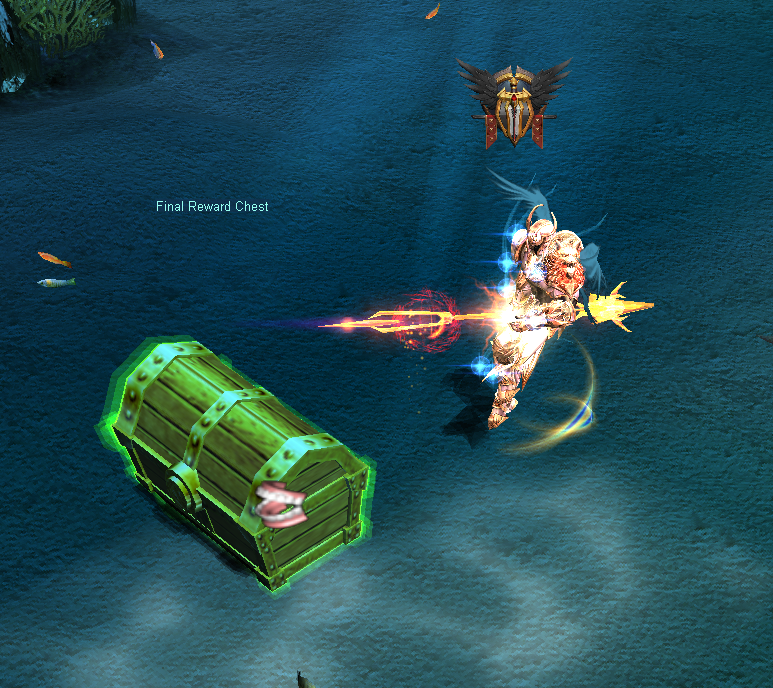
By winning Chaos Castle players will be rewarded with an Ancient Item.
There is also a chance to receive a Condor Flame by winning Chaos Castle 6.

Condor Flame
Chaos Castle 6 Bonus Reward
🏛️ Illusion Temple
ℹ️ Info: Illusion Temple will be available from Stage 2 onwards.
Team-Based Capture the Flag
The event consists of two teams who will try to get as many items from the Stone Pedestal NPC as possible. Once a player has received the item he will be slowed. Returning the item to the base camp will get the team 1 point.
During the Illusion Temple, players will have applied a skin on their character in order to recognize the enemy team.
💡 Tip: The players will be granted special skills when killing adversaries.
📜 Entry Requirements
🔑 Required Item
You must craft a Scroll of Blood to enter.
Scroll of Blood is crafted via Chaos Goblin Machine. You'll also need one Jewel of Chaos for the crafting.

Old Scroll

Illusion Sorcerer Covenant

Jewel of Chaos

Scroll of Blood
🎯 Required Level
Knights, Wizards and Elves:
Gladiators and Lords:
📖 Illusion Temple Rules
- A minimum of 2 Players must enter, or it will not start
- A maximum of 10 Players can join in a single instance
- Any character with a PK Status cannot enter the Illusion Temple map
- PVP is allowed, once the Event starts
- No penalty upon character death
- Upon death, characters are moved to their Party's respawn area, which is inside their base
🎮 Game-play
⏰ Preparation
Prior to the start of the Illusion Temple, the following messages appear in the Lotus Mu Server: "Illusion Temple will close in 5 (4,3,2,1) minute(s)".
As soon as you see such a message, go with the Scroll of Blood to Mirage - located in Elbeland. You need to have the correct Scroll of Blood corresponding to your Character's level in order to enter the Event.
If you did everything correctly, then you will be taken to the Illusion Temple Event Map.
Illusion Temple NPC - Mirage
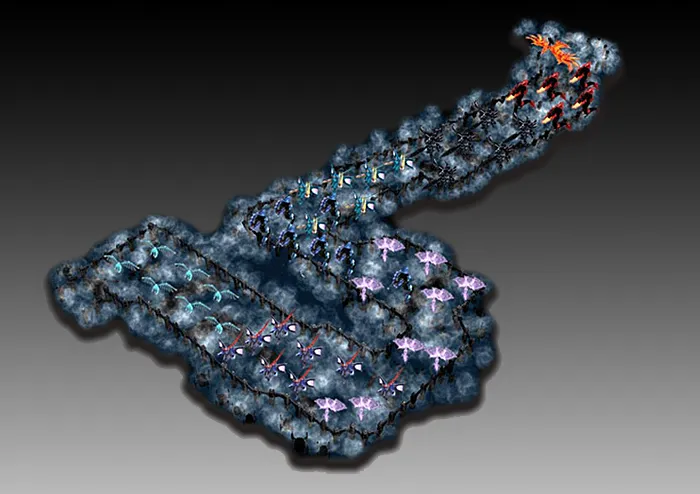
⚔️ Illusion Temple Quest
The arena is large. Here's a look at the layout of the zone. You can see both teams starting positions on the westernmost and easternmost sides of the map.
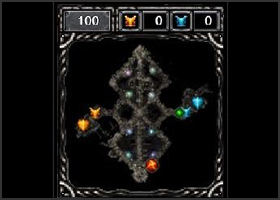
Illusion Temple Event Map
Red team and Blue team spawn on opposite sides of the map:
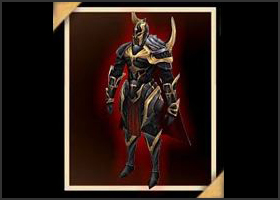
Red Team Skin
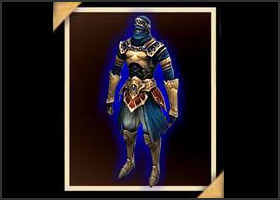
Blue Team Skin
🎯 Objective
The Illusion Temple Ball is located in either the northern or southern part of the map. Return the Ball to the team's pedestal to earn one Game Point.
When a ball is picked up, the character's Movement Speed will be decreased greatly so it's important for his or her teammates to work together to protect the ball carrier from the opposing team.
⚠️ Caution: If the ball carrier is killed, disconnects or leaves the event, the ball will fall to the ground and will be able to be picked up by any player on either team.
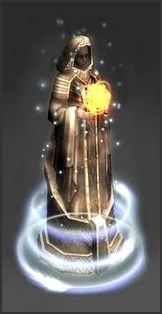
Illusion Temple Pedestal - Ball Spawn Location
Each team's base also comes equipped with a pedestal, where players can bring back the event balls for points.
Illusion Temple Team Pedestal
📝 Note: Once a ball is taken from the statue, both of the statues will disappear. They will reappear again once a team returns the ball to their respective base.
⚡ Kill Points & Skills
Players can kill each other or kill monsters during the Illusion Temple Event to earn Kill Points. They can be used to buy special skills during the event.
Available Special Skills:
💡 Tip: To use a skill select the desired skill from the HUD and press SHIFT + Right Click a target (monster or player).
Kill Points are earned by:
- Player Kill: Kill Points (x5)
- Monster Kill: Kill Points (x2)
🏆 How to Win
The team which is able to return the ball seven times first will win the Illusion Temple.
- Time limit: 15 minutes
- Returning Ball: Game Point (x1)
- Game Points to win: Earn 7 Game Points to win
⚠️ Caution: If both teams have equal Game Points when the time expires the Illusion Temple will fail and no one will receive a reward.
🏆 Rewards
Purple Chaos Box
IT 1-5 Reward
Green Ribbon Box
IT 6 Reward
📝 Note: All players from the winning team will receive the afore mentioned rewards.
🛡️ Imperial Guardian
Fortress of Imperial Guardian
The Imperial Guardian is an exciting event designed for groups of players to challenge their skills and earn valuable rewards. The Fortress features different maps for each day of the week.
🗓️ Daily Map Schedule
Each room consists of 3 stages, except for the final room, which has 4 stages.
Players can enter the event at any time but are limited to 1 entry per day.
📜 Requirements
- Must enter as a party (maximum of 5 players)
- Each participant must have Gaion's Order
⚔️ Conditions for Success and Failure
❌ Failure
- A character dies during the event
- A character disconnects from the server
- The allotted time runs out
✅ Success
The party defeats the final boss of the event.
🎮 Event Features
The event is based on the original MU Online settings and corresponds to the official configuration of Season 6.
During the event period, a mission event is held to reward players with various items based on their performance and levels achieved.
📌 Note: In other private servers, certain requirements may vary. This event is also known as "Gaion, Imperial Fortress, Varka" in some configurations.
🎫 How to Make Event Ticket
🔧 Assembly Prediction: Complete Secromicon
Regular Combination
- Tax rate: 3% (changed in real-time)
- Combining Success rate: 100%
- Required space in inventory: 1×1
- Required zen: 1,030,000 (1,000,000)*
First Secromicon Fragment
Second Secromicon Fragment
Third Secromicon Fragment
Fourth Secromicon Fragment
Fifth Secromicon Fragment
Sixth Secromicon Fragment

Complete Secromicon
💡 Tip: Collect all 6 Secromicon Fragments and combine them at the Chaos Goblin Machine to create your Complete Secromicon entry ticket.
🐉 Kanturu
The Nightmare Awakens
Forged by the ingenuity of the Kantru inhabitants, the most recent amalgamation of life forms stands as the ultimate manifestation of terror. The overwhelming might of Nightmare proved to be uncontrollable, leading to its captivity within Maya from its very inception.
As the foundations of Kantru crumbled and Maya's grip weakened, an opportune moment emerged for Nightmare to resurface within the realm once more.
📜 How to Participate
When a player finds themselves within Kanturu Ruins or Kanturu Relics, a System Notice will emerge, heralding the imminent opening of the Refinery Tower.
⏰ Event Schedules
The initiation time of the Kanturu Event varies according to the distinct status of the server. If Nightmare remains undefeated, the Regular Schedule is in effect, shifting to the Opened Schedule upon Nightmare's defeat.
⚔️ Regular Schedule
- Occurs every 20 minutes
- All individuals entering the Refinery Tower are obliged to confront Nightmare
- Entry Period: 3 minutes prior to the Event starts
- Entry Period closes 1 minute before the Event starts
✅ Opened Schedule
- Persists for a duration of 23 hours, commencing immediately following the demise of Nightmare
- Those entering the Refinery Tower are exempt from contending with Nightmare
- After the 23-hour interval elapses, the Regular Schedule resumes its activity
🚪 Entry Requirements
The entrance - the Gateway Machine is located in the Kanturu Ruins (141, 186) and a player must possess the Moonstone Pendant to gain entry.
Gateway Machine
The Moonstone Pendant (actually equipped in the RING section) can be found in the Kanturu Relics by slaying monsters there. You cannot trade the item but can drop it.

Moonstone Pendant
👐 Hands of Maya
🤚 Maya's Left Hand
Players are required to eliminate a total of 50 monsters as a prerequisite for Maya's Left Hand to emerge. Subsequently, participants must defeat this hand within a 15-minute window; failure to do so will result in the mandatory relocation of all players to Kanturu Safe Zone.
Whenever a player succumbs to defeat, their character is automatically transported to the aforementioned Safe Zone. Following the vanquishing of Maya's Left Hand, a 2-minute standby interval ensues.
Maya's Left Hand
💡 Tip: If the battle's participants decrease to fewer than 15 players, newcomers can join to restore the maximum limit.
🤚 Maya's Right Hand
After the standby period concludes, an additional batch of 50 monsters materializes, necessitating their eradication before Maya's Right Hand makes its appearance. Similar to the initial scenario, players must defeat this hand within 15 minutes to avert relocation to Kanturu's Safe Zone.
Upon the demise of Maya's Right Hand, another 2-minute standby interval is observed. Like before, if the player count dwindles below 15, new contenders can join to replenish the ranks.
Maya's Right Hand
👐 Both Maya's Hands
Upon the termination of the standby period, 50 new monsters emerge, marking the simultaneous appearance and subsequent defeat of both of Maya's Hands.
Upon the triumphant overthrow of Maya, players are seamlessly transported to the second Event Map, where the formidable Nightmare awaits their confrontation.
😈 Nightmare
Within a 20-minute timeframe, players are tasked with eliminating Nightmare, who will summon waves of monsters thrice during the encounter and subsequently withdraw.

Nightmare - The Ultimate Terror
🏭 Refining Tower
The Refining Tower becomes accessible for a duration of 23 hours upon players' successful conquest of Nightmare, allowing entry without the need for a Moonstone Pendant.
This availability extends to any character present in the server.
Conversely, the Refining Tower remains inaccessible until Nightmare is vanquished. Its primary purpose entails refining Gemstones into Jewels of Harmony.
📝 Usage Instructions
- Engage in conversation with Elpis
- Select the "Refine Gemstone" option
- Insert the Gemstone into the apparatus and press "OK" to initiate the refining process
- A successful combination yields a Jewel of Harmony, while an unsuccessful one results in the Gemstone's demise

Elpis - Refining Tower NPC
📦 Pandora
Diving into Mystery
Prepare for an event that will test your wits, strategy, and quick decision-making in the world of Lotus Mu. The Pandora Event offers an intriguing challenge that will keep you on your toes as you strive to emerge victorious amidst a unique blend of strategy and chaos.
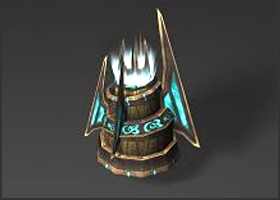
📦 The Mysterious Pandora Box
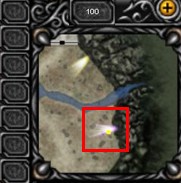
The heart of the Pandora Event lies within the Pandora Box itself. This enigmatic box spawns randomly on one of the maps. When the Pandora Box materializes, a system notice will be broadcasted to all players across the realm, marking the commencement of this thrilling event.
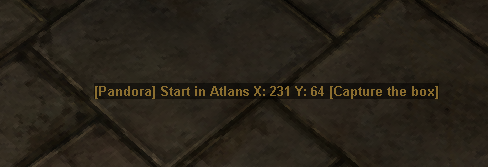
Pandora Event Announcement
Pandora Box
😈 The Cursed Pursuit
The essence of the Pandora Event revolves around the concept of being cursed. The first player to step forward and interact with the Pandora Box is the one who will be initially cursed. However, this isn't a burden to avoid - it's the key to victory.
The duration of the Pandora event is 5 minutes.
💡 Tip: The player who holds the curse at the event's conclusion will be declared the winner.
🎭 The Dance of Deception
But don't assume that the cursed status is a guaranteed ticket to triumph. The beauty of the Pandora Event lies in its cunning strategy.
Other players can vie for the cursed status by eliminating the currently cursed individual. A relentless pursuit of the curse, through alliances, skirmishes, and calculated moves, adds an extra layer of excitement to this event.
📖 Event Rules
- If the cursed player logs out of the game, the Pandora Box will show in its initial location
- The player under the curse will possess a unique appearance, allowing easy identification
- The cursed player will temporarily gain a PK Status
- The cursed player cannot enter safe zones until the event is over
Cursed Player Appearance
🏆 Claiming Victory
As the event draws to a close, the player who remains cursed will be crowned the winner. It's a test of strategy, adaptability, and nerve.
Are you skilled enough to elude the clutches of your pursuers and hold onto the curse until the final moments? Or will you engage in fierce battles to acquire the curse and ensure your place at the pinnacle of this event's victors?
The Pandora Event in Lotus Mu is a true test of cunning and adaptability. Embrace the challenge, employ shrewd strategies, and engage in tactical skirmishes to secure your place as the one who claims the coveted curse and emerges triumphant in this exhilarating competition.
🎁 Rewards
ℹ️ Info: The winner in the event will receive the following as a reward:
Purple Chaos Box
Winner's Reward
Box of Kundun +5
Winner's Reward
🐺 Crywolf
ℹ️ Info: The Crywolf Event will be available from Stage 2 onwards.
Fortress of Crywolf
Fortress of Crywolf is located at the southeastern area of Valley of Loren. It's a front line fortress where the allied forces of humans and elves fight against the forces of Kundun.
The rough geographical features of the fortress made it a fortress blessed with natural barriers for defense and a key area for strategy. Kundun's forces haven't been able to head north and now the frontline is in a deadlock.
Therefore Kundun has commanded his troops to the Fortress of Crywolf to overcome a situation.
📜 How to Participate
A system notice will be sent to all players in the server when the Crywolf Invasion is about to begin.
In order to go in the Crywolf map you can either use the Move Menu in game or warp through the portal in Valley of Loren (164, 35).
Valley of Loren Portal
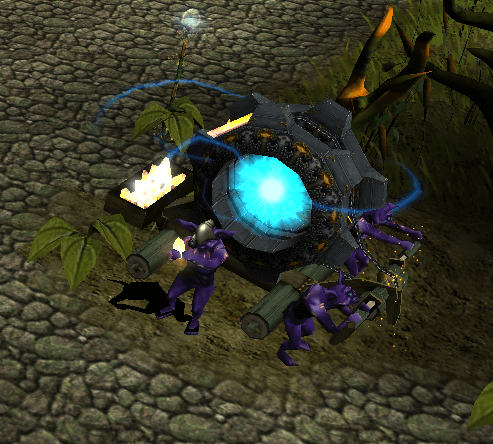
🎯 Objective of the Crywolf Event
Your task involves safeguarding the Wolf Statue from Balgass and his formidable legion.
The Elves establish a connection with the altars to erect a protective HP shield around the statue.
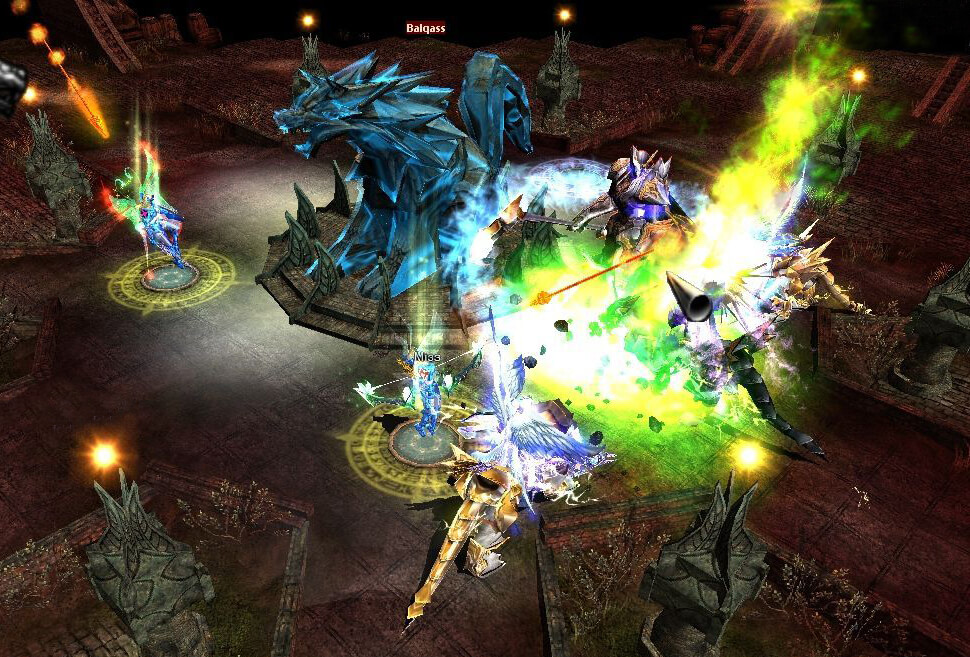
Wolf Statue
Meanwhile, other players are entrusted with fending off the creatures hailing from Balgass's forces, including Balgass himself. The triumph of the event hinges on the successful retention of connected Elves at the altars and the ultimate defeat of Balgass.

Balgass Invasion
⏰ Event's Timeline
- A System Notice is displayed for 5 minutes prior the event
- Preparation time will last for 5 minutes - during this period the monsters which are about to attack will spawn but will remain immune to player attacks
- Altar Contracts - During this period which lasts 5 minutes, Elves will be able to make a contract with the Wolf Statue
- Crywolf Invasion - this period will last for 15 minutes. In the last 5 minutes Balgass will march forward
🎮 Gameplay Details
During the Crywolf Event a special HUD will appear on all participating players. On this HUD players are able to see the following things:
- Alters status
- Wolf Statue Defensive HP Shield
- Dark Elves kill count
- Balgass HP bar
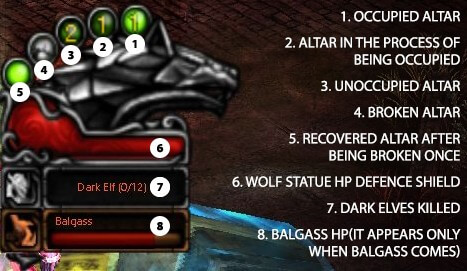
Crywolf HUD
ℹ️ Info: The Wolf Statue is situated at the center of Crywolf Stronghold.
The Stronghold boasts three access points through which marauding monsters will infiltrate:
- North gate
- East gate
- South gate
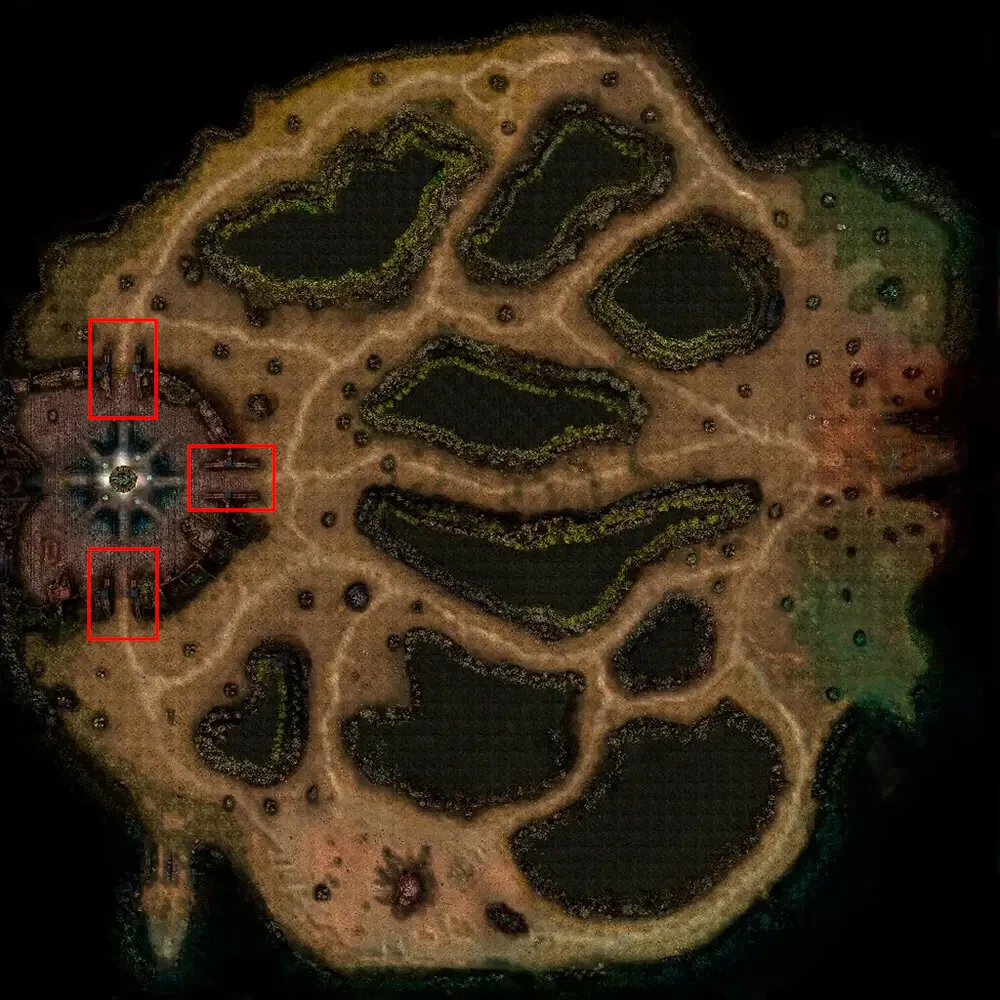
Crywolf Gates
🔮 Altar Contracts
Before the monster assault begins only the elves are able to make a contract with the Wolf Statue. This grants an augmented HP shield to the Wolf Statue, wherein the magnitude of the shield is proportionate to the number of contracts established.
Positioned strategically around the Wolf Statue are a total of five altars.

Wolf Statue Formation
⚔️ Crywolf Invasion
Collaborative efforts of participating players are essential to stop the monsters' advance and safeguard the Wolf Statue and Wolf Alters from devastation. The monsters strive to swiftly converge upon the Wolf Statue.
The objective is to neutralize the entire legion, including the formidable Balgass - a boss monster, which will emerge into the battle when a mere 5 minutes remain.
Triumph in the Crywolf Event is achieved upon the demise of Balgass.
🌊 First Wave
During the First Wave of attack players need to first defeat all Dark Elves.
Dark Elf
🌊 Second Wave
In the last 5 minutes of the Crywolf Invasion player will have to defeat Balgass in order to successfully triumph the Event.
Balgass - The Final Boss
⚠️ Caution: There is a 15 minutes time limit to defeat all the monsters.
🏆 Victory
Emerging victorious in the Crywolf Event entails enduring the invasion and vanquishing the opposing forces. To secure victory, it is imperative that the Wolf Statue remains unscathed throughout the duration of the Event.
⬆️ Item Level Upgrades
In the vast and captivating world of Mu Online, players constantly seek to strengthen their characters and equip them with the most formidable gear. One of the most sought-after achievements is upgrading items to the coveted +15 level, which unlocks immense power and enhances the effectiveness of equipment.
This can be accomplished through the Chaos Machine, a mystical device that holds the key to ascending items to new heights.
🧪 Ingredients
To embark on the journey of upgrading items to +15, players must first gather the necessary materials. The primary ingredients are the Jewel of Bless and the Jewel of Soul - precious gems that fuel the enchantment process.
Players must have a sufficient amount of these jewels when upgrading. Additionally, they will need Zen, the in-game currency, as a cost for each upgrade attempt. And lastly the Jewel of Chaos.
Depending on the level of your item you will need different amount of resource in order to trigger the Chaos Combination. For example if your Item Level is +9, you will need the required materials from Row 1 (+10) of the following table:
📊 Upgrade Requirements
🔮 The Chaos Machine
Once the materials are in hand, players can begin the upgrade process. They must locate the Chaos Machine, which can be found in Noria.
Interact with the Chaos Goblin and follow the prompts to proceed with your combination.
The Chaos Goblin
💡 Important: If the upgrade fails at the Chaos Machine, you will not lose your item. The item will only lose one level (one plus).
🦅 Wings Level 1
Basic wings providing +50 HP/MP and 10% damage increase
Chaos Goblin
Noria (180, 103)
How to Craft Wings Level 1?
In MU Online, crafting your first Wings is a crucial step in boosting your character's power. Wings increase your attack, defense, and movement speed, giving you an edge in battles. To create them, you'll need specific materials and use the Chaos Goblin Machine, but be prepared—crafting can be costly. However, the investment is worth it for the significant boost to your abilities.
To craft your first wings, you need to visit the Chaos Goblin Machine, select the "Regular Combination" option, and input the necessary items.
Chaos Goblin has multiple craft options as:
- Regular combination (Wings, Fruits, Event Invitations, Item +10 and higher, Pets)
- Chaos Weapon Combination (Weapon for 1st level wings)
- Item Option Combination (Jewel of Guardian 380 Item PvP Option)
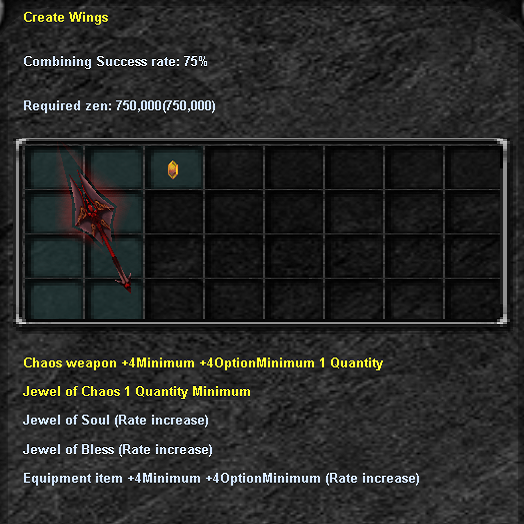
To create first wings you will need few things:
Chaos Weapon +4 +4 Add. Minimum requirement *
 x1
x1
 Zen 750.000
*Chance of successful craft may vary depending on Chaos Weapon enhancement level.
If you wish to acquire more chance percentage - add some


 in item.
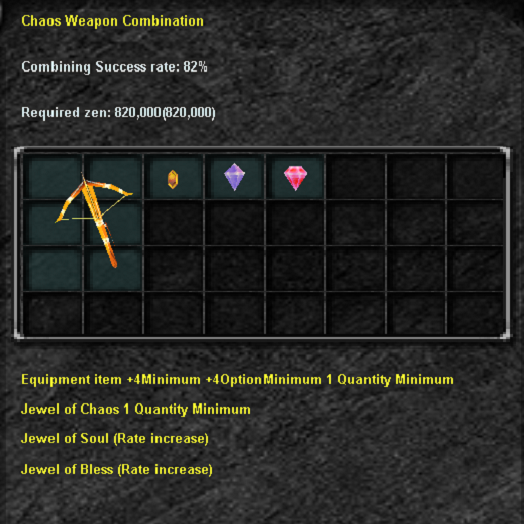
How to create Chaos Weapon?
To create Chaos Weapon you will need few things:
Any Equipment +4 +4 Add. Minimum requirement *
x1
x1
x1
Zen 850.000
*Chance of successful craft may vary depending on Equipment enhancement level.
If you wish to acquire more chance percentage - add some
in item.
How many types of Chaos Weapon are there?
Answer is - 3. There are 3 types of Chaos Weapons, these weapons may be used as a weapon at the beginning of game. They have valuable skills and damage for beginner characters.
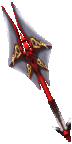

Showroom of 1st Level Wings


✨ Wings Level 2
Enhanced wings with +100 HP/MP and 15% damage
Chaos Goblin
Noria (180, 103)
How to Craft Wings Level 2?
To start preparing for Level 2 Wings craft you should get yourself a Level 1 Wings. How to do that? You can check the 1st Level Wings section above.
To craft your Level 2 wings, you need to visit the Chaos Goblin Machine, select the "Regular Combination" option, and input the necessary items.
Chaos Goblin has multiple craft options as:
- Regular combination (Wings, Fruits, Event Invitations, Item +10 and higher, Pets)
- Chaos Weapon Combination (Weapon for 1st level wings)
- Item Option Combination (Jewel of Guardian 380 Item PvP Option)
Location: Crimson Icarus
Requirements: 1st Level Wings or Horn of Dinorant
Drop chance: Low


Icarus Special Items
To craft Level 2 Wings or Cape you should get one of two items, depending on which craft you wish to make!
for Wings
for Cape.
To get these important ingredients you need to hunt monsters in Icarus zone.
To get into Icarus you should meet requirements as: Character 180 Level + Wings or Dinorant pet.
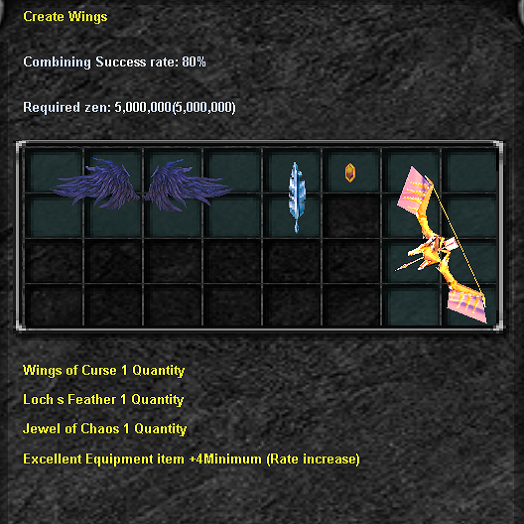
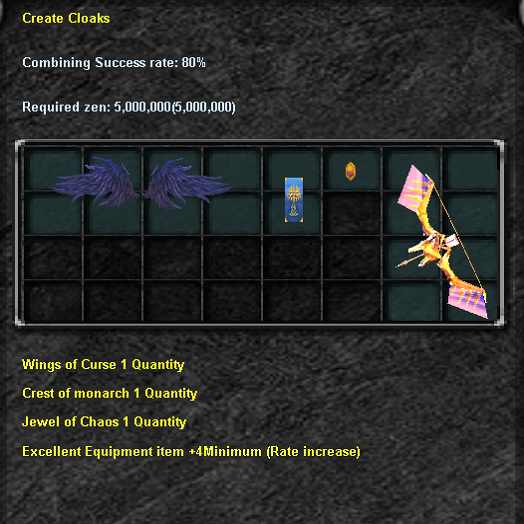
Crafting Requirements
To create second wings you will need few things:
- • Wings Lvl. 1 x1
- • Loch's Feather or Monarch's Crest x1
-
•
x1
- • Any Excellent Equipment +4 +4 Add. Minimum requirement *
Chance of successful craft may vary depending on Excellent Item enhancement level.
Showroom of 2nd Level Wings


💎 Wings Level 2.5
Enhanced intermediate wings - Monster Wings
Chaos Goblin
Noria (180, 103)
MONSTER WINGS - BACKGROUND STORY
Four evil's cursed wings were created by great wizards in Arca, the city of wizards and it was told that those wing were made of parts from killed monsters.
A wizard related to the creation of wing said that those wing were cursed by the evil spirits of killed monsters.
The force of Kundun got to know the secret through a correspondence in Arca and start to misuse the wings.
Therefore, Wizards researched for many years to seal the wings and finally they did. Since the wizards sealed the wings, no one has seen them in the continent of MU...
By words, when normal human equips the evil's cursed wings, the human will be influenced by evil's power and he will be several times stronger.
Meanwhile, wizards who were controlled by evils escaped from Arca to study the evil's cursed wing and they eventually created materials to reinforce the wings.
These materials can't normally be discovered in the continent of MU, but only traded between evils in secret.
HOW TO CREATE MONSTER WINGS?
To create monster wings you must go to the Chaos Goblin Machine and select the "Regular Combination" option and enter the following items.
The materials for the combination will depend on the wings you want to craft.
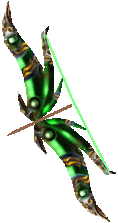
WINGS OF CHAOS
REQUIRED COMBINATION MATERIAL:
- ↳ Wings Tier 2 +0 +4 [Minimum Level +0 & Additional +4]
- ↳ 1 Jewel of Chaos
- ↳ 1 Jewel of Creation
- ↳ 1 Hell Maine Leather
- ↳ Zen [depends on chance of success] - Max 100,000,000
SUCCESSFUL RESULT: Wings of Chaos with random options.
FAILED RESULT: All items will be destroyed.
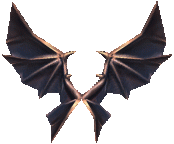
CLOAK OF DEATH
REQUIRED COMBINATION MATERIAL:
- ↳ Wings Tier 2 +0 +4 [Minimum Level +0 & Additional +4]
- ↳ 1 Jewel of Chaos
- ↳ 1 Jewel of Creation
- ↳ 1 Death King Bone
- ↳ Zen [depends on chance of success] - Max 100,000,000
SUCCESSFUL RESULT: Cloak of Death with random options.
FAILED RESULT: All items will be destroyed.
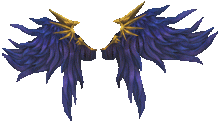
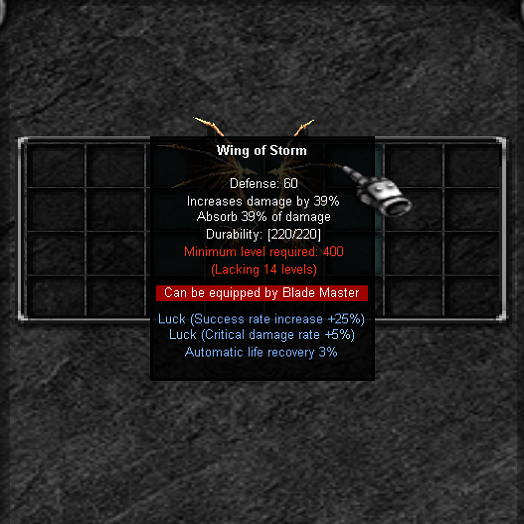
WING OF LIFE
REQUIRED COMBINATION MATERIAL:
- ↳ Wings Tier 2 +0 +4 [Minimum Level +0 & Additional +4]
- ↳ 1 Jewel of Chaos
- ↳ 1 Jewel of Creation
- ↳ 1 Death Beam Knight Soul
- ↳ Zen [depends on chance of success] - Max 100,000,000
SUCCESSFUL RESULT: Wing of Life with random options.
FAILED RESULT: All items will be destroyed.
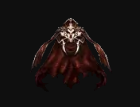
WING OF MAGIC
REQUIRED COMBINATION MATERIAL:
- ↳ Wings Tier 2 +0 +4 [Minimum Level +0 & Additional +4]
- ↳ 1 Jewel of Chaos
- ↳ 1 Jewel of Creation
- ↳ 1 Phoenix of Flame
- ↳ Zen [depends on chance of success] - Max 100,000,000
SUCCESSFUL RESULT: Wing of Magic with random options.
FAILED RESULT: All items will be destroyed.

HELL MAINE LEATHER
DROP: Aida
MONSTER: Hell Maine

DEATH KING BONE
DROP: Losttower
MONSTER: Death King

DEATH BEAM KNIGHT SOUL
DROP: Tarkan 2
MONSTER: Death Beam Knight

PHOENIX OF FLAME
DROP: Icarus
MONSTER: Phoenix of Darkness
MONSTER WINGS SHOWCASE

WINGS OF LIFE
REQUIRED LEVEL: 290

WINGS OF MAGIC
REQUIRED LEVEL: 290

WINGS OF CHAOS
REQUIRED LEVEL: 290
CLOAK OF DEATH
REQUIRED LEVEL: 290
🌟 Wings Level 3
Ultimate wings with +150 HP/MP and 20% damage
Chaos Goblin
Noria (180, 103)
How to Craft Wings Level 3?
To start preparing for Level 3 Wings craft you should get yourself a Level 2 Wings. How to do that? You can check the 2nd Level Wings section above.
Also you will need to complete 3rd Profession Quest to be able to wear Level 3 Wings.
To craft your Level 3 wings, you need to visit the Chaos Goblin Machine, select the "Regular Combination" option, and input the necessary items.
Chaos Goblin has multiple craft options as:
- Regular combination (Wings, Fruits, Event Invitations, Item +10 and higher, Pets)
- Chaos Weapon Combination (Weapon for 1st level wings)
- Item Option Combination (Jewel of Guardian 380 Item PvP Option)
Blade Master
Grand Master
High Elf
Duel Master
Lord Emperor
Dimension Master
Fist Master
Condor Flame

Drops out from:
Raklion
with lower chance
Step 1 - Hunt for Condor Flame
First of all you will need to fight with other players for a possibility to farm an important ingredient - Condor Flame.
This ingredient is very rare and valuable.
Due to that many players are willing to get it first and create Level 3 Wings to become stronger!
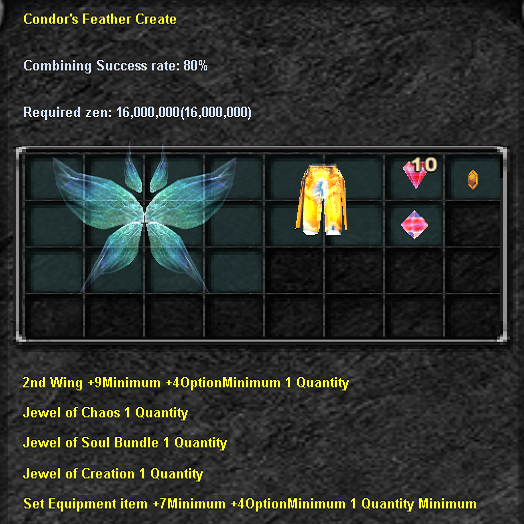
Condor Feather

Craft Mix - Max. Success rate: 70%
x1 Jewel of Chaos
 x1 Jewel of Creation
x10 Jewel of Soul
depending on a success rate
x1 Jewel of Creation
x10 Jewel of Soul
depending on a success rate
Wings Lv. 2 +9 +4 Add. Option
Minimum requirement*
Ancient Item +7 and +4 Add. Option
Minimum requirement*
Chance of successful craft may vary depending on Ancient Item enhancement level. You can add more than 1 Ancient item.
Step 2 - Create Condor Feather
Condor feather is a second crucial ingredient in crafting Level 3 Wings.
To create a Condor Feather you will need to have different ingredients prepared. After obtaining all ingredients - put these into Chaos Goblin Regular Combination and create Condor Feather.
Sometimes it is not getting crafted from a first try, so be prepared for a hard work for a great possibility to strengthen your character!
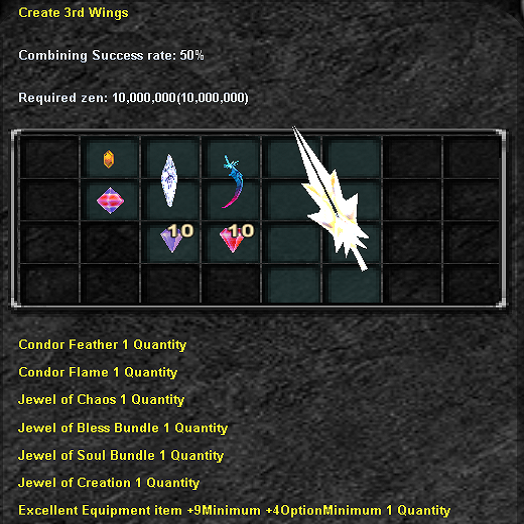
Step 3 - Final Craft
After successfully completing previous steps you can finally move forward and craft Level 3 Wings!
Craft Mix - Max. Success rate: 40% +10% Chaos Mix Rate to VIP Members
x1 Jewel of Chaos
x1 Jewel of Creation
x10 Jewel of Soul
x10 Jewel of Bless
depending on a success rate
x1 Garuda Flame
x1 Garuda Feather
Excellent Item +9 and +4 Add. Option
Minimum requirement*
Chance of successful craft may vary depending on Excellent Item enhancement level. You can add more than 1 Excellent Item
Successful Craft will provide Random Level 3 Wings with Random Options
Showroom of 3rd Level Wings


👑 Wings Level 4
The ultimate wings with incredible power and abilities
CHAOS GOBLIN MACHINE
[Location]
Noria: 180, 102
HOW TO CREATE FOURTH WINGS?
To create the fourth wings you must go to the Chaos Goblin Machine and select the "Regular Combination" option and enter the following items.
REQUIRED COMBINATION MATERIAL:
- ↳ 1 Garuda Feather
- ↳ 1 Garuda Flame
- ↳ 10 Golden Sentence
- ↳ 10 Greater Spirit Stone
- ↳ 30 Jewel of Chaos
- ↳ 30 Jewel of Creation
- ↳ 30 Jewel of Bless
- ↳ 30 Jewel of Soul
- ↳ Zen (depends on chance of success)
SUCCESSFUL RESULT: Random 4th wings/cloak with random options.
FAILED RESULT: All items will be destroyed.

GARUDA FEATHER
HOW TO GET THE GARUDA FEATHER?
To get the Garuda Feather you must go to the Chaos Goblin Machine and select the "Regular Combination" option and enter the following items.
REQUIRED COMBINATION MATERIAL:
- ↳ Wings Tier 3 +13 +4 (Minimum Level +13 & Additional +4)
- ↳ 10 Greater Spirit Stone
- ↳ 30 Jewel of Chaos
- ↳ 30 Jewel of Bless
- ↳ 30 Jewel of Soul
- ↳ Zen (depends on chance of success)
SUCCESSFUL RESULT: Garuda Feather.
FAILED RESULT: All items will be destroyed.

GARUDA FLAME
DROP: Deep Dungeon 2, 3, 4, 5.

GOLDEN SENTENCE
DROP: Deep Dungeon 2, 3, 4, 5.

GREATER SPIRIT STONE
HOW TO GET GREATER SPIRIT STONE?
To get Greater Spirit Stone you must go to the Chaos Goblin Machine and select the "Regular Combination" option and enter the following items.
REQUIRED COMBINATION MATERIAL:
- ↳ Ancient Item +7 +4 (Minimum Level +7 & Additional +4)
SUCCESSFUL RESULT: X Greater Spirit Stone.
*Depending on the price of the item, the number of magic stones created may be different.
4TH WINGS / CLOAKS
WINGS OF ELYSIUM
REQUIRED LEVEL: 300
WINGS OF FLAME GOD
REQUIRED LEVEL: 300
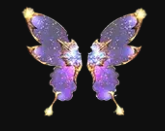
WING OF CELESTIAL BODY
REQUIRED LEVEL: 300
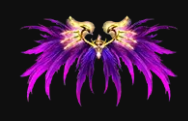
WINGS OF OTHER WORLD
REQUIRED LEVEL: 300
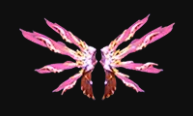
WINGS OF ANNIHILATION
REQUIRED LEVEL: 300
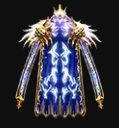
CLOAK OF DOMINATOR
REQUIRED LEVEL: 300
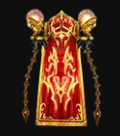
CLOAK OF JUDGMENT
REQUIRED LEVEL: 300
⚡ Wings Level 5
The ultimate wings crafting guide for the most powerful wings
HOW TO CREATE THE FIFTH WING
5TH WING RELIC COMBINATION
After combining the fifth wing relics, you can do the fifth wing combination.
Note: Golden Sentence and Uriel's Feather items can be acquired with a low probability in the Elite Zone.

5TH WING RELIC
The ultimate wing relic for creating the most powerful wings.

URIEL'S FEATHER
Rare feather obtained from Elite Zone with low probability.
5TH WING COMBINATION
The 5th wing does not have a luck option.
5TH WING OPTION
A new damage correction option is added to the 5th wing.
The damage correction option is calculated with the target's correction option value and affects attack and hit damage.
5TH WINGS
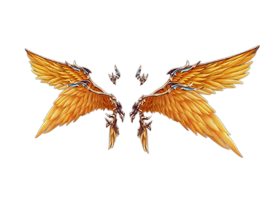
WINGS OF VIRTUE
Required Level: 300
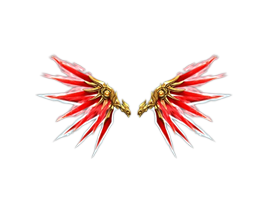
WINGS OF PUNISHMENT
Required Level: 300
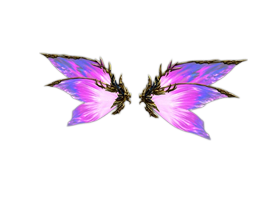
WINGS OF FANTASY
Required Level: 300
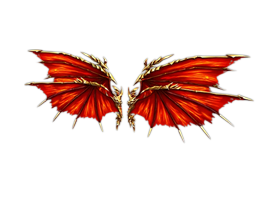
WINGS OF DESTRUCTION
Required Level: 300
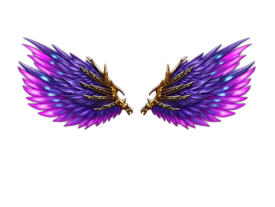
WINGS OF BARRIER
Required Level: 300
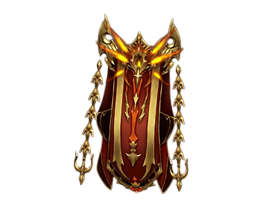
CLOAK OF OATH
Required Level: 300
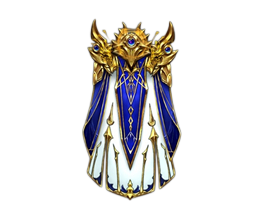
CLOAK OF ZERO
Required Level: 300
⌨️ In-game Commands
In this article We will list all the available in-game commands in Lotus Mu.
Please explore the following table for details.
💡 TIP
You can also check this list of commands while playing through the Especial Menu.
ℹ️ INFO
When double-tapping Ctrl you will be able to attack other Character without hold it down.
🤖 Mu Helper
Mu Helper is an exceptional in-game assistance system that seamlessly integrates within the game, providing players with comprehensive support and guidance.
This remarkable feature operates efficiently, enabling players to access its valuable assistance even when the game window is minimized or running in the background.
With Mu Helper, players can effortlessly navigate through the game's intricacies, swiftly overcoming challenges and maximizing their gameplay experience.
Interface
By simply tapping the icon situated at the screen's pinnacle, you can effortlessly access the Mu Helper settings menu.
The settings for Mu Helper are neatly divided into two distinct tabs, namely "Hunting" and "Obtaining".
📝 NOTE
It is worth noting that you need to save your settings before closing the Mu Helper Settings Window.
Hunting
Range
Configure the desired proximity at which your character engages and attacks monsters.
Potion
To enable the automatic use of healing potions, you must mark the checkbox. By clicking on the "Settings" option, you gain the ability to establish the threshold at which your character will consume a healing potion based on your character's HP.
Long Distance Attack
Adjust the maximum attainable attack range.
Original Position
Configure the duration it takes for your character to return to the starting position.
Skills and Buffs Settings
These configurable settings provide you the ability to determine the usage behavior of your character's combat skills and buffs.
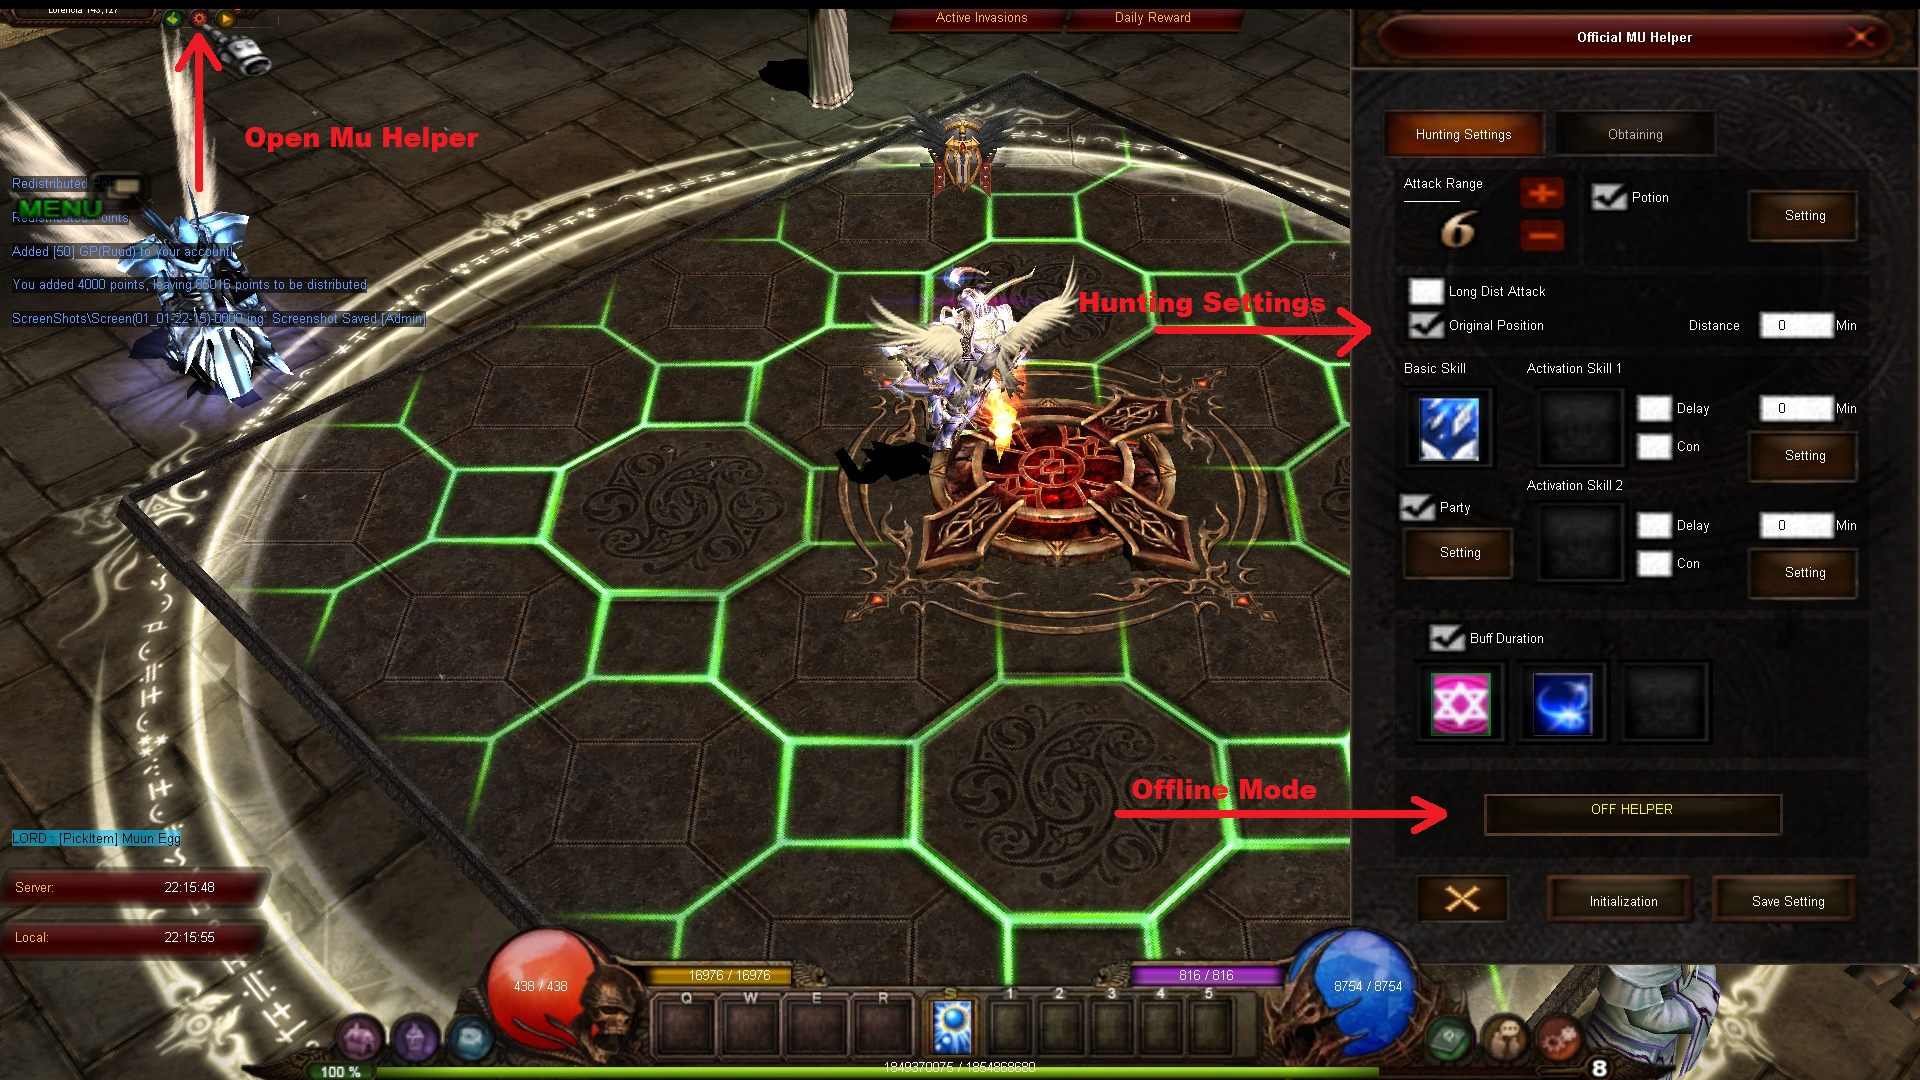
Mu Helper Settings
Obtaining
Range
Customize the preferred range at which your character will acquire items.
Repair Item
Furthermore, you have the option to enable automatic equipment repair through Mu Helper.
Pick All Near Items
When this option is enabled, your character will automatically collect all nearby dropped items.
Pick Selected Items
By selecting this option, only the items that align with your preferences and needs will be automatically picked up.
Add Extra Item
If you wish to specifically collect certain special items, you can mark this checkbox and manually enter the name of the desired item.

Mu Helper Settings
Launching the Mu Helper
To initiate the Mu Helper functionality, simply click the yellow play button.
Make sure you have saved your settings before starting the Mu Helper.
Off Helper
The Off Helper lets you close the game client while your character continues farming.
⚠️ WARNING
Be aware that there are time limits - once expired, your character will be disconnected, so use it wisely.
To activate it, save your helper settings and click the Off Helper button. This will close your game client, but your character will continue hunting and farming as if the game was open and the MU Helper was running.
📋 Especial Menu
The Especial Menu is an exclusive feature that offers players a multitude of valuable resources and information related to the game.
Within this menu, players can conveniently access and monitor their credit resources, keep track of event and invasion timers, explore event rankings, and discover an array of other useful features.
The Especial Menu serves as a centralized hub, providing players with a comprehensive overview of essential aspects of the game, empowering them to stay informed and make strategic decisions.
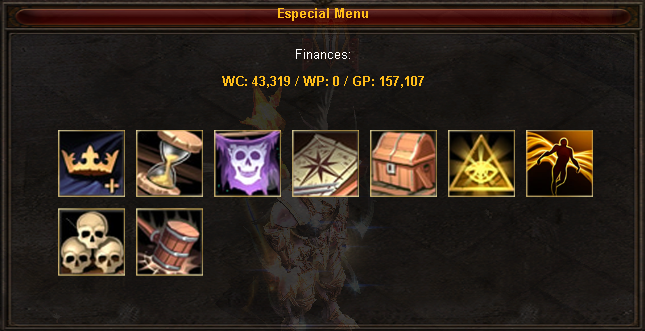
Especial Menu
Open Especial Menu
To access the Especial Menu, simply click on the M-button situated at the top left corner of the screen

Another way to use its functionality is by hitting the Menu button in the bottom right part of screen. You call also press the "U" key to achieve the same result.
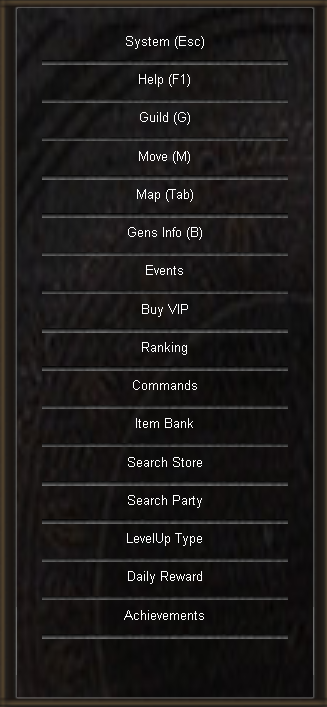
Especial Menu Buttons
🔘 Especial Buttons
The Especial Buttons, located at the top center of the screen, grant users convenient access to a range of noteworthy features, including:
- Active Invasions
- Daily Reward
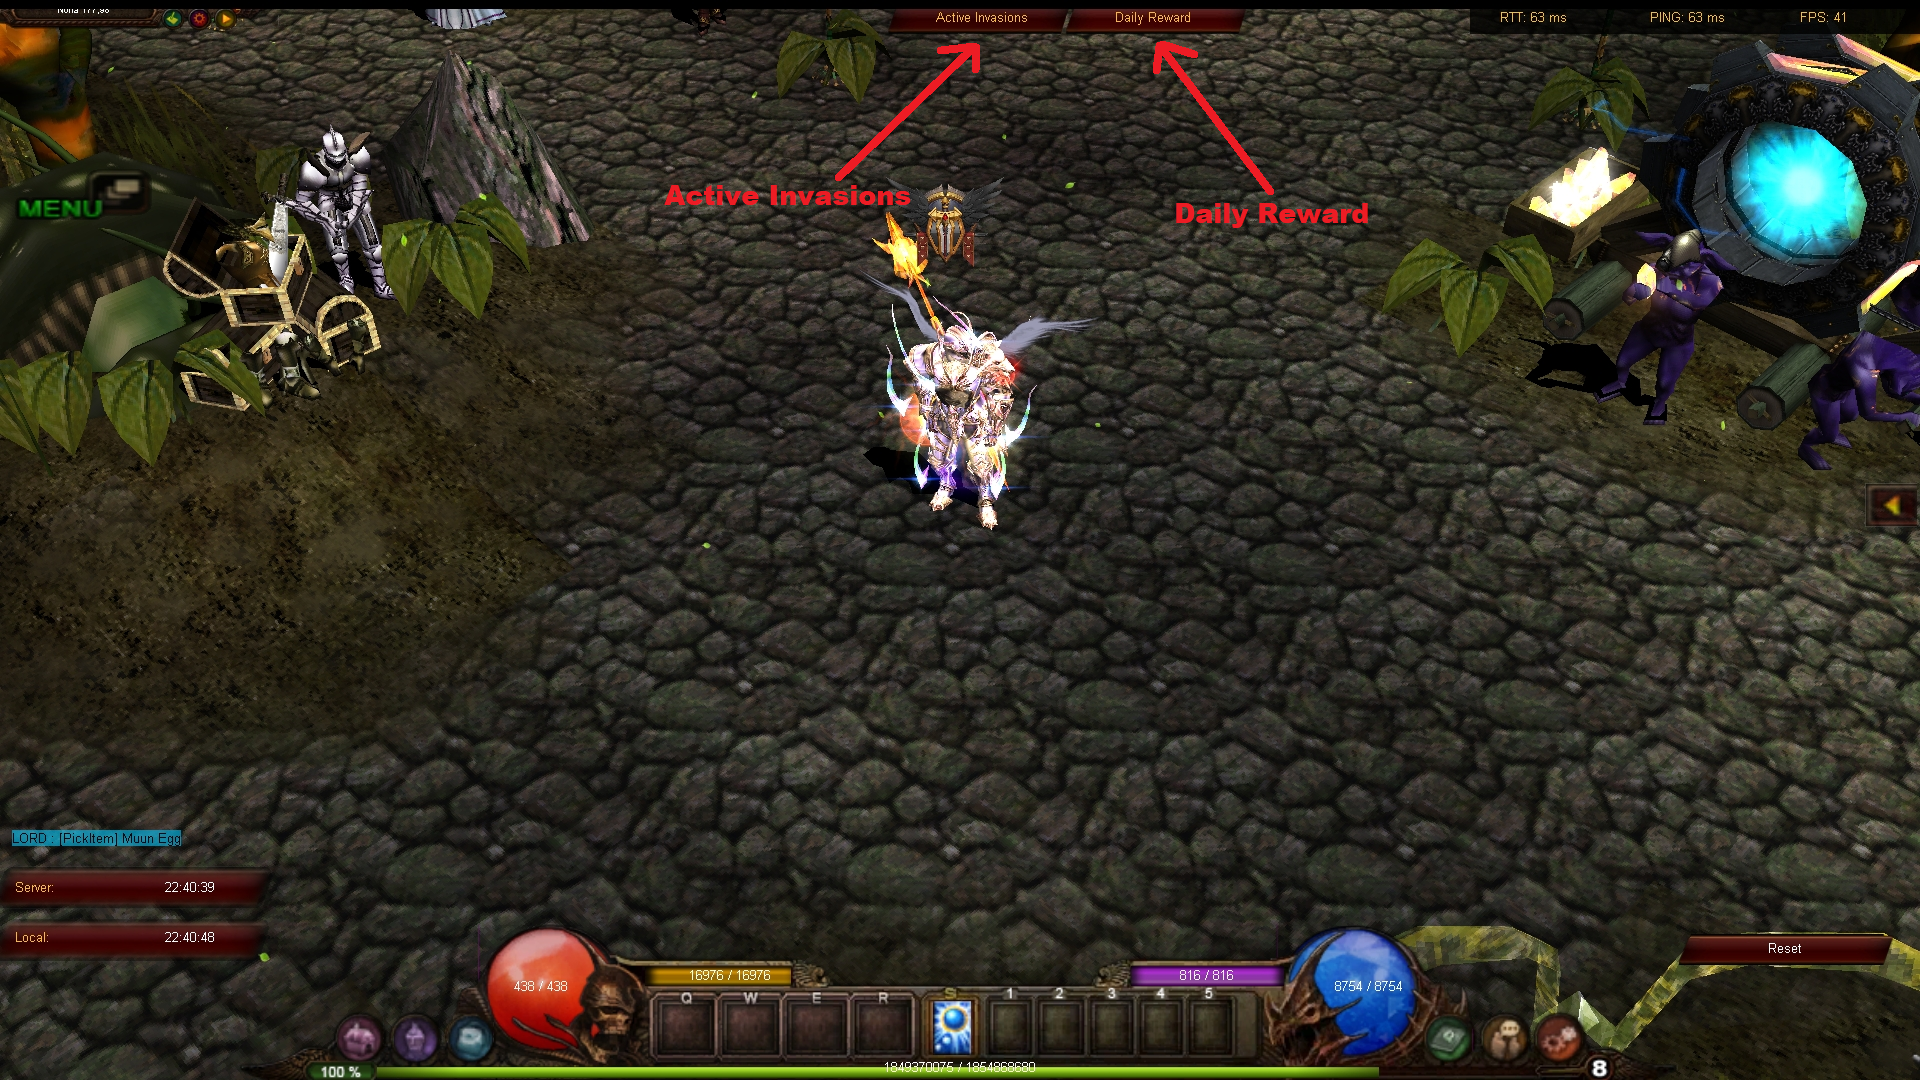
Especial Buttons
Active Invasion
During periods when an invasion is ongoing in the server, the Active Invasions Button becomes accessible.
Upon clicking this button, a window will appear on the screen, displaying comprehensive information about the currently active invasion.
In cases where multiple invasions are transpiring simultaneously, you will have the ability to navigate through all of them, gaining insights and updates for each specific invasion.
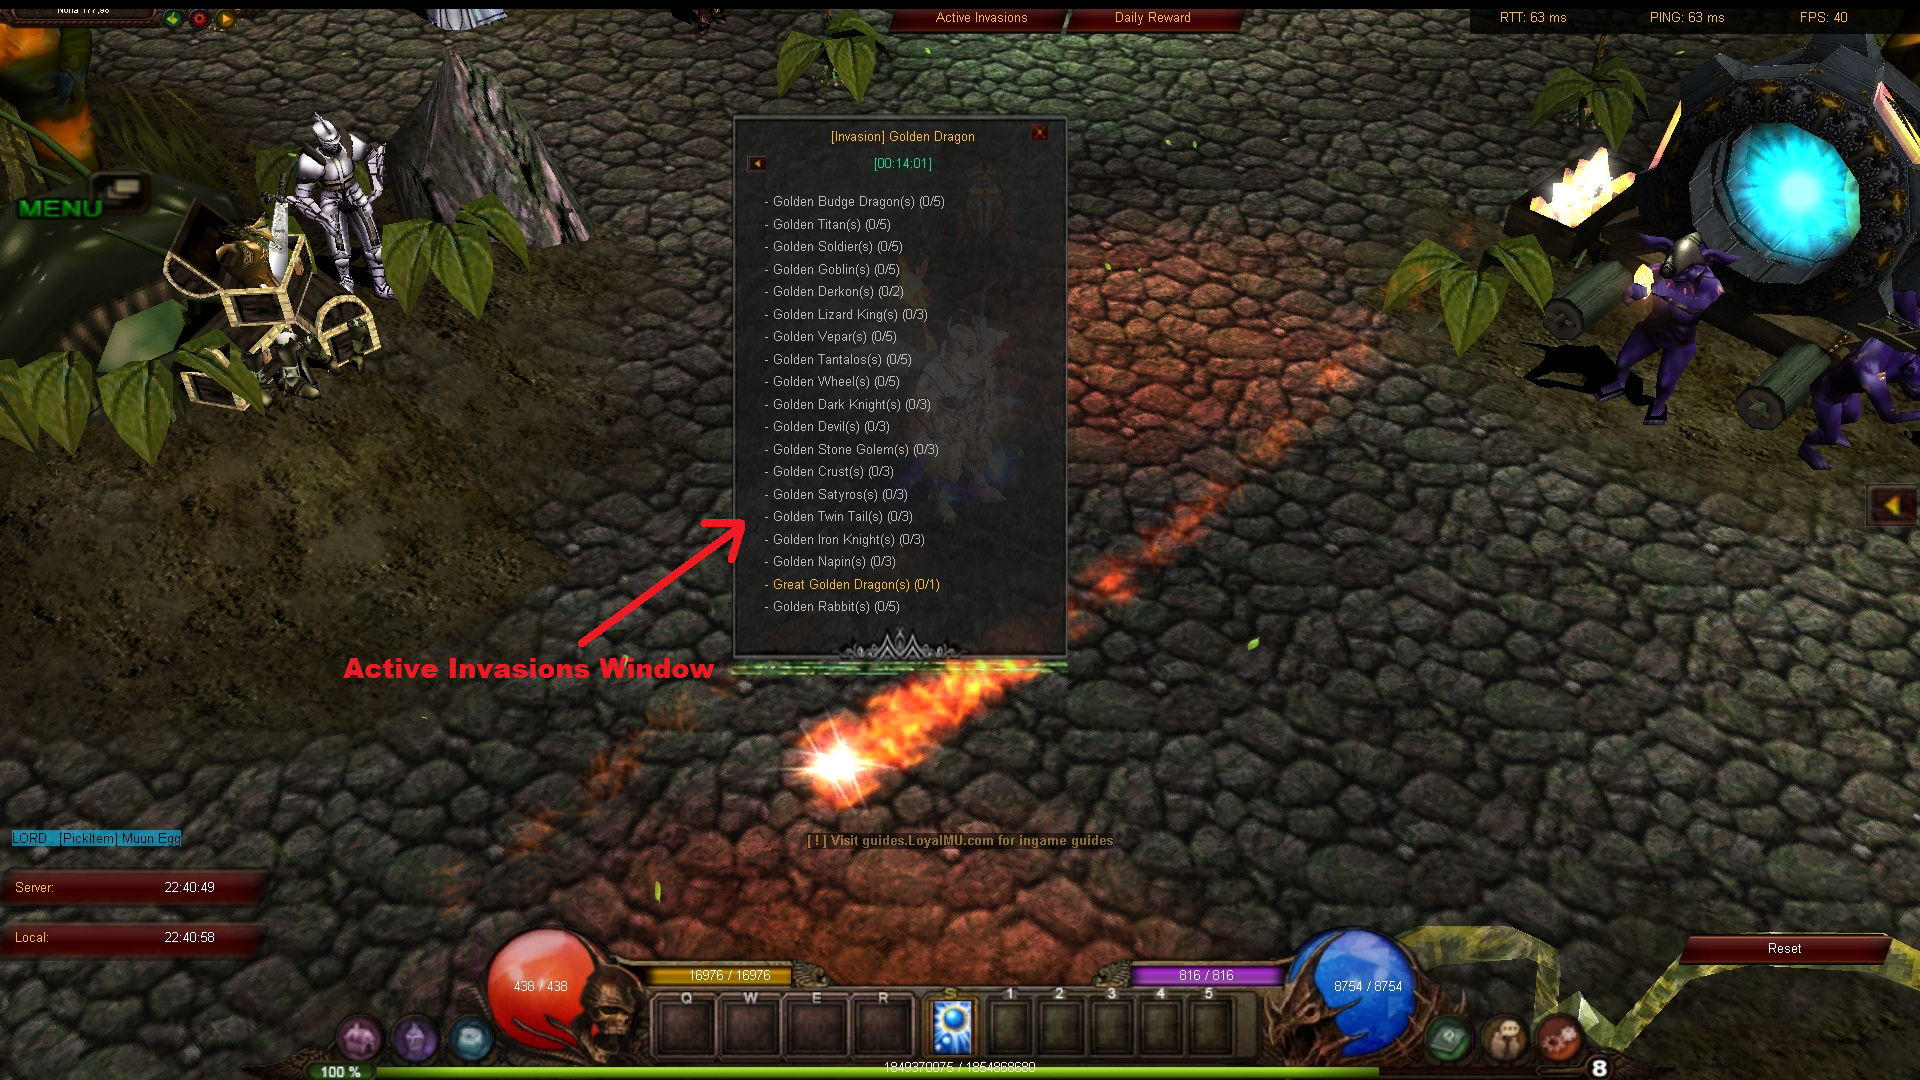
Active Invasions Window
🏦 Item Bank
The Lotus Mu Item Bank serves as a secure repository where you can safeguard and manage your valuable collection of harvested jewels and other precious resources.
This innovative feature empowers you with the freedom to access and utilize your stored items effortlessly, regardless of your location or situation. Whether you're in the midst of an epic quest or exploring uncharted territories, the Item Bank ensures that your hard-earned treasures are readily available at your disposal, enhancing your adventures and enabling you to make the most of your gaming experience.
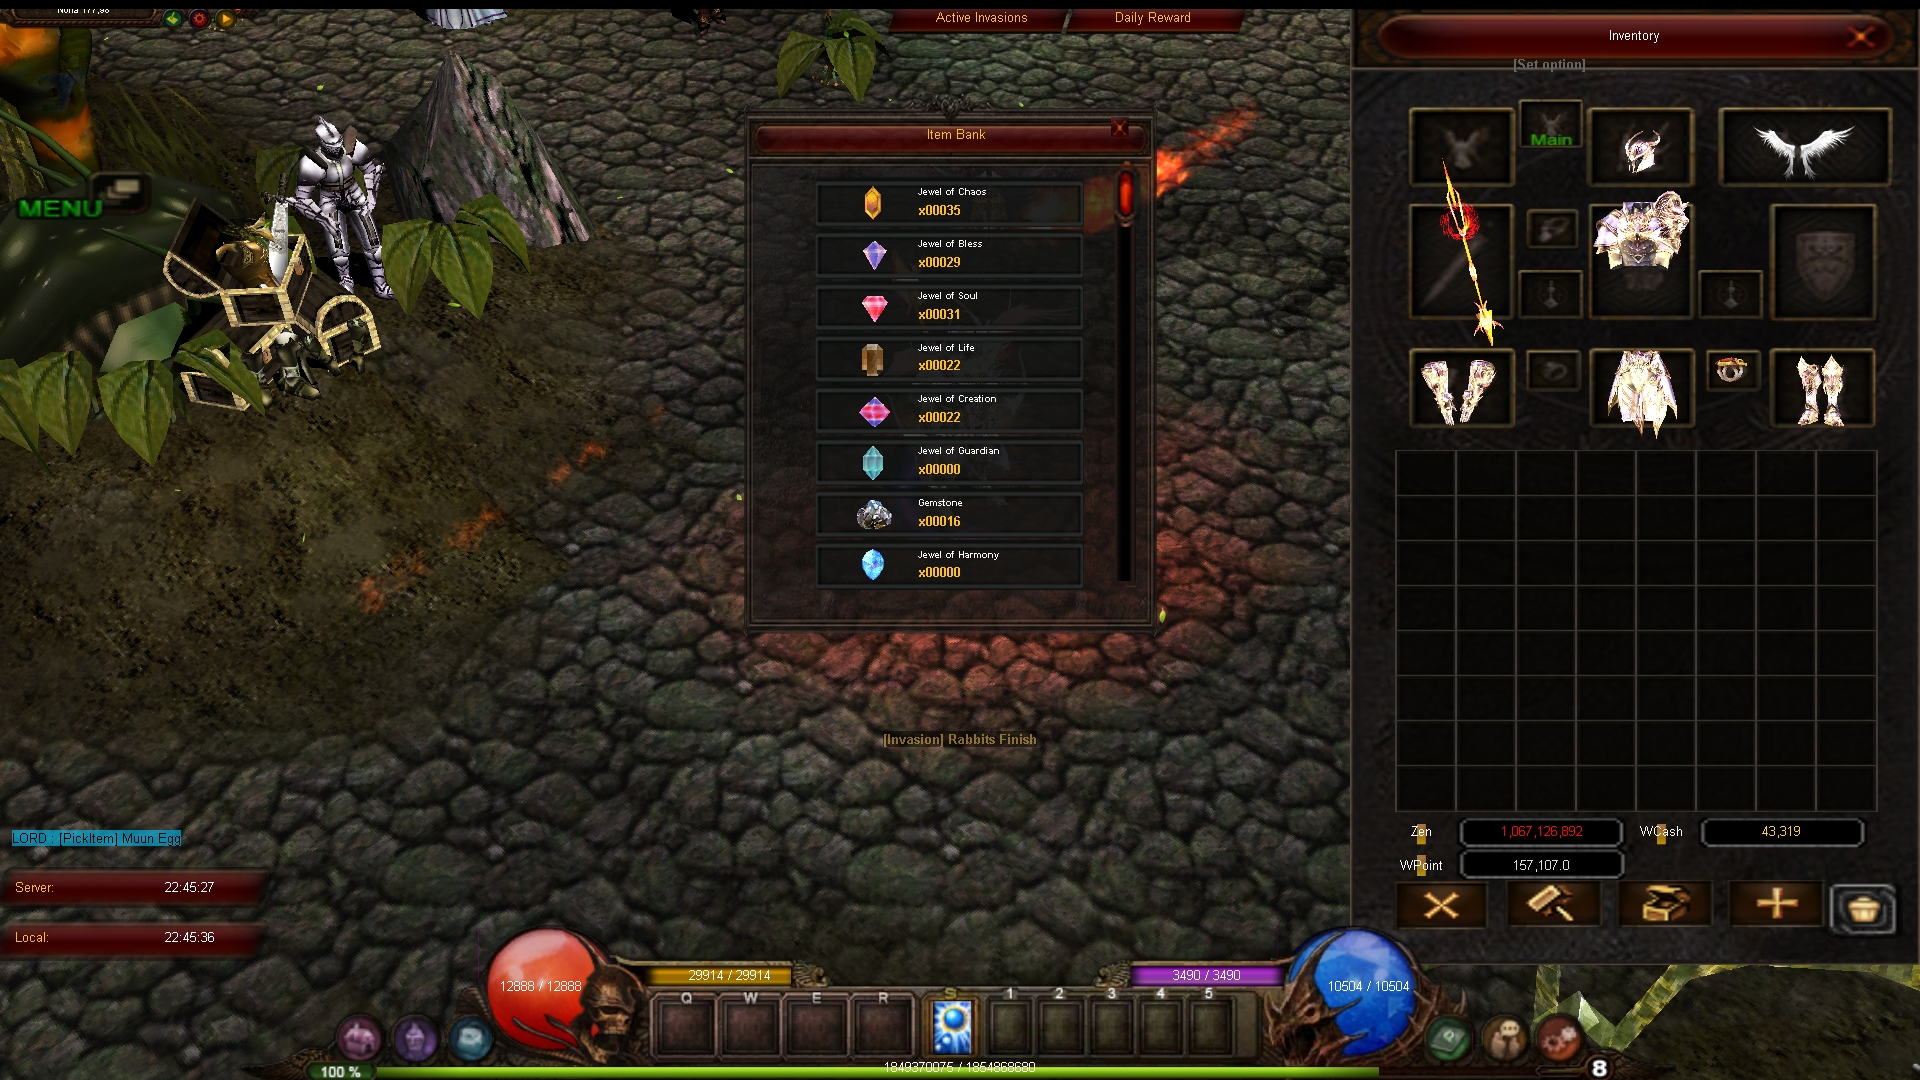
Item Bank
💡 TIP
To access the Item Bank you can either utilize the Especial Menu or by simply pressing the J key.
When you open the Item Bank, you gain the ability to browse through various types of jewels and view the quantity you have stored. By clicking on a specific jewel, you'll be directed to a section where you can deposit or withdraw as many as you desire. Whether you wish to withdraw them individually or in a bundle, the choice is yours.
💡 TIP
Press Ctrl + Right-Click on the item to deposit it.
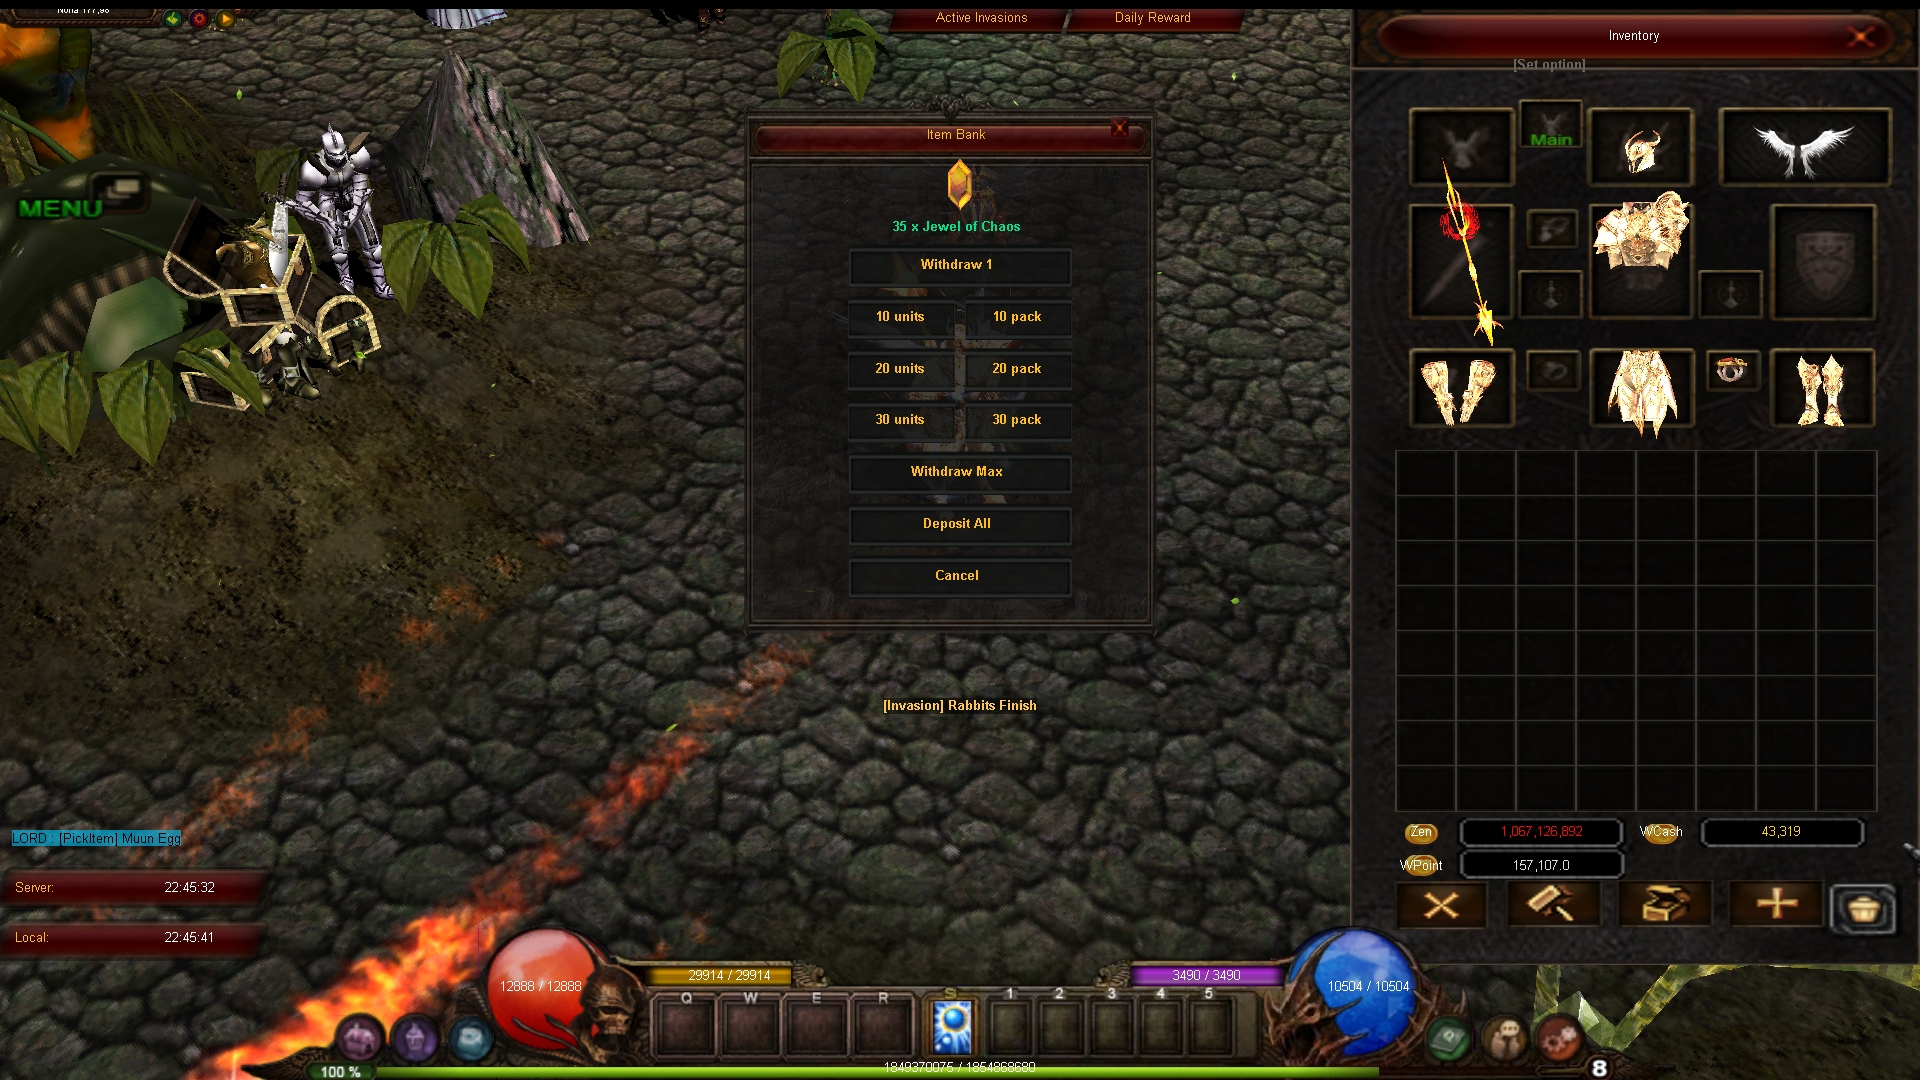
Item Bank Deposit/Withdraw
👥 Search Party
We are thrilled to introduce the Search Party functionality, seamlessly integrated into the game client. With this groundbreaking feature, connecting with fellow adventurers has never been easier.
Gone are the days of searching tirelessly for like-minded players to join your quests. With the Search Party Module, you can swiftly assemble a team of brave warriors, cunning mages, or steadfast healers at the breeze of a few clicks.
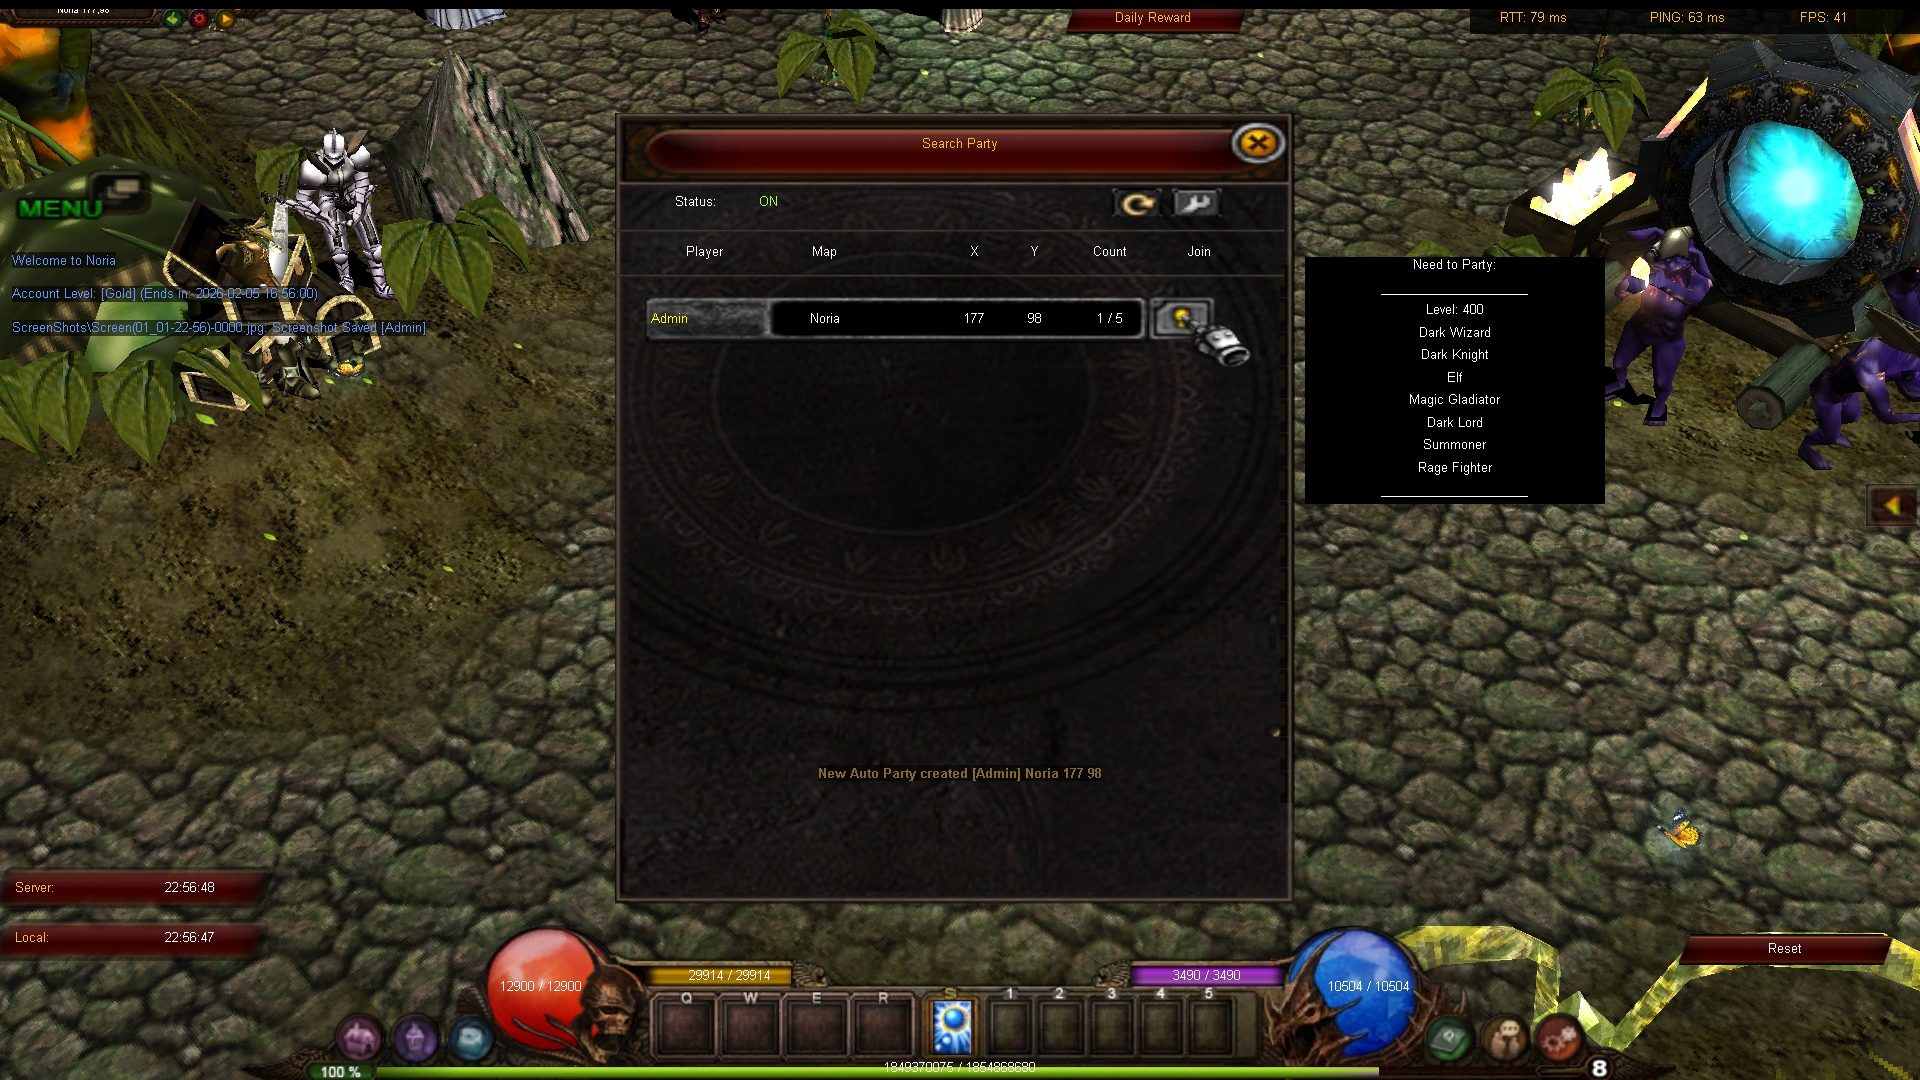
Search Party
💡 TIP
You can access the Search Party Module through the Especial Menu.
The Search Party Module allows you to discover the most suitable party for your needs, providing you with precise details about its location and the number of players currently in the party.
Customizing Your Search Party
If you already have a party formed and wish to invite more members to join, you can effortlessly post your party within the system.
To do this, navigate to the Search Party Module and access the wrench button located in the top right corner of the module. From there, you can customize your preferences accordingly.
If you have a specific individual in mind, you have the option to add a password to the party. Alternatively, you can restrict invitations solely to Guild or Alliance members. Additionally, you retain control over the party's composition by specifying the maximum level and permitted classes for those seeking to join your group.
This way, you can ensure that your party is precisely tailored to your preferences and requirements, optimizing your collective strength for your upcoming adventures.
Search Party Settings
ℹ️ INFO
You can learn more about our party system by visiting the Party System article.
💰 Sell Items
Promoting your items for sale has never been easier! No more typing global messages manually. With the Sell Items function, all you need to do is hold the Shift Key and Right Click on your item to effortlessly send a global message that stands out from regular post messages.
Sell Items Function
To maintain a clutter-free chat environment, we've implemented a cooldown on this function, allowing you to utilize it once every 5 minutes.
By pressing the Shift Key you will toggle the so called Trade Window, allowing you to view all the items posted for sale in one convenient location.
Trade Window
📖 Hunting Log
The Hunting Log in Lotus Mu helps you monitor your farming performance in real time, showing stats like experience gained, damage dealt, monsters killed, and items picked up - all updated at your preferred time interval.
How to Open the Hunting Log
Press the END key on your keyboard to toggle the Hunting Log window on or off at any time during gameplay.
Hunting Log
ℹ️ INFO
Settings (Interval Time)
Lets you choose how often the stats refresh (1–60 seconds).
Start/Stop Button
Starts or stops the hunting log to track stats during play.
Statistics Panel
Displays EXP, damage, kills, and item pickups based on the selected time interval.
⚙️ Options Menu
The Options Menu offers a diverse range of settings to customize your game client according to your preferences. Within this menu, you can configure the following aspects:
- Game Client Resolution
- Font Size
- Health Bars (show/hide)
- AntiLag Features
- Others
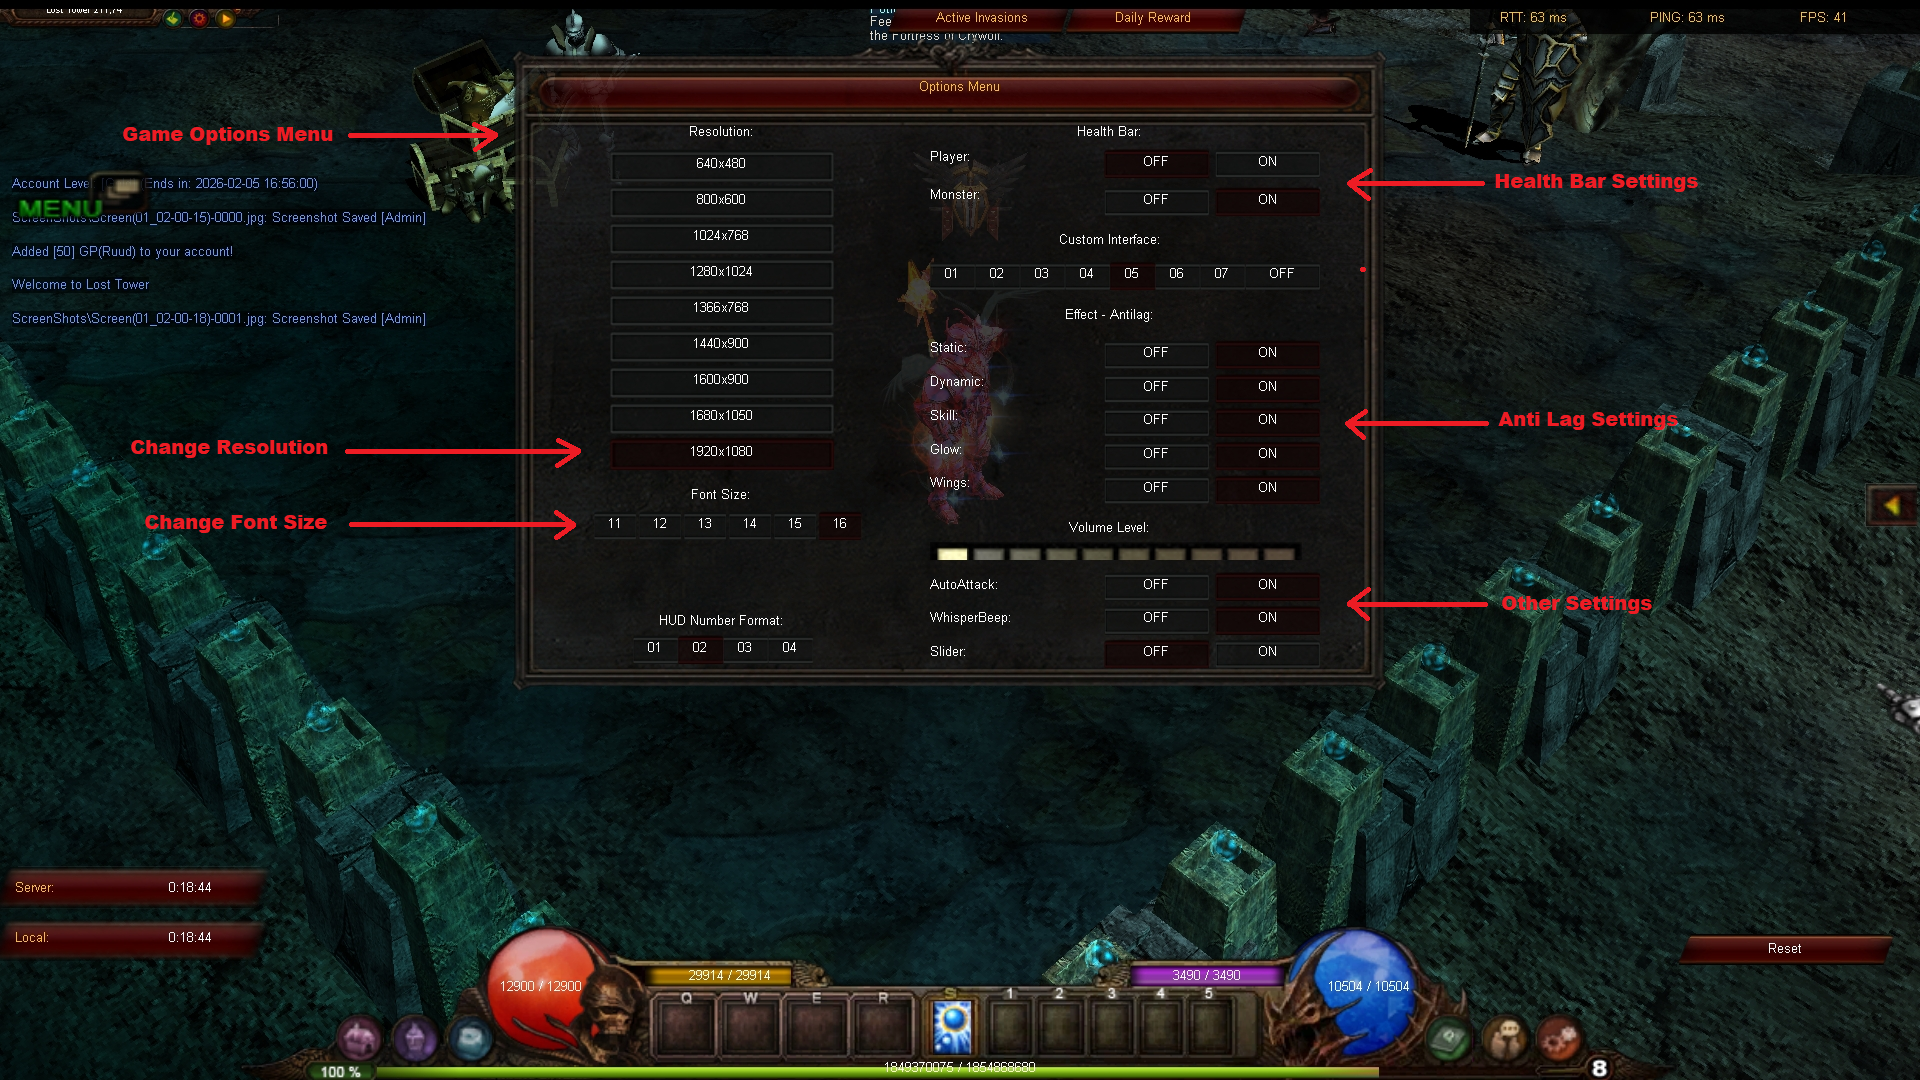
Options Menu
💡 TIP
To open the Options Menu, simply hit the ESC button and then click on Options.
👥 Party System
A Party refers to a compact gathering of players who unite their efforts to efficiently vanquish monsters. By banding together, party members not only accelerate the process of eliminating foes but also share in the experience points earned and the loot obtained from fallen adversaries.
- A Party can have up to 5 characters in it.
- Party Members within a certain distance of each other will share Experience Points.
- Party Members also share item drops.
- Any two players can join a Party together via Character Command.
- The player that sends the initial Party Request will become the Party Leader.
- To join an existing Party, only the Party Leader can accept a Party Request.
- If a Party Member disconnects from the game, the character will remain in the Party.
Party Window
When you join a Party, the Party Window will appear. The window shows the real-time status of each character, including their HP, Buff or Debuff.
To remove a Party Member, the Party Leader can click the "X" next to their name.
The Party Leader is identified by a small flag icon next to their name.
Party EXP Sharing
Experience Points (EXP) are distributed among the members of a Party. The distribution is determined by various factors, and in order to receive shared EXP, you need to be in close proximity to other Party Members.
EXP sharing within the Party is based on the Character Level of each member, following a specific ratio. The calculation of shared EXP takes into account the Base EXP obtained by the Party Member who has the highest Character Level.
Party EXP Bonus
While actively participating in a Party, characters can receive a Party EXP Bonus. The bonus amount increases as more characters join the Party!
The Party Bonus EXP gained is determined based on the personal Base EXP of each character.
There are two types of Party Bonuses: the General Party Bonus, which is obtained when any combination of Character Classes are in a party, and the Character Set Party Bonus, which is acquired when a specific combination of Character Classes are present in a party.
| Party Bonus | Two Members | Three Members | Four Members | Five Members |
|---|---|---|---|---|
| General Party | +2% EXP | +5% EXP | +7% EXP | +10% EXP |
| Character Set Party | +5% EXP | +10% EXP | +15% EXP | +20% EXP |
💡 TIP
To form a Character Set Party, your party must consist of different character classes.
Search Party
The Search Party Module is a convenient feature that allows you to easily discover and join a suitable party.
ℹ️ INFO
You can find more information on how utilize this feature in the Search Party article.
Set Party
You also have the possibility to create a password-protected party which you can share with your fellow players so they can join the party anytime, anywhere by just typing the password, without the need of your confirmation.
💡 TIP
To create a password-protected party type:
/setparty <password>
To join a password-protected party type:
/joinparty <password>
🛡️ Guild System
Guilds hold significant significance in the gameplay of MU Online, serving as platforms for players to establish their own close-knit communities and provide mutual assistance.
These guilds are formed with various objectives in mind, whether it's bringing together friends or consolidating collective strengths. Essentially, guilds serve as a symbol of unity within the MU Online gameplay experience.
📝 NOTE
In Loyal MU, guilds have a maximum capacity of 20 members. However, if the guild master is Dark Lord, the guild can accommodate up to 25 members.
How to create a Guild
Creating a guild in MU Online is a straightforward process. To initiate the guild creation, players can visit the Guild Master NPC (Captain Lorence) and interact with him.
Captain Lorence
However, certain requirements need to be met:
- The guild master must have a minimum level of 100.
- The guild name should consist of at least 4 letters and should not include any symbols.
💡 TIP
You can find the Guild Master NPC in Devias.
Guild's Mark
The Guild Mark, also referred to as the Guild Logo, serves as the visual representation of a guild. After expressing the intention to create a guild to Captain Lorence, the player is required to input the desired guild name and create a unique guild logo.
⚠️ CAUTION
It is important to note that once the guild's name and logo are chosen, they cannot be modified or changed.
Guild's Position
Each community or group possesses its own distinct characteristics. In the realm of MU Online guilds, the Guild Master holds the authority to promote or demote members based on their perceived deserving positions.
To promote a guild member, the Guild Master simply needs to click on their name and locate the "Promote" button within the guild tab. Upon clicking, an option screen will appear, allowing the Guild Master to select the appropriate position, which could be one of the following:
- Assistant Guild Master
- Battle Master - this role can be assigned to 3 players in total
Disbanding/Leaving Guild
Just as creating a guild is a straightforward process, leaving or disbanding a guild is equally simple.
To leave a guild, one can press the G key to open the guild interface and navigate to the "Guild" tab located in the left corner. From there, selecting the "Withdraw" option at the bottom of the "Guild" tab will initiate the process of leaving the guild.
Similarly, to disband a guild, pressing the G key opens the guild interface, and selecting the "Guild" tab is the next step. At the bottom of the "Guild" tab, there is an option to choose "Disband," which will commence the process of dissolving the guild.
Guild's Alliance
⚠️ CAUTION
The option for guild alliances is not available in Loyal MU.
Guild's Hostility
Guilds have the ability to declare hostility towards other guilds in Loyal MU. Once this feature is enabled, all members of the opposing guild will be visually marked as flagged for PK (Player Killing), allowing attacks and kills on them without incurring any penalties. The names of hostile guilds will appear in red on your screen, similar to the appearance of outlaws.
💡 TIP
Engaging and defeating members of hostile guilds will not result in you being flagged as an outlaw.
Guild's War
Guild Masters in Loyal MU have the authority to initiate guild duels by using the command /war followed by the name of the target guild. Once the challenged guild accepts the duel, members from both guilds can engage in immediate combat against each other.
If your guild is challenged to a duel by another guild master, a notification screen will appear. If you prefer not to participate in the duel, you can reject the proposal by selecting "Cancel". It is possible to receive multiple guild duel challenges while playing the game. In such cases, you can block incoming requests by enabling the "Request Off" option. Enabling "Request Off" will block all trade, party play, and guild duel requests.
🔄 Reset System
The dynamic experience system is designed to adjust the experience gained based on the number of resets you have performed. Its core principle is that as your reset count increases, the experience received gradually decreases. This ensures that the more powerful you become, the more challenging it becomes to level up your character.
However, with each reset, there is a compensatory effect where the amount of received stat-points and bonuses is increased. Consequently, each subsequent reset becomes more enticing and rewarding.
The table below provides a comprehensive overview of the rewards and experience points associated with each reset, offering a deeper understanding of the benefits and exp gained at each stage.
ℹ️ INFO
Every Friday evening, the maximum reset limit will be capped at the highest reset count of the top-ranked player.
At midnight on the following Sunday, the reset limit will be lifted.
During this period, experience bonuses are increased based on VIP tier:
- Non-VIP: +10%
- 🥉 Bronze: +20%
- 🥈 Silver: +30%
- 🥇 Gold: +40%
💰 Reset Cost & Points by VIP Tier
VIP tiers reduce reset costs. Points awarded decrease with higher reset ranges.
| Min Reset | Max Reset | Required Level | Non-VIP Money |
🥉 Bronze Money |
🥈 Silver Money |
🥇 Gold Money |
Points Awarded |
|---|---|---|---|---|---|---|---|
| 0 | 10 | 400 | 5,000,000 | 3,000,000 | 3,000,000 | 3,000,000 | 2,000 |
| 11 | 20 | 400 | 10,000,000 | 6,000,000 | 6,000,000 | 6,000,000 | 1,500 |
| 21 | 30 | 400 | 15,000,000 | 9,000,000 | 9,000,000 | 9,000,000 | 1,000 |
| 31 | 40 | 400 | 20,000,000 | 12,000,000 | 12,000,000 | 12,000,000 | 500 |
| 41 | 50 | 400 | 25,000,000 | 15,000,000 | 15,000,000 | 15,000,000 | 250 |
Note: All resets require Level 400. VIP players receive significant discounts on reset costs (40-60% off).
📊 Dynamic EXP Rates (50x)
⚡ Normal EXP (Level 1-400)
Experience rates decrease as you progress through resets to maintain balanced progression.
| Min Level | Max Level | Min Reset | Max Reset | Min Master Reset | Max Master Reset | EXP Rate |
|---|---|---|---|---|---|---|
| 1 | 400 | 0 | 10 | - | - | 100% (50x) |
| 1 | 400 | 11 | 20 | - | - | 80% (40x) |
| 1 | 400 | 21 | 30 | - | - | 60% (30x) |
| 1 | 400 | 31 | 40 | - | - | 40% (20x) |
| 1 | 400 | 41 | 50 | - | - | 20% (10x) |
| 1 | 400 | 0 | 10 | 1 | 2 | 95% (47.5x) |
| 1 | 400 | 11 | 20 | 1 | 2 | 75% (37.5x) |
| 1 | 400 | 21 | 30 | 1 | 2 | 55% (27.5x) |
| 1 | 400 | 31 | 40 | 1 | 2 | 35% (17.5x) |
| 1 | 400 | 41 | 50 | 1 | 2 | 15% (7.5x) |
| 1 | 400 | 0 | 10 | 3 | 5 | 90% (45x) |
| 1 | 400 | 11 | 20 | 3 | 5 | 70% (35x) |
| 1 | 400 | 21 | 30 | 3 | 5 | 50% (25x) |
| 1 | 400 | 31 | 40 | 3 | 5 | 30% (15x) |
| 1 | 400 | 41 | 50 | 3 | 5 | 10% (5x) |
How to Reset
Resets are made in-game via /reset command
📜 Quest System
Loyal Mu offers a captivating array of consecutive quests that not only add variety to the gameplay but also reward players with a plethora of prizes upon successful completion.
Our Primary Quests have been meticulously crafted to align with the growth and advancement of your hero. This means that you'll start off by slaying Spiders, then progress to Budge Dragons, and so forth, until you find yourself facing off against the most formidable creatures in the realm.
Each completed quest bestows upon the player a reward, ensuring that they are well-equipped for their journey ahead. These valuable rewards will undoubtedly prove to be invaluable assets in the long run, bolstering the player's capabilities and enhancing their chances of success.
💡 TIP
We strongly advise all players to begin their quests immediately after creating their first character.
Quests also give a lot of Wcoins and Ruud to boost your character's power.
Check the quest list below for details.
Quest Window
As you join in the Lotus Mu realm you will see a white arrow in the middle right of your screen. When you press this arrow, the Quest Window will pop.
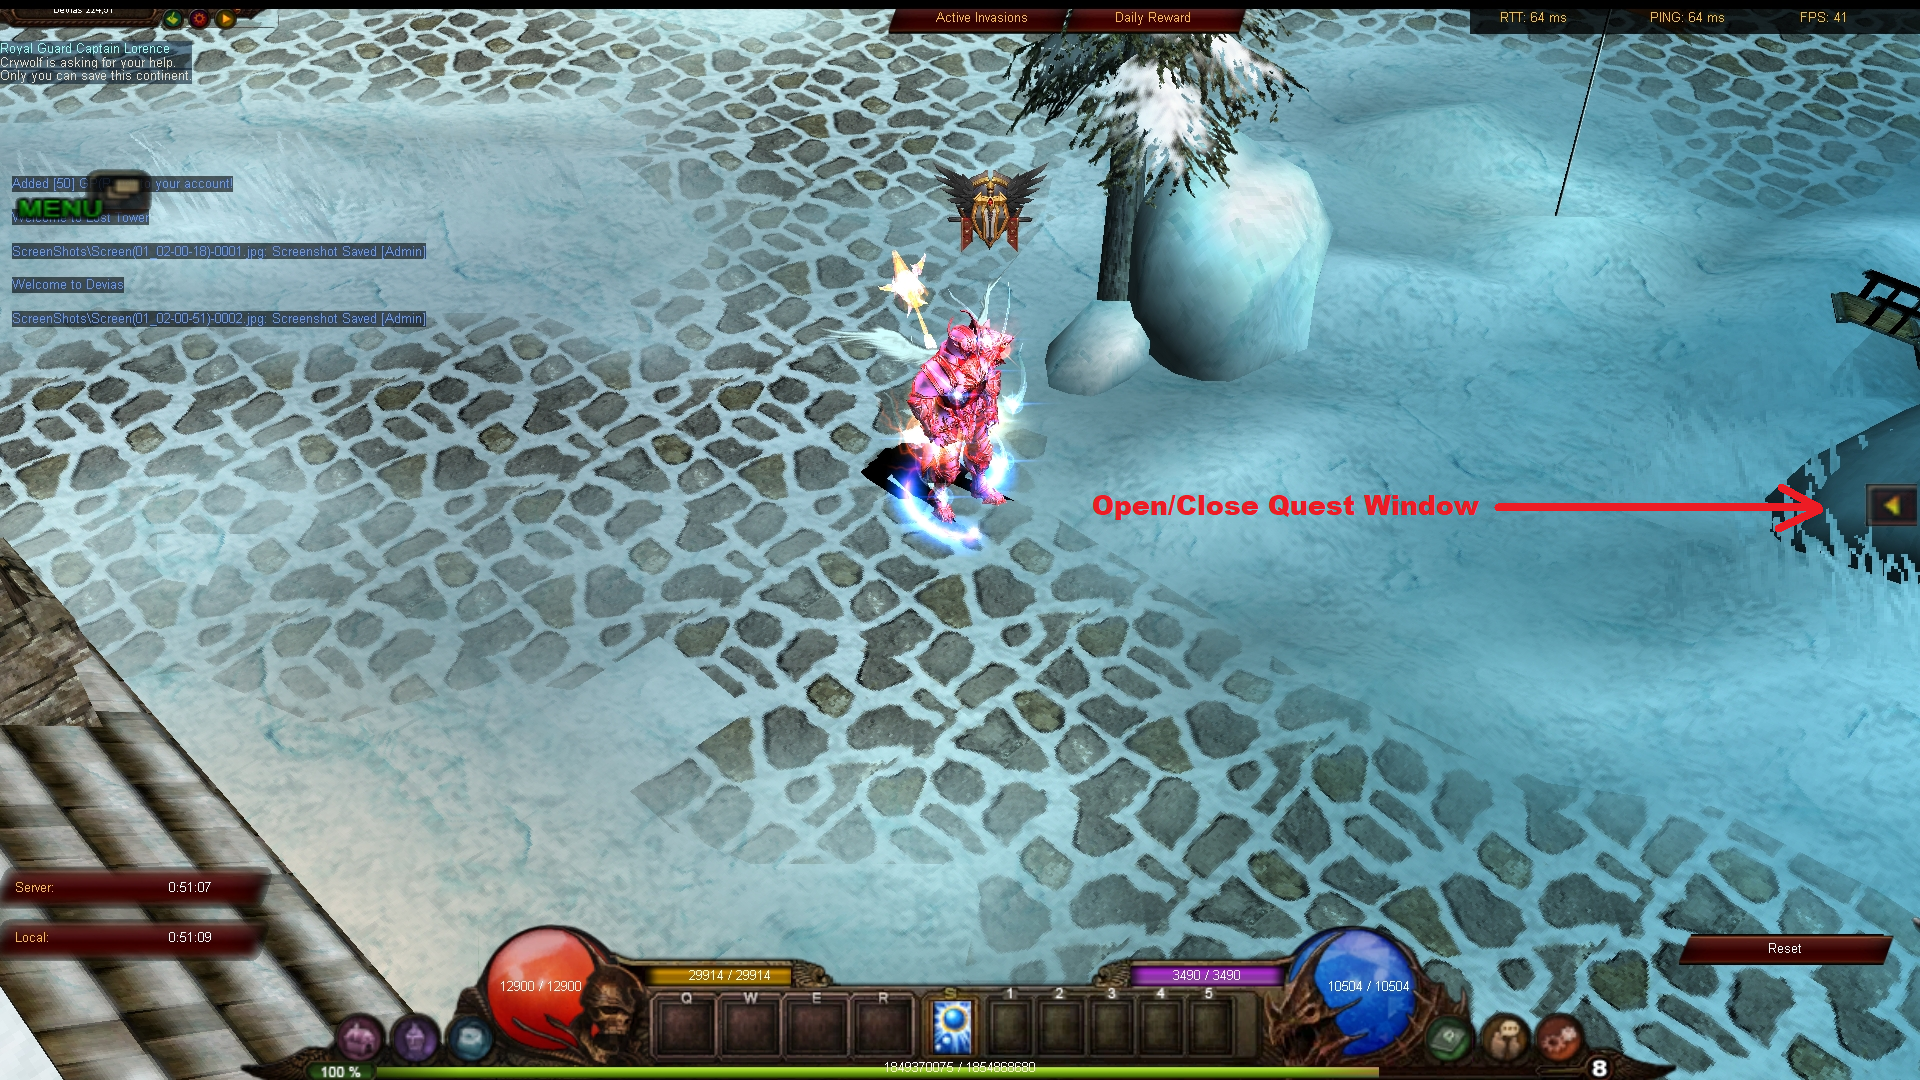
Open/Close Quest Window
Once the Quest Window is opened you will be able to see what are the Requisites needed to complete your quest. If you want to check what your reward will be after completing the quest, just click on the Reward button.
⚠️ CAUTION
Beware that you need to manually finish your quest.
To accomplish this, all you need to do is click on the Get Reward button.
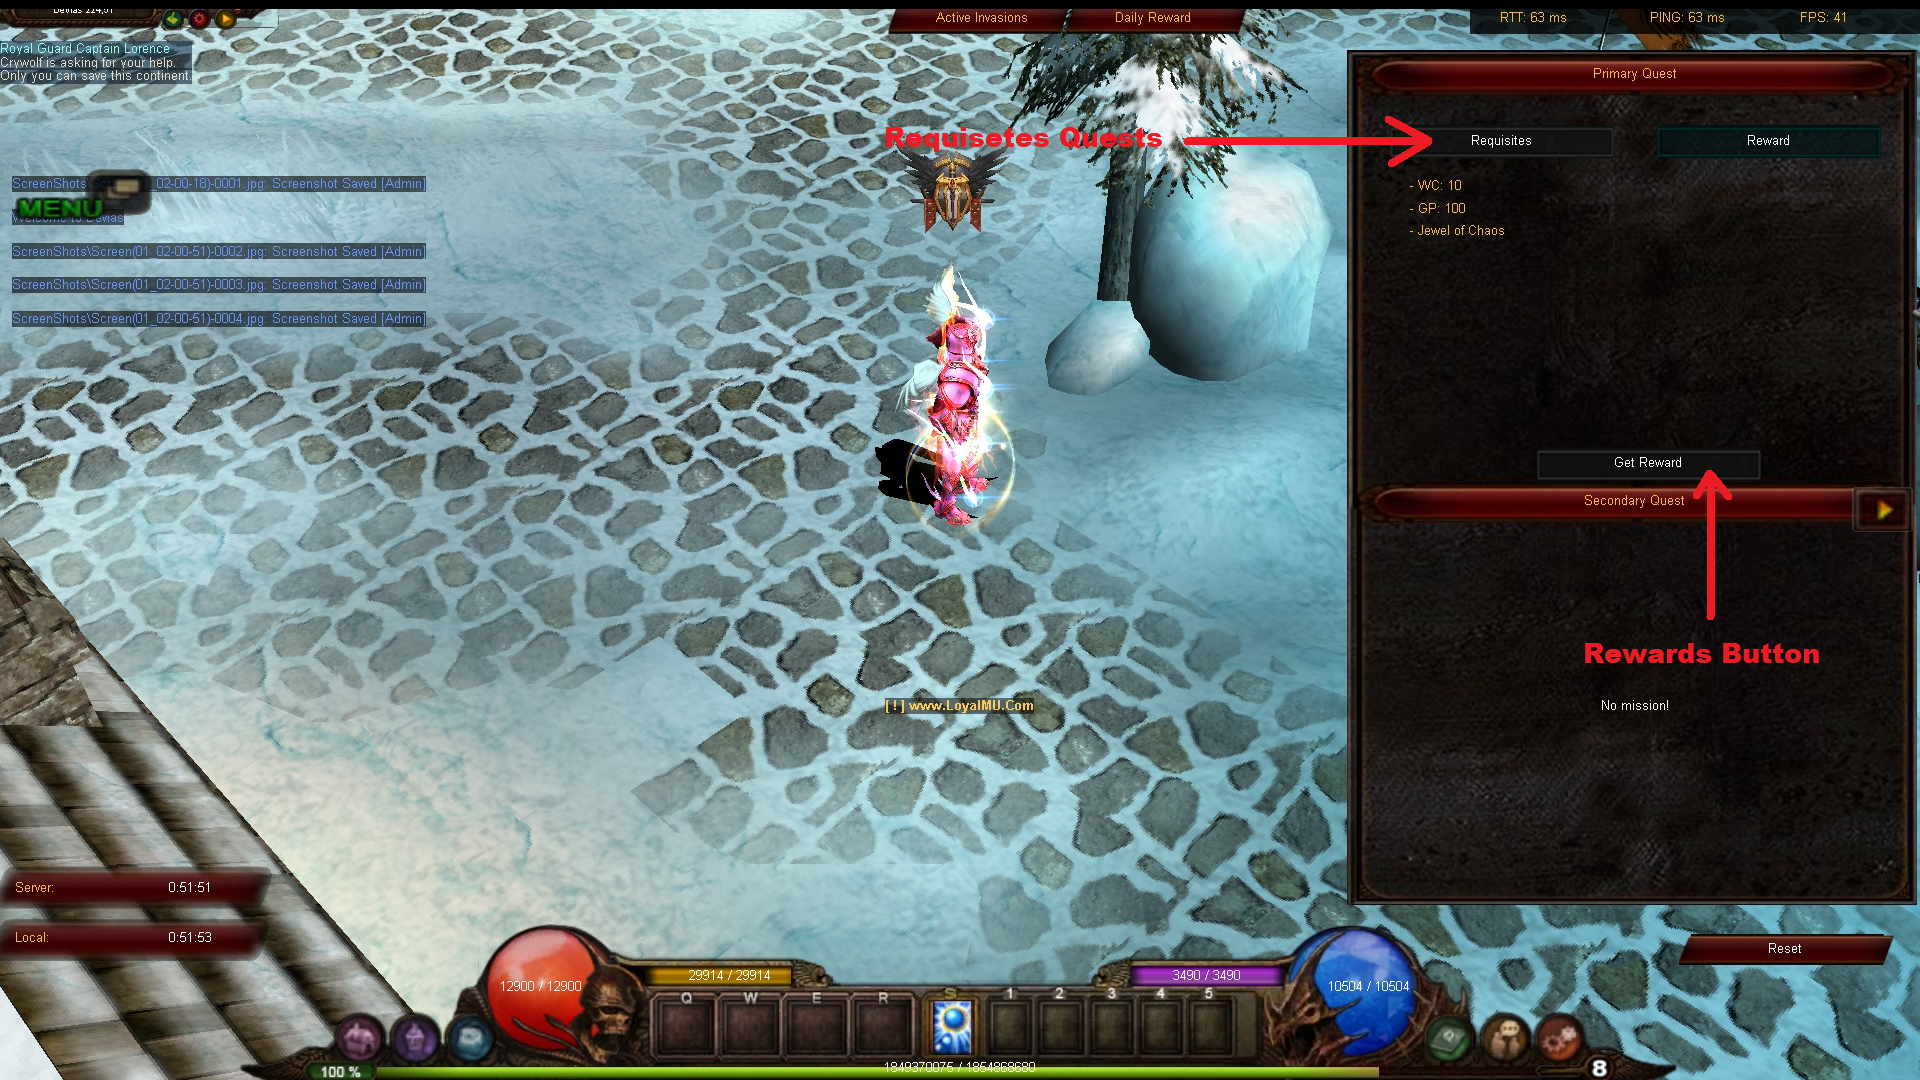
Quest Window
Quest List
The following table represents all the quests in Loyal Mu.
ℹ️ INFO
The total Wcoin earned from all quests is 3000.
The combined RUUD amount to 60,000.
| Nr. | Quantity | Monster Name | Location | RUUD | WCoin | Zen (kk)/ Reward Item |
|---|
❌ Close Client - Issue
🧭 Steps to Follow if You Experience a “Close Client” Issue
If you encounter errors or the client closes unexpectedly, check the following:
- Verify Visual C++ Installation: Make sure all required Visual C++ packages are installed. You can find them in the Utilities folder included with the client.
- Disable Your Antivirus: Some antivirus programs may block client files. Temporarily disable your antivirus and try again.
- Do Not Run Too Many Client Instances: Run only 2–3 instances at most. Note: Instances started with offattack also count.
- Set the Resolution to 1024×768: Recommended to avoid compatibility issues.
- Disable Windows Firewall: Windows Firewall can block client connections. Temporarily disable it.
- Set Graphics Quality to 32 Bits: In the configuration window, set color depth to 32-bit.
- Add the Client to Firewall Exceptions: If you cannot fully disable the firewall, add the client’s folder to the exception list.
- Check for Additional Antivirus Software: Multiple antivirus programs can conflict and block client files.
- Add
main.exeto DEP Exceptions: Ensuremain.exeis added to the DEP (Data Execution Prevention) exception list. Vezi ghidul de mai jos.
📘 DEP Guide – add main.exe
Follow these steps to set DEP to "Essential Windows programs and services only" and add main.exe to the exception list.
STEP 1
Open System Properties → Advanced → Performance (Settings).
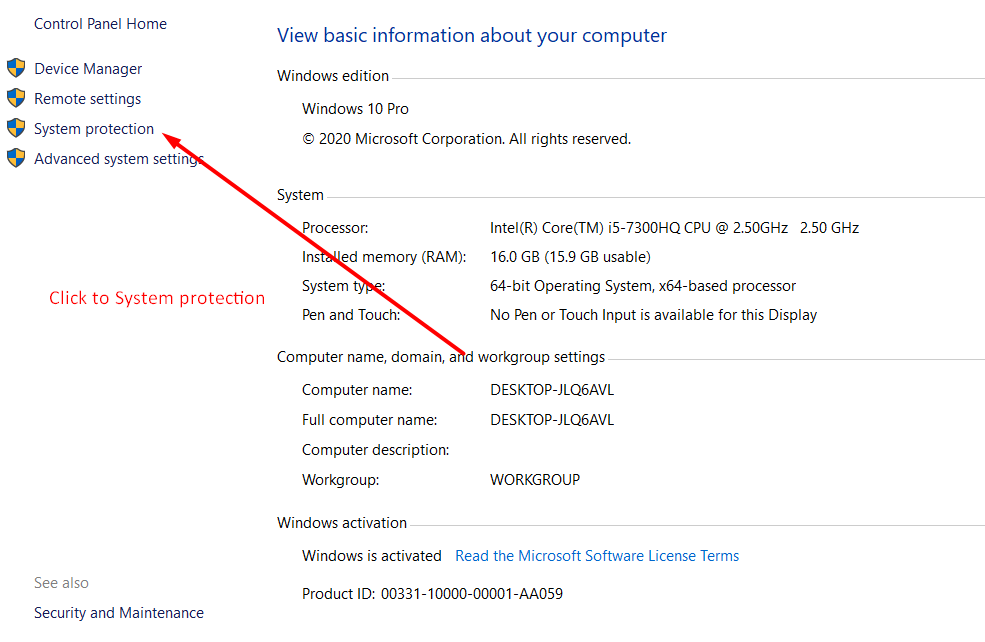
STEP 2
Go to the "Data Execution Prevention" tab.
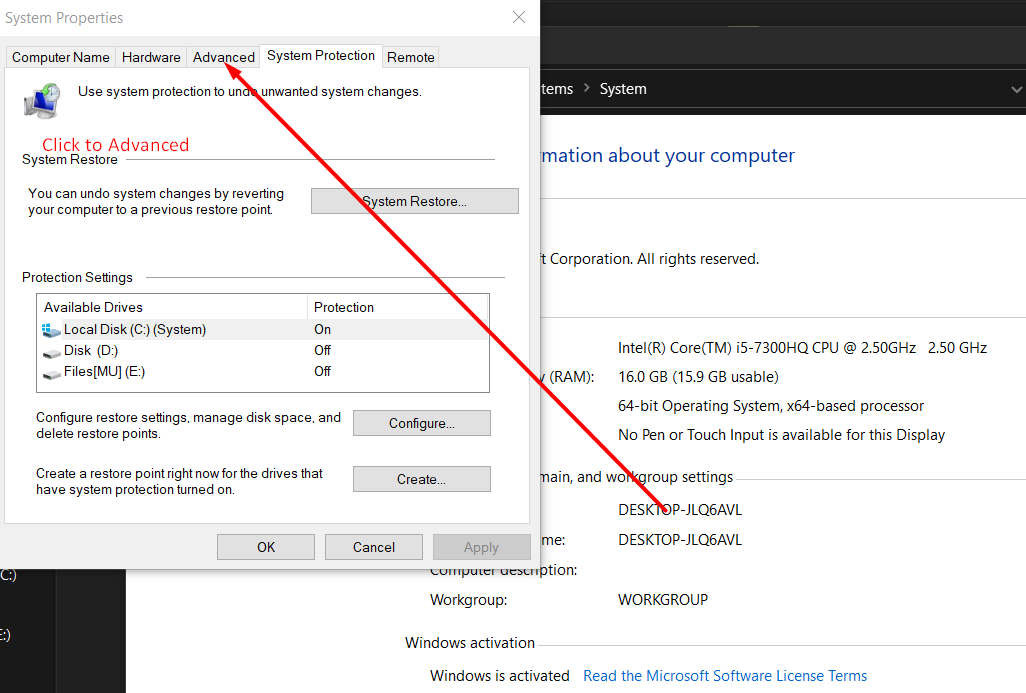
STEP 3
Select "Turn on DEP for essential Windows programs and services only".
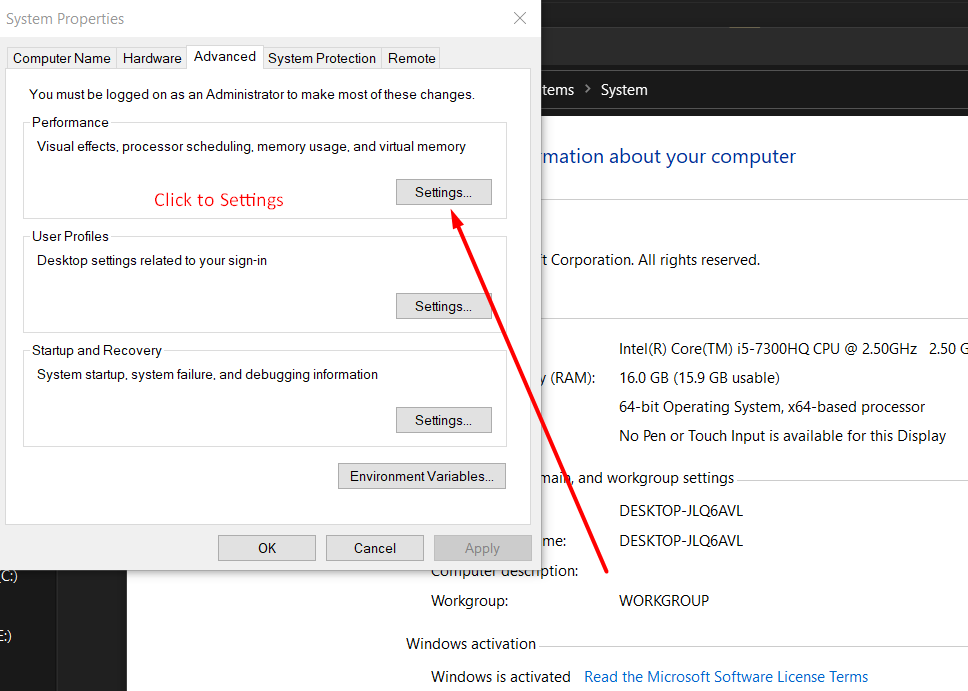
STEP 4
Click "Add..." and select main.exe from the client folder.
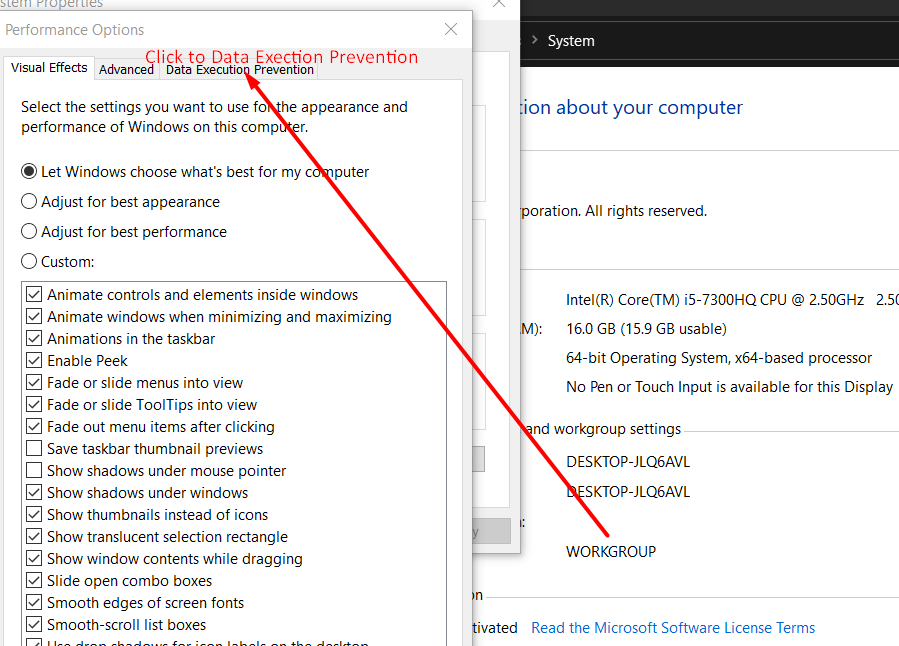
STEP 5
Apply changes and confirm main.exe appears in the list.

🏆 Stage System Current Stage 1
The stage system is a progressive content release mechanism that controls the availability of various gameplay elements throughout the server's lifecycle.
Rather than releasing all content simultaneously, the server launches with Stage 1 and gradually unlocks additional features, bosses, events, and crafting possibilities as it progresses through Stage 2, Stage 3, and ultimately Stage 4.
This system ensures a balanced gameplay experience, allowing players to adapt to each tier of content before more challenging elements become available.
Stage 1 - Foundation
Stage 1 represents the initial phase of the server, providing players with core gameplay elements and foundational content.
Important - Weekly Reset Cap Event!
📅 Every Friday from 16.01, 18:00 → Sunday 22:00: Reset Cap at top player level + Double EXP (2x)
Grand Reset Requirement: 0 (Available from server start)
⭐ Master Level Limit: Level 100 / 100 Points
🪽 Wings Craft
👑 Golden Invasions
📜 Custom Quests
⚔️ Available Invasions & Events
🎮 Available Events
📍 Available Maps
| Map Name | Grand Reset Required |
|---|---|
| Arena | 0 |
| Lorencia | 0 |
| Noria | 0 |
| Elbeland | 0 |
| Elbeland 2 | 0 |
| Elbeland 3 | 0 |
| Devias | 0 |
| Devias 2 | 0 |
| Devias 3 | 0 |
| Devias 4 | 0 |
| Dungeon | 0 |
| Dungeon 2 | 0 |
| Dungeon 3 | 0 |
| Atlans | 0 |
| Atlans 2 | 0 |
| Atlans 3 | 0 |
| Lost Tower | 0 |
| Lost Tower 2 | 0 |
| Lost Tower 3 | 0 |
| Lost Tower 4 | 0 |
| Lost Tower 5 | 0 |
| Lost Tower 6 | 0 |
| Lost Tower 7 | 0 |
| Tarkan | 0 |
| Tarkan 2 | 0 |
| Aida 1 | 0 |
| Aida 2 | 0 |
| Icarus | 0 |
| Kanturu Ruin 1 | 0 |
| Kanturu Ruin 2 | 0 |
| Kanturu Ruin Island | 0 |
| Kanturu Remain | 0 |
| Karutan 1 | 0 |
| Karutan 2 | 0 |
| Arkania | 0 |
🎁 Daily Rewards
In the adventure that is Loyal Mu, exciting treasures await those who faithfully embark on their heroic quests day after day. The allure of Daily Rewards beckons all players, promising an array of valuable goodies that vary with each passing day and month.
At the heart of this enticing system lies the promise of something special every day. Set your sights on exquisite jewels, mysterious item bags, and other precious artifacts that can be a true boon to your journey.
📝 NOTE
The Daily Rewards are only available to our VIP Players.
Consistent, Yet Ever-Changing
The Daily Rewards system is a testament to the ever-evolving landscape of Lotus Mu. While it offers consistent opportunities for bountiful gains, each day unveils a fresh surprise. With every sunrise comes a new chance to claim extraordinary riches. Furthermore, as the months roll by, expect even more exclusive rewards to be revealed, providing added motivation to be a loyal and persistent.
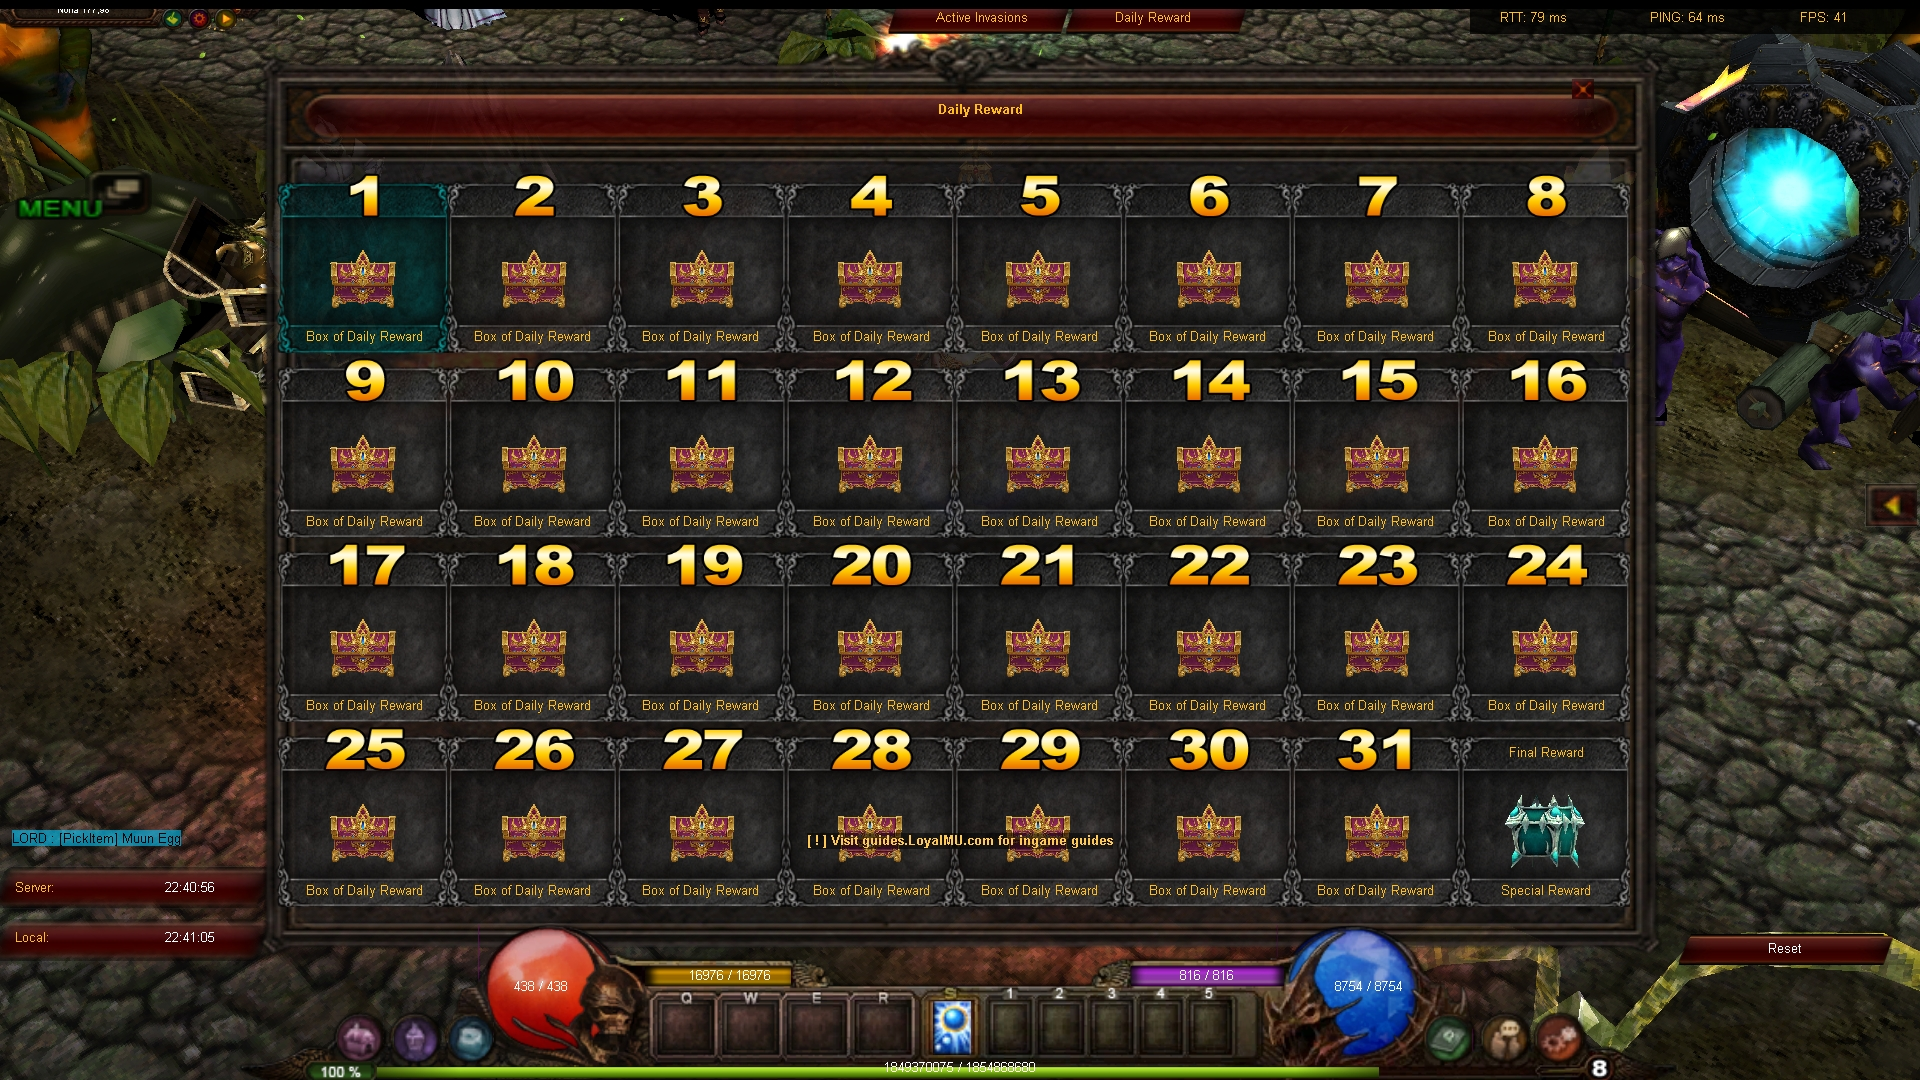
Daily Reward Module
Seize Your Daily Fortune
Claiming your Daily Rewards is as effortless as it is rewarding. All you need to do is log in and embark on your adventures. This simple act of logging in will granting you a chance to obtain your daily reward.
Within the Daily Reward Module, you'll be able to click on the reward for the current day and claim it without any hassle.
💡 TIP
You can open the Daily Reward Module by clicking on the corresponding Especial Button situated at the topmost part of the screen.
🏆 Achievements System
The achievements system allows players to complete various missions and challenges to earn achievement points. These points can then be spent to unlock permanent character bonuses and enhancements.
By completing different types of objectives, players can steadily improve their characters while working towards long-term progression goals beyond traditional leveling and equipment upgrades.
How to Open the Achievements Window
You can open the Achievements Windows by hitting the Menu button in the bottom right part of screen. You call also press the "U" key to achieve the same result.
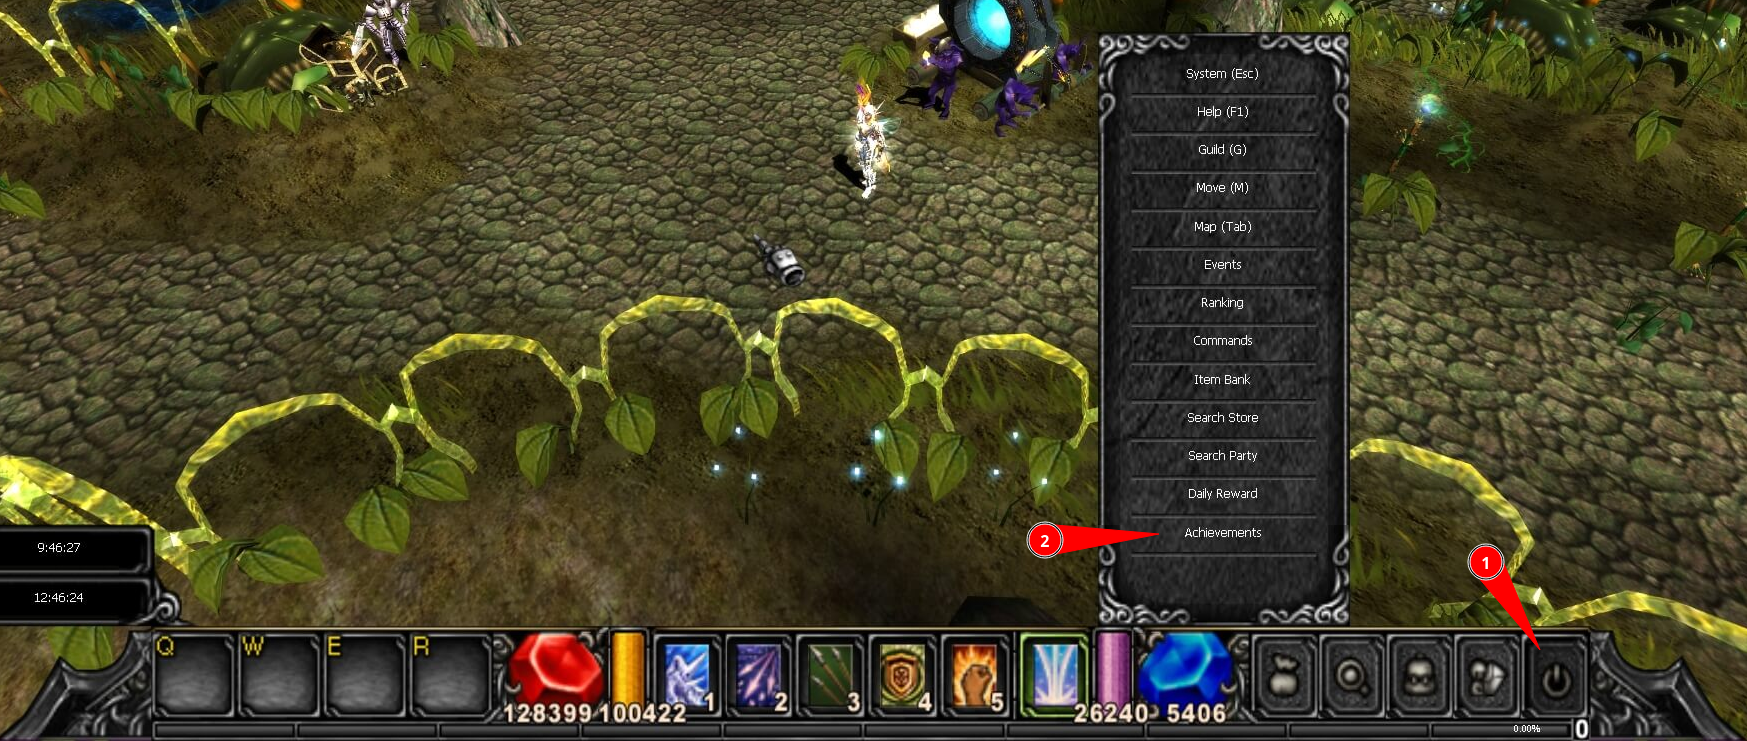
Especial Menu Buttons
Character Bonuses
Achievement points can be invested in various permanent character enhancements. These bonuses provide measurable improvements to core character statistics, including combat effectiveness, survivability, and progression speed.
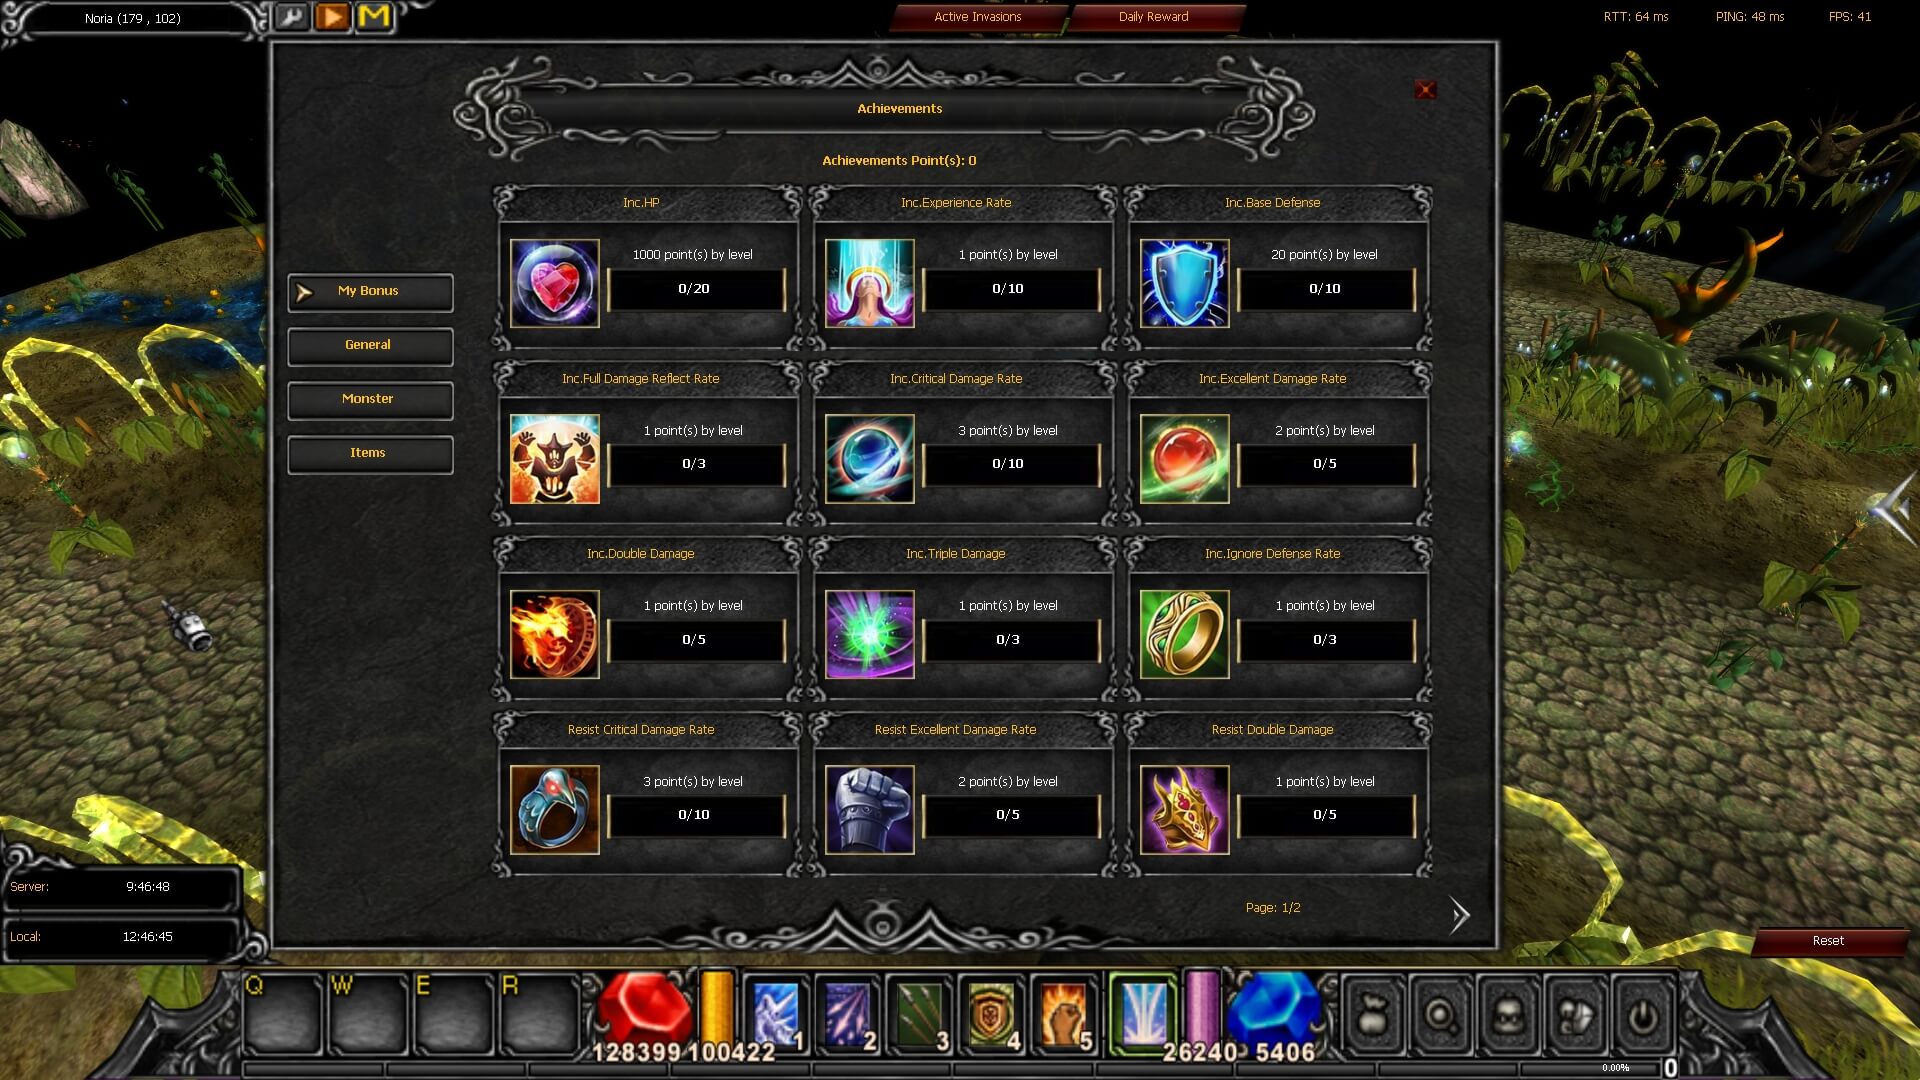
Achievement Bonuses
Missions
💡 TIP
Each mission has multiple levels, allowing players to complete the same mission repeatedly for additional rewards.
The requirements for completing a mission increase by 50% of the previous level's requirements for each consecutive level.
Example:
Complete Blood Castle
- ▸ Level 1 - complete successfully 10 Blood Castles.
- ▸ Level 2 - complete successfully 15 Blood Castles.
- ▸ Level 3 - complete successfully 22 Blood Castles.
- ▸ Level 4 - complete successfully 33 Blood Castles.
- ▸ Level 5 - complete successfully 49 Blood Castles.
The missions are divided into three categories:
General
Play several times, make resets, complete quests, participate in events
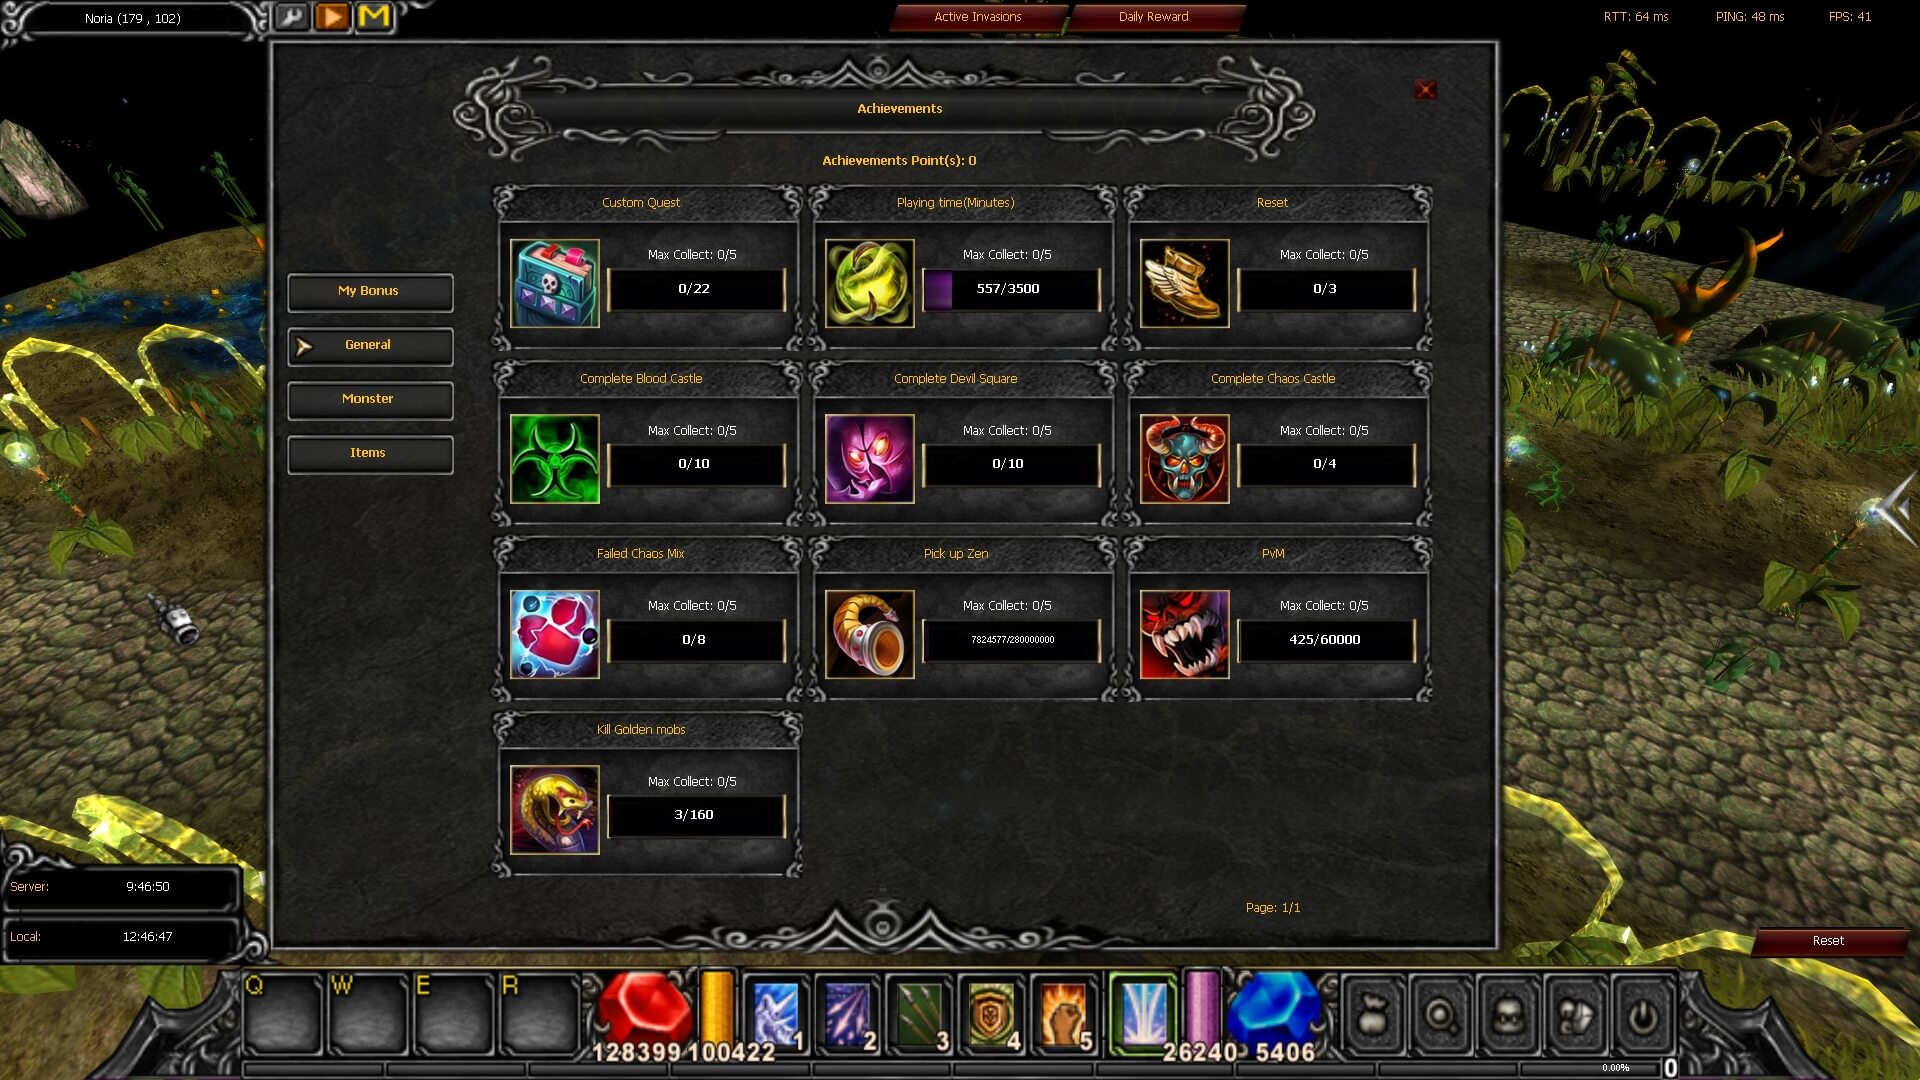
General Missions
Monsters
Kill specific monsters listed in the Monsters Missions Tab
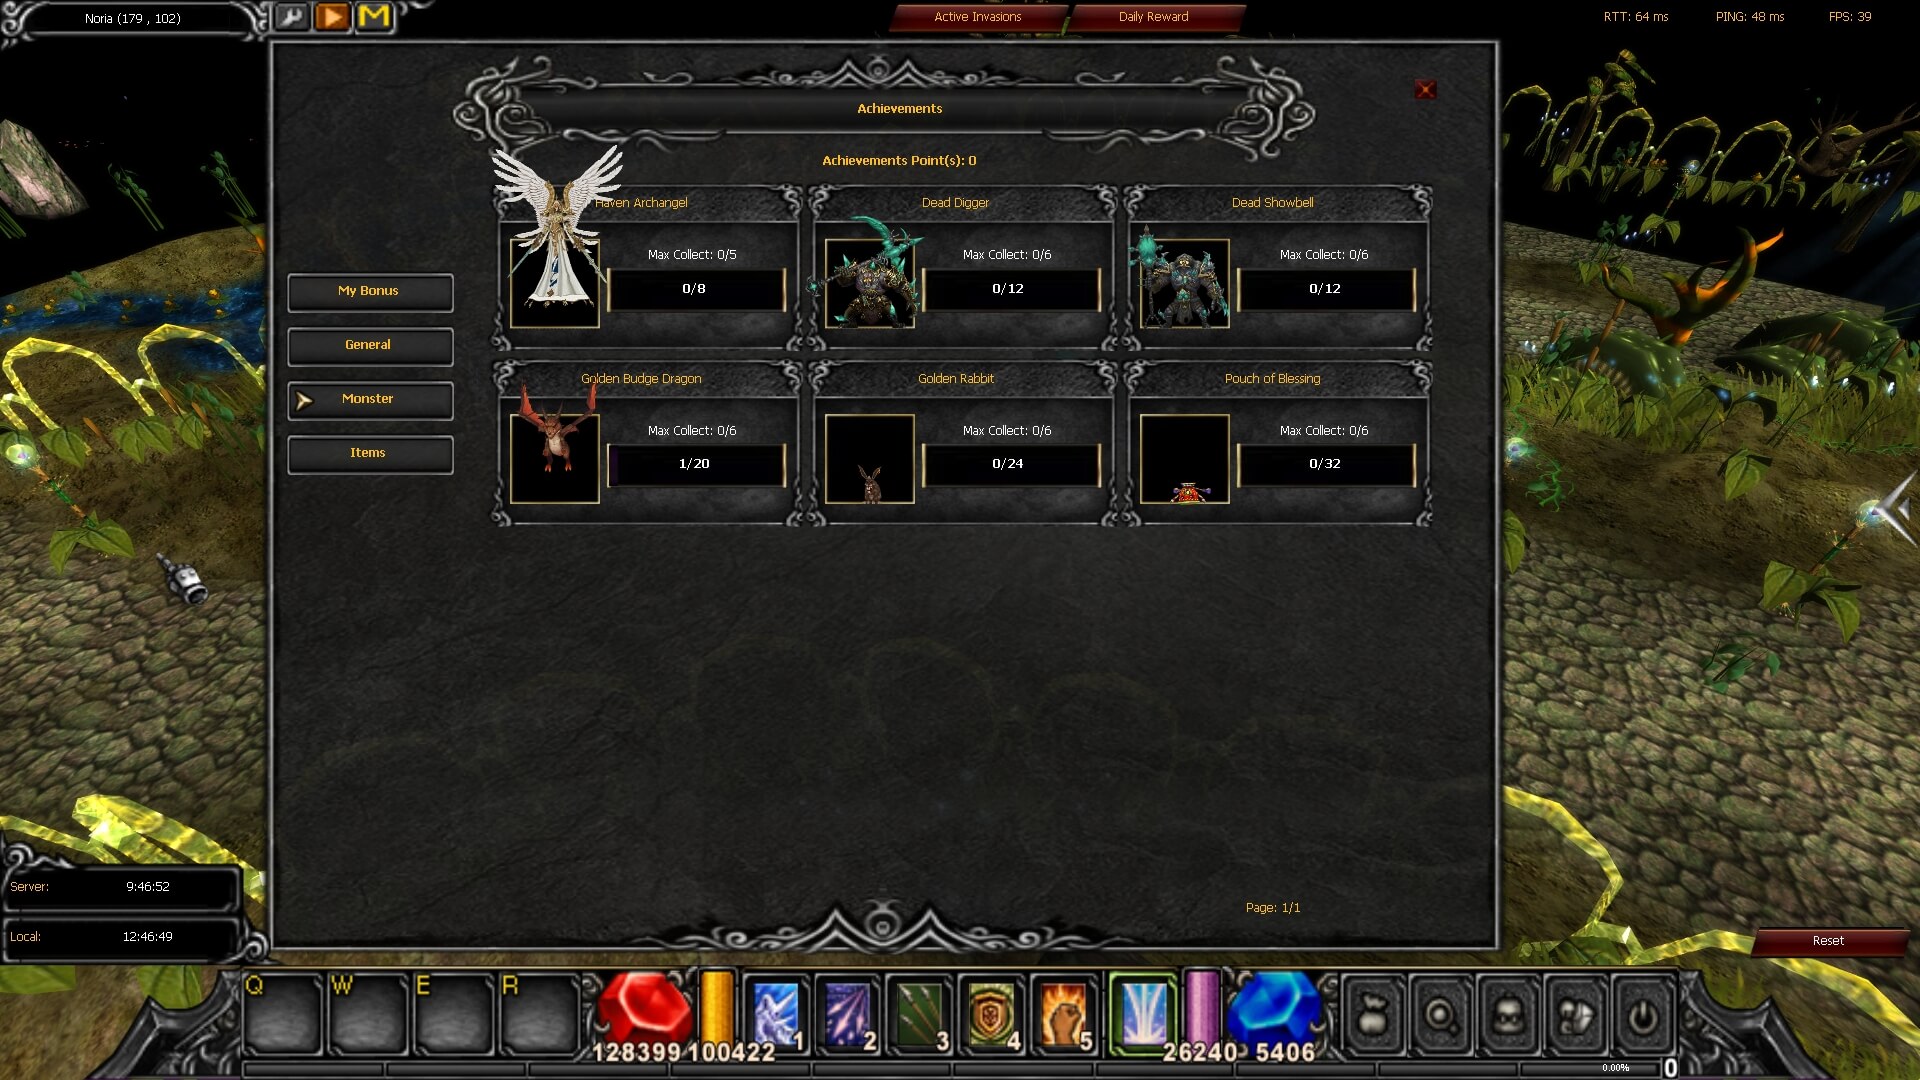
Monster Missions
Items
Use or drop specific items
Item Missions
Lorencia
Content for Lorencia map coming soon...
🐰 Lunar Rabbit Invasion
In the mystical world of Loyal Mu, a cataclysmic event has unfolded, plunging the realm into darkness and unleashing chaos upon its inhabitants. The once serene and peaceful lands have been invaded by the fearsome Lunar Rabbits, heralding an era of destruction and uncertainty. Today, we delve into the heart of this unprecedented crisis and explore the consequences it has wrought upon the world of Loyal Mu.
Lunar Rabbit
Place of Invasion
The areas targeted by the Lunar Rabbits consistently encompass the following maps:
💡 TIP
You can find the invaders close to the safe zones of the mentioned maps.
Lunar Rabbit Invasion lasts for 10 minutes. After that, all remaining rabbits will disappear.
Schedule
You have the option to utilize the in-game scheduler (hit H) to check the remaining time before the next instance commences.
Reward
When a player successfully kills a Lunar Rabbit, they will receive a rewarding prize - one from the following selection of options:
Gemstone

Talisman of Luck
3,333,333 Zen
🐉 Red Dragon Invasion
In the mystical world of Loyal Mu, a cataclysmic event has unfolded, plunging the realm into darkness and unleashing chaos upon its inhabitants. The once serene and peaceful lands have been invaded by the fearsome Red Dragons, heralding an era of destruction and uncertainty. Today, we delve into the heart of this unprecedented crisis and explore the consequences it has wrought upon the world of Loyal Mu.
Red Dragon
Place of Invasion
The areas targeted by the Red Dragons consistently encompass the following maps:
💡 TIP
You can find the invaders close to the safe zones of the mentioned maps.
Schedule
You have the option to utilize the in-game scheduler (hit H) to check the remaining time before the next instance commences.
Reward
When a player successfully vanquishes a Red Dragon, they will receive 600 RUUD and one from the following selection of options:
Gemstone
8,888,888 Zen
🧙 White Wizard Invasion
Unleashing chaos and uncertainty upon the mystical realm of Loyal Mu, the White Wizard has sent shockwaves throughout the land. In this article, we delve into the heart of this unprecedented crisis, exploring the origins, consequences, and challenges that accompany the arrival of the enigmatic White Wizard. Brace yourself as we embark on a journey to understand the magnitude of this invasion and discover the heroic efforts of Loyal Mu's players as they unite to confront this formidable threat. Prepare to witness the clash between light and darkness in a battle that will determine the fate of the realm.
White Wizard
Place of Invasion
The areas targeted by the White Wizard consistently encompass the following maps:
💡 TIP
The White Wizard and his troops appear on all of the aforementioned maps.
Schedule
You have the option to utilize the in-game scheduler (hit H) to check the remaining time before the next instance commences.
Reward
Accompanying the White Wizard are formidable Orc allies known for their destructive nature. Engaging in battles with these ferocious creatures poses a thrilling challenge. However, there is an enticing opportunity for players to obtain valuable rewards, as there is a chance that the Orcs themselves will drop a reward upon their defeat.
Prepare yourself for intense encounters with the White Wizard and his menacing Orc companions, for within their midst lies the potential for great riches and glory.
White Wizard
When a player successfully vanquishes a White Wizard, they will receive 500 RUUD and one of the following:
10 Bundled Jewels of Bless
10 Bundled Jewels of Soul
10 Bundled Jewels of Life
Destructive Orcs
When a player kills a Destructive Orc, they have the chance to receive one of following:

Wizard's Ring
10,000,000 Zen
Orc Soldier
Orc Archer
💡 TIP
10 Destructive Orcs are spawned in each of the mentioned maps.
⭐ Events Exclusive Monsters
🖐️ Maya Hands
Left Hand of Maya / Right Hand of Maya
Within the vicinity surrounding the Maya Statue during the Kanturu Event, both the Left and Right Hands of Maya materialize. These mystical beings serve as harbingers, issuing a foreboding message that the formidable Nightmare is on the verge of making its presence known.
Left Hand of Maya
Right Hand of Maya
Details
These creatures can be encountered only during the Kanturu Event.
💡 TIP
Each of them appears twice during the event. You can find more information in the Kanturu Event article.
Reward
Upon successfully killing a Hand of Maya, players will be rewarded with:
Gemstone
500 RUUD
🧝 Dark Elf
Throughout the Crywolf Event, the assistance of Dark Elves is enlisted by Balgass in his assault. These highly skilled and exceptional warriors pose a formidable challenge, demanding significant effort to defeat. However, their defeat promises substantial rewards to those who can overcome these elite monsters.
ℹ️ INFO
The Dark Elf will be available from Stage 2 onwards.
Dark Elf
Details
These creatures can be encountered only during the Crywolf Event.
💡 TIP
You can find more information on when exactly the Dark Elves appear in the Crywolf Event article.
During the Crywolf Event 15 Dark Elves are being spawned.
Reward
Upon successfully killing a Dark Elf, players will be rewarded with:
Box of Kundun +5
500 RUUD
🐉 Others
💰 Pouch of Blessing
In this article, we delve into the depths of the enigmatic Pouch of Blessing, unraveling its bountiful rewards that await daring adventurers who dare to encounter this formidable creature.
Pouch of Blessing
Details
The subsequent table provides detailed information about location, respawn time and the quantity of the available Pouch of Blessing across the realm.
| Map Number | Quantity |
|---|---|
| 04 - Noria | 10 |
| 07 - Atlans | 10 |
| 08 - Tarkan | 10 |
| 33 - Aida | 10 |
| 37 - Kanturu 1 | 10 |
| 57 - Raklion | 10 |
Reward
Upon successfully killing a Pouch of Blessing, players will be rewarded with one of the following:
Red Ribbon Box
6,666,666 Zen
🐔 Chicken
The Chicken Invasion is a unique and exciting event in MU Online where hordes of chickens suddenly appear across the realm. These seemingly harmless creatures carry valuable treasures, making them a prime target for adventurers seeking quick rewards. Despite their innocent appearance, these chickens are surprisingly resilient and require skilled warriors to defeat them. The invasion creates a festive atmosphere as players rush to hunt down these feathered foes before they disappear.
Place of Invasion
| Map | Quantity |
|---|---|
| Lorencia | 15 |
| Noria | 15 |
Reward
Upon successfully killing a Chicken, players will be rewarded with one of the following jewels:
Jewel of Bless
Jewel of Soul

Chaos Card
💍 Jewelry Rewards:
Ring of Ice, Ring of Poison, Pendant of Lighting, Pendant of Fire, Ring of Fire, Ring of Earth, Ring of Wind, Ring of Magic, Pendant of Ice, Pendant of Wind, Pendant of Water, Pendant of Ability
👹 Demons Goblin
MONSTER INVASIONS
Description
The event consists of hunting 5 GOLDEN GOBLINs that appeared on one of the maps listed below. When he encounters him and kills him, the goblin will drop a book that will summon a monster stronger than him, leading to the same sequence of summons to the GOLDEN KUNDUN. The next monster invoked will always be TWICE stronger in life, defense, and damage than the monster predecessor.
- GOLDEN GOBLIN has a 70% chance of dropping the book to invoke the GOLDEN TITAN.
- GOLDEN TITAN has a 60% chance of dropping the book to summon the GOLDEN TANTALOS.
- GOLDEN TANTALOS has a 50% chance of dropping the book to summon the GOLDEN EROHIM.
- GOLDEN EROHIM has a 40% chance of dropping the book to summon the GOLDEN HELL MAINE.
- GOLDEN HELL MAINE has a 30% chance of dropping the book to summon the GOLDEN KUNDUN.
- GOLDEN KUNDUN has a 50% chance of dropping ANGEL AND DEVIL WINGS.
Location
The golden goblin will appear randomly on just one of these maps:
| Map |
|---|
| Tarkan |
| Aida |
| Kanturu |
| Karutan |
Rewards
Wings of Angel and Devil FO (1 unit).
The conquered wing will be completely smooth, non-negotiable and lasting for 24 hours.
🔥 Fire Flame Ghost
Fire Flame Ghost :: Invasion
⚠️ IMPORTANT
If monster is not killed within 60 minutes - it disappears and must wait till next Invasion!
(In other words: you have time 60 minutes since Invasion start to find and kill monster)
Fire Flame Ghost Monsters
Fire Flame Ghost Invasion monsters are randomly spawned in 6 different maps across the whole map.
Map List
| Map |
|---|
| 04 - Noria |
| 07 - Atlans |
| 08 - Tarkan |
| 33 - Aida |
| 37 - Kanturu 1 |
| 57 - Raklion |
Fire Flame Ghost Drop
Upon successfully killing a Fire Flame Ghost, players will be rewarded with one of the following jewels:
Jewel of Chaos
Jewel of Soul
Jewel of Creation
Jewel of Bless
😈 Zaikan Invasion
Prepare for an intense and thrilling journey as we delve into the formidable Zaikan Invasion in Loyal Mu. In this article, we explore the origins, challenges, and rewards that await players as they confront the merciless Zaikan and his hordes. Join us as we unravel the mysteries of this epic invasion and discover the strategies needed to emerge victorious against this fearsome adversary.
Zaikan
Place of Invasion
The area targeted by the Zaikan is the following map:
Tarkan
💡 TIP
You can find the Zaikan throughout Tarkan. During the invasion, 3 monsters are spawned.
Schedule
You have the option to utilize the in-game scheduler (hit H) to check the remaining time before the next instance commences.
Reward
Upon successfully defeating the Zaikan, players will be rewarded with 250 RUUD and one of the following:

Loch's Feather

Crest of Monarch
💡 TIP
These items are ingredient in the 2nd Level Wings Chaos Combination.
👻 Illusion of Kundun
Kalima, an accursed realm where the malevolent lord Kundun languishes in eternal exile, stands as a gathering ground for his unwavering minions. Among the formidable forces under his command, the Illusions of Kundun hold a prominent rank as his trusted commanders.
Kalima comprises seven distinct regions, each escalating in difficulty and accessible only to warriors who have reached a specific Character Level. While the first six floors of Kalima harbor the haunting presence of an Illusion of Kundun, it is on the treacherous seventh floor where the true manifestation of the Kundun awaits, ready to test the mettle of brave adventurers.
Illusion of Kundun
Location
Within the various regions of Kalima, Kundun's dominion manifests through an array of monsters, each possessing varying degrees of strength. From the first to the sixth area, the Illusion of Kundun assumes the role of commanding these formidable troops.
💡 TIP
You can learn on how to reach these monsters trough the Kalima article.
Details
Kalima 1
Box of Kundun +1 x3
200 RUUD
⏱️ Respawn: 2h after being killed
Kalima 2
Box of Kundun +2 x3
400 RUUD
⏱️ Respawn: 3h after being killed
Kalima 3
Box of Kundun +3 x3
600 RUUD
⏱️ Respawn: 4h after being killed
Kalima 4
Box of Kundun +4 x2
800 RUUD
⏱️ Respawn: 5h after being killed
Kalima 5
Box of Kundun +5
1,000 RUUD
⏱️ Respawn: 6h after being killed
Kalima 6
Box of Kundun +5
1,500 RUUD
⏱️ Respawn: 7h after being killed
💀 Death King
Prepare for a harrowing encounter as the Death King descends upon the realms of Loyal Mu, shrouding the land in darkness and despair. In this formidable event, players must rise to the challenge and confront the malevolent forces that seek to unleash chaos and destruction. Brace yourself for epic battles and face the wrath of the Death King as you embark on a quest to defend the realm and restore peace.
Death King
Place of Invasion
The areas targeted by the Death King are the following maps:
Reward
Upon successfully defeating the Death King, players will be rewarded with one of the following:

Condor Flame
Drop Rate: 30%
10,000,000 Zen
Drop Rate: 70%
👹 Nightmare
Embark on a perilous journey into the depths of Kanturu Relics as we unveil the harrowing tale of the dreaded Nightmare.
Once a serene sanctuary, now plagued by the relentless attacks of this ancient warlord and his monstrous horde, Kanturu Relics hides the coveted Refinery Tower where impure Gemstones are transformed into exquisite Jewels of Harmony.
Join us as we delve into the treacherous path that leads adventurers to confront the formidable Nightmare and reclaim the sanctuary's tranquillity.
ℹ️ INFO
The Nightmare can only be defeated by participating in the Kanturu Event.
Nightmare
Reward
Upon successfully killing the Nightmare, players will be rewarded with 1,000 RUUD and 3 random Excellent items from the following pool:
🛡️ Excellent Armor Sets
Dragon Knight
- Helm
- Armor
- Pants
- Gloves
- Boots
Venom Mist
- Helm
- Armor
- Pants
- Gloves
- Boots
Sylphid Ray
- Helm
- Armor
- Pants
- Gloves
- Boots
Volcano
- Armor
- Pants
- Gloves
- Boots
Sunlight
- Mask
- Armor
- Pants
- Gloves
- Boots
Storm Blitz
- Helm
- Armor
- Pants
- Gloves
- Boots
Phoenix Soul
- Helm
- Armor
- Pants
- Boots
⚔️ Excellent Weapons
- Bone Blade
- Explosion Blade
- Soleil Sceptor
- Sylph Wind Bow
- Storm Blitz Stick
- Grand Viper Staff
- Phoenix Soul Star
🔥 Balgass
Amidst the height of the fierce battle, when tensions escalate to their pinnacle, the formidable presence of Balgass, the revered supreme commander of Crywolf's relentless attacking corps, shall manifest itself.
With anticipation and trepidation, adventurers brace themselves for the ultimate clash with this imposing figure, as victory over Balgass holds the promise of extraordinary rewards and glory.
ℹ️ INFO
Can only be defeated by participating in the Crywolf Event.
Will be available from Stage 2 onwards.

Balgass
Reward
Upon successfully killing the Balgass, players will be rewarded with:

Green Ribbon Box
1,000 RUUD
🐍 Medusa
Medusa reigns as one of the most formidable bosses within the realms of Loyal Mu.
ℹ️ INFO
Medusa will be available from Stage 2 onwards.

Medusa
Location
Medusa can be found in the following location:
Swamp of Calmness
Details
You have the option to utilize the in-game scheduler (hit H) to check the remaining time before the next instance commences.
💡 TIP
A Global message will appear to all players when the Medusa spawns.
Reward
Upon successfully killing the Medusa, players will be rewarded with:
Green Ribbon Box
1,000 RUUD
🦂 Selupan
Selupan is a highly powerful boss with immense health and defense, utilizing a wide range of skills such as poison, freeze, teleportation, knockback, and summoning guards.
ℹ️ INFO
Selupan will be available from Stage 3 onwards.

Selupan
Details
The passageway to the Hatchery is called the Hatchery Gate Portal, which is located in La Cleon.
💡 TIP
A Global message will appear to all players when the Selupan is about to spawn.
Reward
Upon successfully killing the Selupan, players will be rewarded with:
Golden Box
1,000 RUUD
👹 Kundun
ℹ️ INFO
Kundun will be available from Stage 3 onwards.

Kundun
Location
Kundun can be found in the following location:
Kalima 7
Reward
Upon successfully killing the Kundun, players will be rewarded with:
Blue Ribbon Box
2,500 RUUD
✨ Golden Dragon Invasion
Prepare to be enthralled by the mythical realm of Loyal Mu as we delve into the thrilling phenomenon of the Golden Dragon Invasion. In this article, we embark on a journey through a land shrouded in mystery, where fearsome dragons wield immense power and treasure awaits those bold enough to face their fiery wrath. Join us as we uncover the secrets, challenges, and rewards that await adventurers who dare to confront the Golden Dragon Invasion in the immersive world of Loyal Mu.
Place of Invasion
Unleashing its fury across multiple kingdoms simultaneously, the Golden Dragon Invasion ravages the lands with relentless force. In the forthcoming section of this article, we will explore in detail the numerous locations that fall victim to this devastating assault. Brace yourself as we delve into the specifics of the kingdoms targeted by the Golden Dragon Invasion, revealing the breadth and scope of this cataclysmic event in Loyal Mu.
Schedule
You have the option to utilize the in-game scheduler (hit H) to check the remaining time before the next instance commences.
Invasion Details
Golden Budge Dragon
| Map | Qty |
|---|---|
| Lorencia | 5 |
Box of Kundun +1
Golden Soldier
| Map | Qty |
|---|---|
| Devias | 5 |
Box of Kundun +1
Golden Derkon
| Map | Qty |
|---|---|
| Lorencia | 2 |
| Devias | 2 |
| Noria | 2 |
| Elbeland | 2 |
2x Box of Kundun +3
Golden Dark Knight
| Map | Qty |
|---|---|
| Devias | 3 |
Box of Kundun +2
Golden Titan
| Map | Qty |
|---|---|
| Devias | 5 |
Box of Kundun +2
Golden Goblin
| Map | Qty |
|---|---|
| Noria | 5 |
Box of Kundun +1
Golden Devil
| Map | Qty |
|---|---|
| Lost Tower | 3 |
Box of Kundun +2
Golden Lizard King
| Map | Qty |
|---|---|
| Atlans | 3 |
Box of Kundun +3
Golden Vepar
| Map | Qty |
|---|---|
| Atlans | 5 |
Box of Kundun +2
Golden Satyros
| Map | Qty |
|---|---|
| Kanturu 1 | 3 |
Box of Kundun +4
Golden Twin Tail
| Map | Qty |
|---|---|
| Kanturu 2 | 3 |
Box of Kundun +4
Golden Iron Knight
| Map | Qty |
|---|---|
| Raklion 1 | 3 |
Box of Kundun +5
Golden Napin
| Map | Qty |
|---|---|
| Raklion 1 | 3 |
Box of Kundun +5
Great Golden Dragon
| Map | Qty |
|---|---|
| Kanturu 1 | 1 |
| Raklion 1 | 1 |
2x Box of Kundun +5
Golden Rabbit
| Map | Qty |
|---|---|
| Elbeland | 5 |
Box of Kundun +1
🪙 Lucky Coins Exchange
🪙 How to Get Lucky Coins
Lucky Coins drop from all monsters in all maps!
Collect them and exchange to get rewards.
Exchange NPC: Delgado in Devias (192, 17)
⚠️ Important: Be sure to register your collected Lucky Coins before you can Exchange them!
🪙 Lucky Coin 10
🪙 Lucky Coin 10
Random RewardExchange Type: Random chance to receive one of the following rewards
Possible Rewards:
x10
x10
x10
x10
x10
1,000 Ruud
🪙 Lucky Coin 20
🪙 Lucky Coin 20
Random RewardExchange Type: Random chance to receive one of the following rewards
Possible Rewards:
x20
x20
x20
x20
x20
1,000 Ruud
🪙 Lucky Coin 30
🪙 Lucky Coin 30
Premium RewardsExchange Type: Random chance to receive one of the following rewards
Special: Includes rare jewels and higher Ruud rewards!
Possible Rewards:
x30
x30
x30
x30
x30
Rare!
Rare!
Rare!
1,000 Ruud
5,000 Ruud
🌸 Cherry Blossom Event
🌸 How to Participate
Loot Cherry Blossom Play-Box from monsters level 70+
Obtain Blossom Branches to exchange for prizes.
Exchange NPC: Cherry Blossom Spirit in Noria (178, 127)
🌸 White Cherry Blossom Branch
🌸 White Cherry Blossom Branch
x10 RequiredExchange Requirement: 10 White Cherry Blossom Branches
Available Rewards:
Lucky Item
x10
x10
🌸 Red Cherry Blossom Branch
🌸 Red Cherry Blossom Branch
x30 RequiredExchange Requirement: 30 Red Cherry Blossom Branches
Available Rewards:
x10 or x20
x10 or x20
x10 or x20
x10 or x20
x10 or x20
✨ Golden Cherry Blossom Branch
✨ Golden Cherry Blossom Branch
x255 Required - Premium Pets!Exchange Requirement: 255 Golden Cherry Blossom Branches
Special: Exchange for exclusive pets!
Exclusive Pet Rewards:
Exclusive Pet!
Exclusive Item!
Exclusive Pet!
Exclusive Pet!
Exclusive Pet!
Exclusive Pet!
Exclusive Pet!
Exclusive Pet!
🐾 Pets & Mounts
Pets and mounts are loyal companions that accompany you on your adventures, providing various bonuses, assistance in combat, and increased movement speed.
| Image | Name | Description |
|---|---|---|

|
Unicorn | A mount which increases the movement speed of the rider. |

|
Dinorant | A mount which increases the movement speed of the rider. Also, a flying mount which allows access to the Icarus map. • Increases damage by 15% • Absorb 10% of damage |

|
Imp | Increases Attack Power and Wizard by 30% |

|
Guardian Angel | • Absorb 20% of Damage • Increases Maximum Health +50 |

|
Dark Horse | A mount only available to Dark Lords. With access to the Earthquake skill, a power stomp which knocks enemies to the ground as the earth is forced up from beneath them. |

|
Dark Raven | A pet only available to Dark Lords. The Dark Raven commanded by the Dark Lord, will assist them in attacks, will attack alone, or can be set to attack at random. |

|
Pet Panda | • Collects zen automatically • Increase +10% experience • Increase defensive skill +50 ⚡ Combo: When worn with Ring, experience doubles! |

|
Pet Skeleton | • Collects zen automatically • Attack power/Wizardry/Curse spell 20% increase • Attack speed increase +10 • Exp 5% increase ⚡ Combo: When worn with Ring, experience doubles! |

|
Demon | Increases Attack Power and Wizard by 40% |

|
Pet Unicorn | • Collects zen automatically • Zen increase +50% • Defensibility +50 |

|
Spirit of Guardian | • Absorbs monsters damage to your character by 30% • Increases Maximum Life by 50 |

|
Rudolf | Collects zen automatically |

|
Horn of Fenrir | • Plasma Storm (Mana: 50) • Increases movement speed |
🦄 Muuns
Muuns are mystical creatures that provide powerful buffs and special abilities to enhance your character's performance. All classes can use all Muuns.
Normal Muuns
| Image | Normal Muuns Name | Description | Obtained From | Use Class |
|---|---|---|---|---|
|
Dragon Knight | • Life: 255 • Increases maximum HP by 500 • Damage 5% • Double Damage Rate 2% |
X Shop | All |
|
Dark Wizard | • Life: 255 • Increases maximum MP by 500 • Reflect Damage 2% • Double Damage Rate 2% |
X Shop | All |

|
Fairy Elf | • Life: 255 • Increases attack speed by 30 • Double Damage Rate 2% • Restore Excellent Damage 5% |
X Shop | All |

|
Luki | • Life: 255 • Excellent Damage rate 3% • Reflect Damage 3% |
Cherry Blossom Event, Muun Egg | All |
.webp)
|
Luki (Evolved) | • Life: 255 • Excellent Damage rate 5% • Reflect Damage 5% |
 Evolution Stone Evolution Stone |
All |
|
William | • Life: 255 • Reduction Damage Rate 3% • Reflect Damage 3% |
Cherry Blossom Event, Muun Egg | All |
.webp)
|
William (Evolved) | • Life: 255 • Reduction Damage Rate 5% • Reflect Damage 5% |
Evolution Stone |
All |

|
Tibetton | • Life: 255 • Increases maximum HP by 500 • Increases maximum MP by 500 |
Cherry Blossom Event, Muun Egg | All |
.webp)
|
Tibetton (Evolved) | • Life: 255 • Increases maximum HP by 1000 • Increases maximum MP by 1000 |
Evolution Stone |
All |

|
Wooparoo | • Life: 255 • HP 500 • MP 500 |
Cherry Blossom Event, Muun Egg | All |
.webp)
|
Wooparoo (Evolved) | • Life: 255 • HP 1000 • MP 1000 |
Evolution Stone |
All |

|
Chiron | • Life: 255 • HP 500 • Damage 3% |
Cherry Blossom Event, Muun Egg | All |
.webp)
|
Chiron (Evolved) | • Life: 255 • HP 1000 • Damage 5% |
Evolution Stone |
All |

|
Desmodus | • Life: 255 • Damage 3% • Attack Speed 15 |
Cherry Blossom Event, Muun Egg | All |
.webp)
|
Desmodus (Evolved) | • Life: 255 • Damage 5% • Attack Speed 30 |
Evolution Stone |
All |
🐴 Mounts
Mounts allow you to travel faster across the world of MU Online while providing additional stat bonuses and visual customization. All classes can use all mounts.
Available Mounts
| Image | Mount Name | Description | Obtained From | Use Class |
|---|---|---|---|---|
|
Ghost Horse | • Life: 255 • Increases maximum HP by 100 • Increases maximum MP by 100 • Increases attack speed by 20 • Double Damage Rate 1% • Triple Damage Rate 1% • Earth shake skill (Mana: 0) • Dark Lord exclusive skill |
All | |

|
Ice Dragon | • Life: 255 • Increases maximum HP by 200 • Increases maximum MP by 200 • Increases attack speed by 25 • Double Damage Rate 2% • Triple Damage Rate 2% |
All | |
.png)
|
Ice Dragon (Rare) | • Life: 255 • Increases maximum HP by 300 • Increases maximum MP by 300 • Increases attack speed by 30 • Double Damage Rate 3% • Triple Damage Rate 3% |
All | |
|
Pierce Ryan | • Life: 255 • Increases maximum HP by 400 • Increases maximum MP by 400 • Increases attack speed by 35 • Double Damage Rate 4% • Triple Damage Rate 4% |
All | |
.png)
|
Pierce Ryan (Rare) | • Life: 255 • Increases maximum HP by 500 • Increases maximum MP by 500 • Increases attack speed by 40 • Double Damage Rate 5% • Triple Damage Rate 5% |
All | |
|
Shining Tail | • Life: 255 • Increases maximum HP by 600 • Increases maximum MP by 600 • Increases attack speed by 40 • Double Damage Rate 6% • Triple Damage Rate 6% |
All | |
.png)
|
Shining Tail (Rare) | • Life: 255 • Increases maximum HP by 700 • Increases maximum MP by 700 • Increases attack speed by 40 • Double Damage Rate 7% • Triple Damage Rate 7% |
All | |

|
Ur | • Life: 255 • Increases maximum HP by 800 • Increases maximum MP by 800 • Increases attack speed by 40 • Double Damage Rate 8% • Triple Damage Rate 8% |
All | |
.png)
|
Ur (Rare) | • Life: 255 • Increases maximum HP by 900 • Increases maximum MP by 900 • Increases attack speed by 40 • Double Damage Rate 9% • Triple Damage Rate 9% |
All | |
|
Leviathan | • Life: 255 • Increases maximum HP by 1000 • Increases maximum MP by 1000 • Increases attack speed by 40 • Double Damage Rate 10% • Triple Damage Rate 10% |
All | |
|
|
Leviathan (Rare) | • Life: 255 • Increases maximum HP by 1100 • Increases maximum MP by 1100 • Increases attack speed by 40 • Double Damage Rate 11% • Triple Damage Rate 11% |
All |